
Western Red Cedar Fence: Costs, Lifespan and Local Rules

“Choose cedar because it lasts without maintenance” is poor advice for an Ottawa–Gatineau fence. Western red cedar is a premium material, not a substitute for drainage, sound construction or legal checks. A beautiful fence can still fail early at ground level, exceed a yard's height limit or fall short as a pool barrier.
Start with the permitted layout and a complete materials estimate, then decide whether cedar's appearance justifies its cost and upkeep. The useful question isn't how much a board costs or how long cedar lasts. It's what you're buying, where water will collect and whether the finished design belongs on your property.
Cedar Fence Parts, Sizes and Cost Estimate
The boards you buy the most of should drive your estimate. Privacy pickets block sightlines and make up the largest share of the material bill, posts carry the load, horizontal rails connect the posts and support the boards, and gates handle daily movement and repeated loading. Caps, brackets, hinges, latches and fasteners complete the assembly.
Measure each run separately, subtract gate openings and work from the board's actual face width rather than its nominal lumber designation.
Work from coverage, not the lumber label
Use this calculation:
Picket count = run length ÷ (actual picket face width + installation gap)
A hypothetical 12 m run with a combined board-and-gap module of 150 mm needs 80 pickets. Add a 10% spare allowance for defects and cutting and the order becomes 88 boards. That spacing is an estimating assumption; it doesn't describe the finished width of a nominal fence board.
Multiply that count by the current per-board price from your supplier and you have a picket subtotal. Lumber pricing moves, so ask suppliers to quote the boards, posts, rails and hardware in writing on the same day you compare contractors.
Budget rule: A board subtotal isn't a fence price. Don't compare it with an installed quote until both cover the same work.
Build the whole-fence estimate
Add separate allowances for posts, rails, gate framing, hinges, latches, fasteners, finish, excavation, removal and labour. Confirm post and rail sizes against the proposed spans and gate loads with your lumber supplier, and get those component prices in writing so the estimate rests on current figures.
Use the Ontario wood fence cost calculator to organise the project scope, then replace assumptions with written quotations. An overlapping privacy design needs a different board count from a simple side-by-side layout.
Check the delivery before installation. Look for consistent grade, straight boards and suitably dry stock, especially in pieces reserved for gates.
Your measured materials list should include:
Pickets: Actual coverage, layout and spare allowance.
Rails and posts: Quantities, dimensions and protection.
Gate components: Framing, hinges, latch and stops.
Installation supplies: Compatible fasteners, brackets and foundation materials.
Finish: Board treatment, end-grain sealer and application supplies.
Cedar Compared With Other Fence Materials
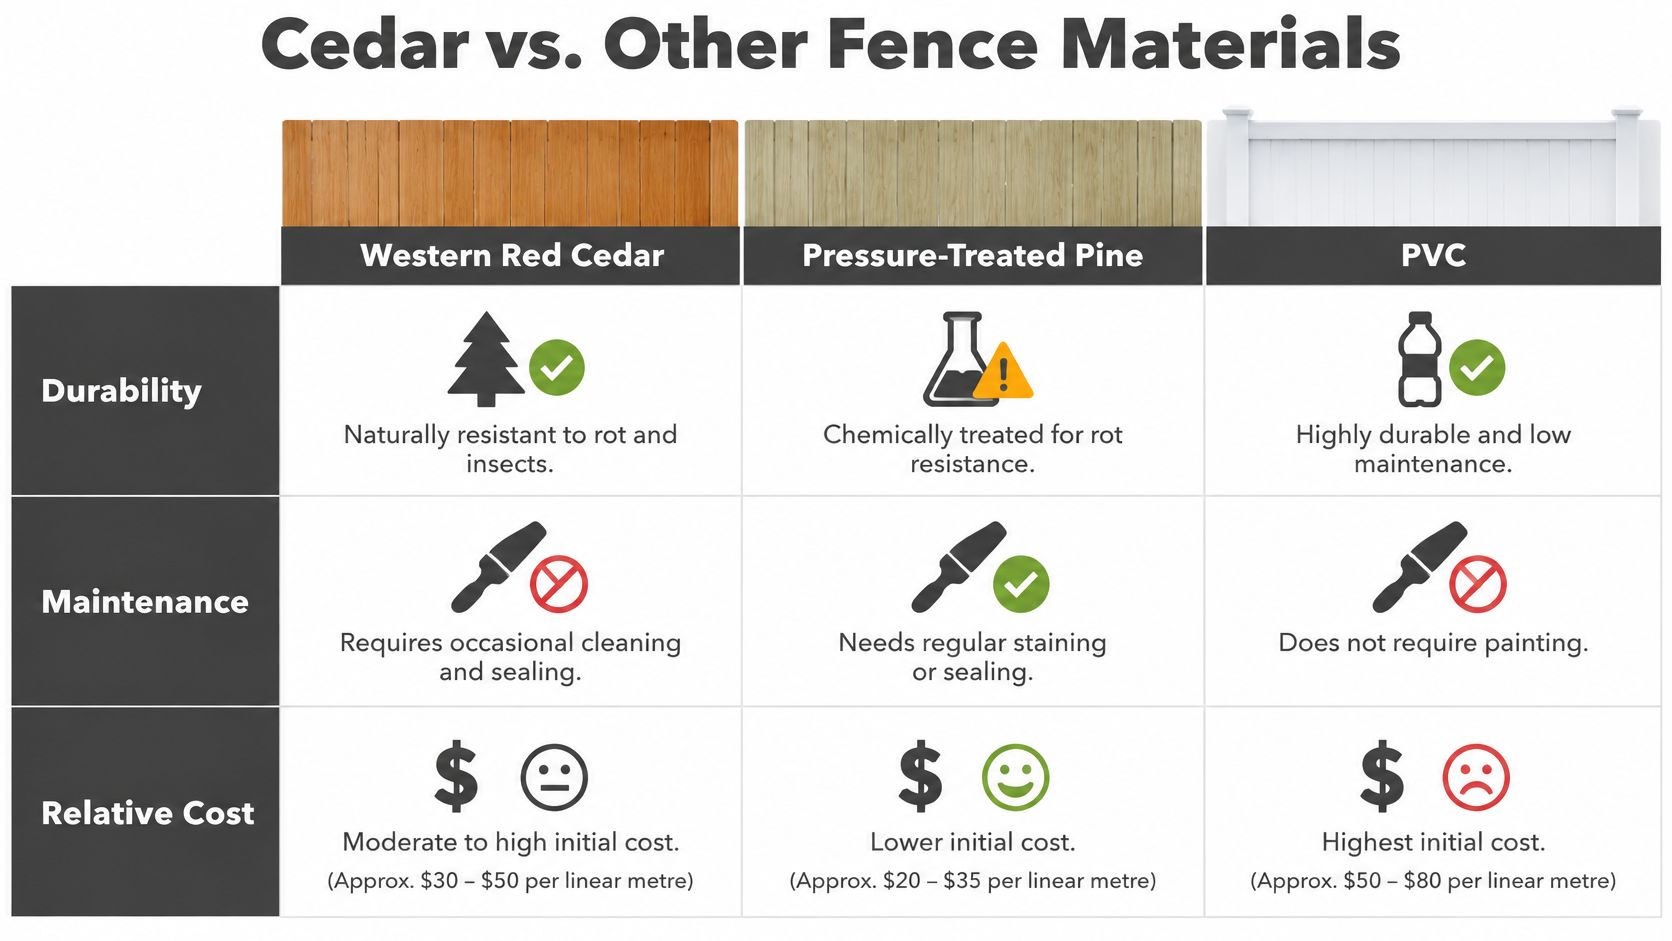
Western red cedar against common fence materials
Material | Durability | Upkeep | Relative cost |
|---|---|---|---|
Western red cedar | High in heartwood; second-growth durability is less certain and may be lower | Periodic finish and yearly inspection | Premium |
Pressure-treated pine | Good when the treatment is intact | Periodic finish or stain | Lower |
PVC | Does not rot; can be damaged by impact | Washing; minimal finishing | Higher at purchase |
Cedar's performance depends on grade, heartwood content and installation. The species name alone doesn't tell you whether the boards are well selected or the assembly can dry.
The comparison below captures the broad trade-offs, but don't read cedar's maintenance symbol as permission to ignore the fence.
Choose for the ownership you want
Choose cedar when the wood itself is part of the design. Its grain, colour variation and workable texture suit custom trim, fitted gates and detailed privacy layouts. It's relatively light to handle and accepts suitable exterior stains well, but preserving its original tone takes deliberate care.
Choose pressure-treated pine when the initial budget leads. Its decay protection comes from treatment rather than cedar's natural heartwood characteristics. If you're planning a painted or stained appearance anyway, paying more for cedar's natural colour may deliver less value than spending that money on stronger gate construction or better hardware.
Choose PVC when routine upkeep needs to stay simple. Washing replaces most finishing work, and rot isn't the concern it is with wood. The trade-off is a higher purchase cost and a material that still needs appropriate supports and protection from impact.
The PVC fence versus wood comparison can help you weigh those ownership differences rather than comparing appearance alone.
Don't pay for a finish you won't maintain
Cedar doesn't require stain to remain recognisable as a sound wood fence. Finishing is a choice about moisture management and appearance, not a licence to neglect construction. If you want consistently rich colour but don't want to clean and recoat wood, cedar may be the wrong fit.
A well-chosen cedar fence after its first winter should still have aligned pickets, secure rails and a gate that closes without dragging. Some colour change isn't the same as structural deterioration. Judge the installation by movement, moisture retention and operation, not by whether every board still matches its delivery-day colour.
How Long Cedar Lasts and How to Detail It for Winter
There's no defensible universal lifespan for every western red cedar fence. Heartwood quality, exposure and construction matter too much to turn the species name into a guaranteed service-life figure.
British Columbia's western redcedar forestry report attributes much of heartwood's decay resistance to thujaplicins, while cautioning that second-growth durability isn't well understood and may be lower than old-growth heartwood. Specify a high heartwood proportion for exposed pickets and rails, and reject substantial sapwood, end splits and defects that hold water. Boards heavy in sapwood cost less at the yard and usually cost more in early replacements.
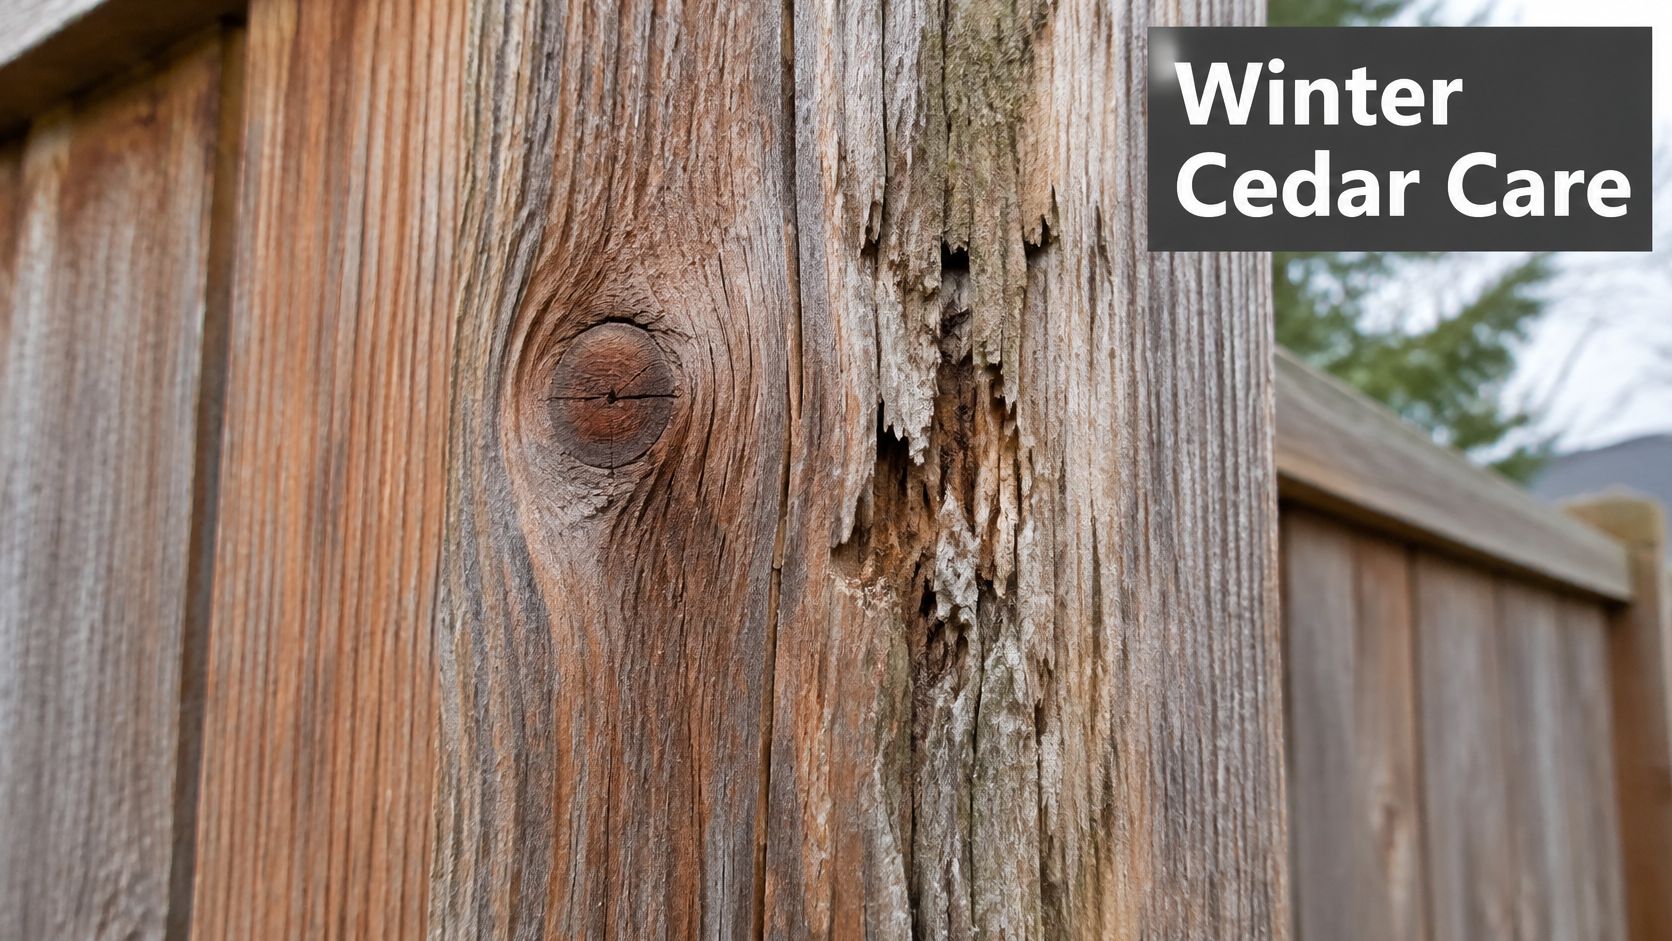
Sound heartwood pickets on protected posts can serve for many years. The same boards set into wet soil fail early. Look closely at lower boards and exposed end grain when assessing deterioration.
Buy stability, then give the wood somewhere to dry
The Coast Forest western red cedar technical sheet lists approximately 0.39 specific gravity at 12% moisture content; its low density and relatively low shrinkage help with handling and dimensional stability. Ottawa's wet seasons and freeze-thaw cycles make moisture control especially important in local fence detailing.
Stable stock still splits, loosens or deteriorates if its base stays wet, even when the rest of the fence looks sound. Snow banked against the fence line makes this worse, holding meltwater against the boards well into spring. Keep piled snow off the base where you can.
Ground contact is the avoidable weak point. For example, I'd detail a picket with 50 mm of clearance above a well-drained surface rather than let it sit in wet soil. Treat that as a starting detail; slopes or pool-barrier requirements can demand a different solution.
Use pressure-treated or otherwise protected posts wherever soil exposure is unavoidable. Premium cedar pickets never rescue a weak post specification.
Follow a moisture-management sequence
Specify kiln-dried or properly seasoned boards. Wet stock can move after fastening and complicate finishing. Check questionable boards with a moisture meter rather than judging dryness by surface colour.
Set ventilation and drainage gaps deliberately. Use the board supplier's recommended spacing for the delivered moisture condition and layout. Tight assembly looks private on day one and leaves no allowance for movement or drying.
Use corrosion-resistant fasteners. Stainless steel is a sound choice for exposed cedar; other approved corrosion-resistant systems must suit both the wood and any treated components. Rust streaks are the visible problem. A connection that weakens behind them is the structural one.
Slope or cap water-catching surfaces. Broad, flat rail tops and open cap joints collect water. Shape each detail so rain drains away instead of soaking into a pocket beside a fastener.
Seal freshly cut ends. Treat cuts before they become inaccessible inside joints. A neatly finished board face leaves an untreated cut exposed.
Keep pickets clear of the ground. Allow for soil settlement, mulch additions and seasonal maintenance. Clearance built into the installation disappears fast once a new garden bed goes in.
Inspect slow-drying areas first. Start with shaded, north-facing and vegetation-covered runs. Those locations deserve attention before the exposed section that dries quickly after rain.
Use installation demonstrations to examine joints and drainage details behind the finished appearance.
A protective coating can slow wetting. It can't turn a water trap into a durable joint.
The practical objective is to let the wood dry between wet periods. Fix persistent dampness at its source before adding another coat of finish.
Height Limits in Ottawa Yards and Driveways
Ottawa fence height limits by location
The following limits come from Ottawa's Fence By-law No. 2003-462.
Location | Maximum height | Note |
|---|---|---|
Residential front yard | 1 m | Lower profile; check the driveway triangle as well |
Residential other yards | 2.13 m | Design cedar privacy fences below this height |
Non-residential property | 3 m | Commercial and institutional lots |
Driveway visibility triangle | 75 cm | Measured 2 m along the lot line and driveway at the road |
A backyard privacy design can be unsuitable at the front of the same property. Decorative tops, caps and grade changes need consideration before you settle the finished profile, not after the panels arrive.
Check the lot before ordering
Ottawa's land development guide says an ordinary residential fence doesn't require a building permit, but it must comply with the Fence By-law; it also directs owners to establish property lines using a registered survey and keep fences out of the municipal right-of-way.
Work through the layout in this order:
Confirm the boundary. Use the survey rather than an old fence, hedge or neighbour's recollection. The city doesn't establish your lot line for you.
Record finished grades. Measure both sides of the proposed run and identify the lower side at changes in elevation. Confirm the by-law's height-measurement method with the city rather than measuring from whichever point gives the most favourable result.
Check driveway visibility. Mark the restricted area at the road approach before placing tall panels. Pay particular attention to corner-lot sightlines and driveway entrances.
Keep the right-of-way clear. A lawn maintained by the homeowner isn't necessarily all private property. Resolve the boundary before selecting post positions.
Confirm the approval category. An ordinary boundary fence and a regulated pool enclosure aren't interchangeable projects. Lack of a standard building-permit requirement doesn't remove other obligations.
Leave room for the finished installation
For example, a proposed 2.2 m backyard cedar fence exceeds the residential other-yard maximum shown in the table. Lower or redesign it before ordering, and don't assume that removing a cap later is an acceptable construction plan.
Cedar is exempt from Ottawa's general coating requirement, but owners must still keep fences structurally sound, weather-resistant and free of accident hazards. That legal exemption isn't a maintenance recommendation.
Gatineau has its own municipal rules. Don't carry an Ottawa layout across the river without checking the local requirements for that property.
Pool Enclosure Rules in Ottawa and Gatineau
A cedar layout that passes in Ottawa can still fail as a Gatineau pool barrier. Height is one test. Openings, climb points, and the gate decide whether those boards are a legal enclosure.
Ottawa's pool enclosure guidance sets a minimum enclosure height of 1.5 m once the water is 600 mm or deeper, and it requires a self-closing, self-latching gate. Gaps in that barrier are limited by the same pool-enclosure rules, including the space under the bottom rail.
The Québec Ombudsman's pool-safety guidance sets a general enclosure height of 1.2 m and requires the fence to block passage of a 10 cm sphere, with anti-climb construction and a gate that closes and latches by itself. Gatineau's own permit and safety-device rules apply on top of those provincial expectations.
Pool enclosure requirements in Ottawa and Quebec
Requirement | Ottawa | Quebec (Gatineau side) |
|---|---|---|
Minimum enclosure height | 1.5 m | 1.2 m |
Water depth that triggers the rule | 600 mm or more | Pools covered by Quebec's provincial safety rules |
Maximum opening | Limited by Ottawa's pool-enclosure by-law | Blocks passage of a 10 cm sphere |
Gate closing | Self-closing and self-latching | Anti-climb fence with a self-closing, self-latching gate |
Permit | Pool Enclosure Permit required | Gatineau's municipal permit rules, in addition to the provincial standard |
A cedar fence used as the pool barrier is a regulated safety enclosure. An existing perimeter fence does not satisfy the approval on its own when a pool is added. A closed-looking yard can still have a climbable rail, an oversized gap, or a gate that does not latch.
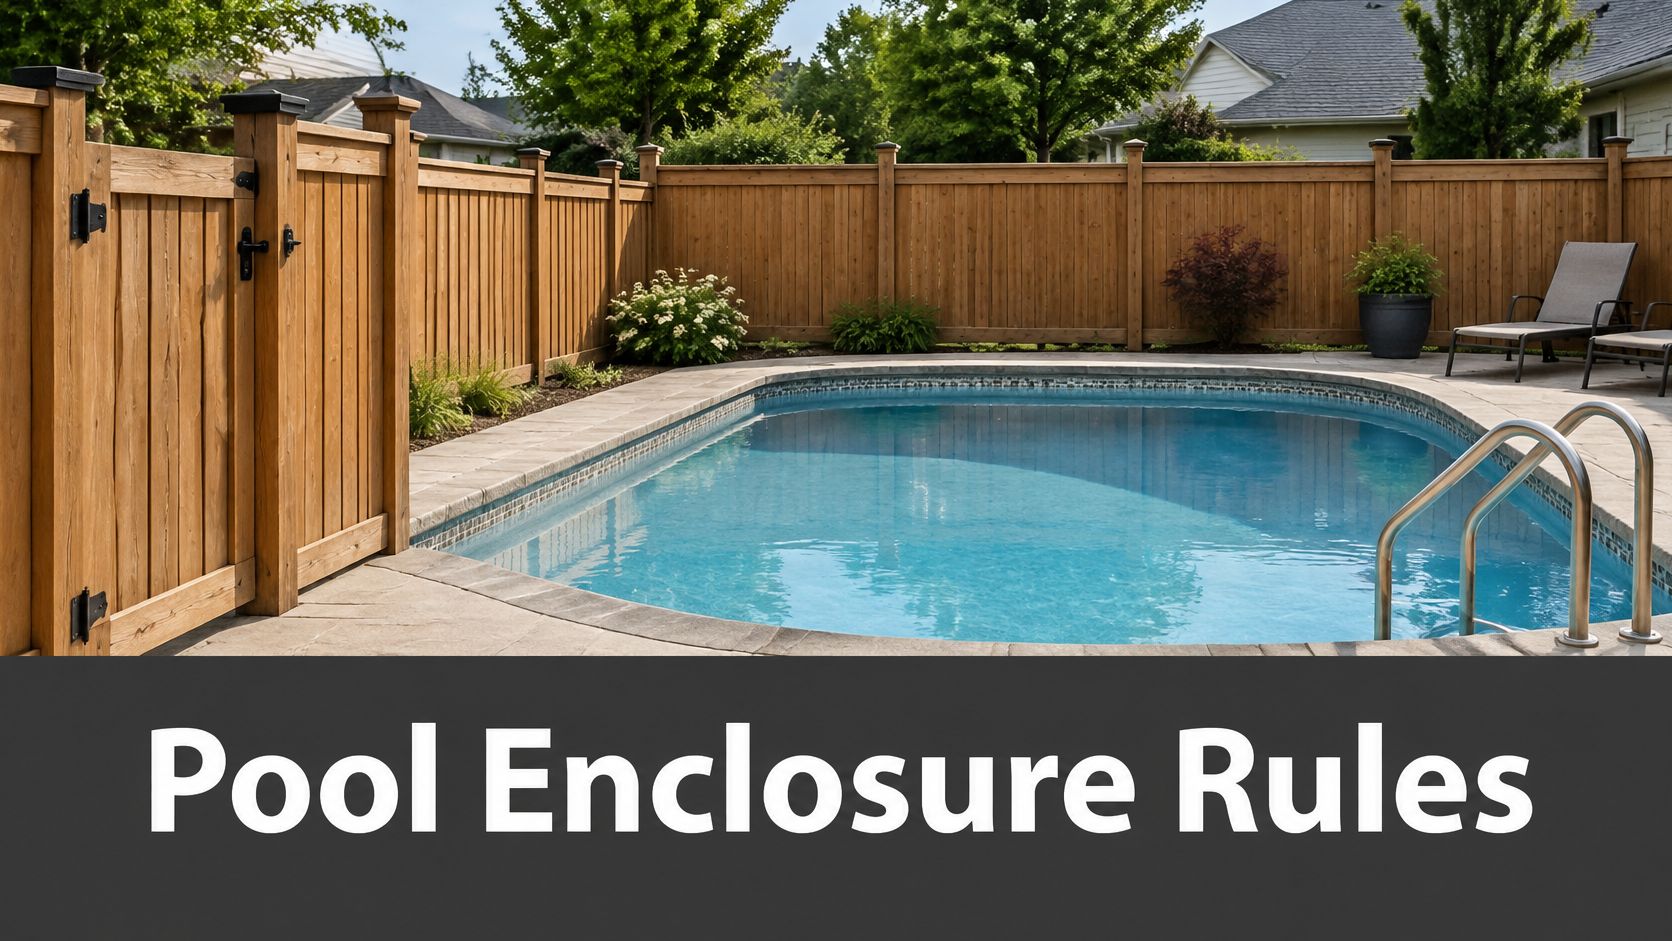
Price the boards only after the barrier's job is clear. Use the rules for the property address, not the contractor's side of the river and not a neighbour's older approval. If this run is the required pool barrier, the drawing has to show the whole geometry: height, openings, underside clearance, rails, lattice, grade changes, and anything built against the fence. A planting bed or a deck can turn a legal face into a step. If a separate enclosure already meets the rule, the cedar line outside it is a boundary fence and should be priced that way.
Vertical boards hide the water. They do not fix a horizontal rail that works as a ladder, lattice that leaves a hole, or a good-looking gate whose hardware fails to catch. Submit the layout and the gate details for the permit, then order. A generic cedar sketch is a poor substitute for that drawing, and a later hinge or latch swap can undo the approval.
Use the pool enclosure by-law guide to prepare questions for the municipal review. Keep the accepted drawings and the hardware list with the job file.
I would not buy premium cedar for a pool run until the opening rule and the gate hardware are written down for that city. Ottawa's 1.5 m line and Quebec's 1.2 m line are different tests. Clearing the taller one does not prove the 10 cm sphere rule, the anti-climb expectation, or Gatineau's permit.
Seasonal Care, Finishes and Inspection
Seasonal care calendar for a cedar fence
Season | Task | Reason |
|---|---|---|
Spring | Check lower boards for wet spots and splashback | Thaw holds moisture where the fence meets the ground |
Summer | Check the finish and recoat where water no longer beads | Sun and heat weather the surface and wear the finish |
Autumn | Clear leaves and debris from rails and tops | Debris traps water on horizontal surfaces |
Winter | Brush snow away from the base after heavy falls | Packed snow prolongs moisture exposure against the boards |
Use gentle cleaning methods. A stiff scraper or an aggressive pressure-washer jet can damage soft cedar while making the surface look temporarily cleaner.
Match the finish to the appearance you'll maintain
Unfinished cedar weathers towards silver-grey. That avoids a colour-maintenance commitment, but it doesn't remove the need to clear debris, check connections and correct damp areas.
Penetrating stains colour the wood without building the same surface film as paint-like coatings. They're a practical choice when you want visible grain and a finish that can be renewed without extensive removal of peeling layers.
Film-forming coatings sit on the surface and can peel when moisture gets behind them. Apply them only to clean, suitably dry boards, with proper preparation and compatible products.
FPInnovations' research on western red cedar weathering describes the loss of protective extractives through weathering and leaching, with meaningful protection demonstrated by only certain coatings. Don't assume that any product labelled for exterior wood will perform equally well.
A south-facing run may fade and dry faster than a shaded north-facing run. Inspect exposure zones separately rather than recoating the entire property because one section looks tired.
Make a short inspection walk
Allow about ten minutes for a practical first pass, then return with tools where needed.
Test connections: Gently check suspect pickets and rails for looseness.
Inspect damaged boards: Distinguish superficial checking from splits that compromise a fastening point.
Look at the base: Note wet soil, rising mulch and places where drainage has changed.
Check metalwork: Investigate rust bleeding, loose hinges and latch misalignment.
Examine cut ends: Look for greying, splitting or failed protection at exposed cuts.
Use water beading as an inspection clue, not the sole instruction to recoat. Check the product's renewal guidance and the condition of the existing finish before adding material over a dirty or failing surface.
Write a Material Specification and Compare Quotes
Put the fence in writing before putting it in the ground. A useful specification converts your approved layout and material choices into something each bidder can price consistently.
Include a marked plan showing the boundary, accepted height profile, driveway restrictions and pool-barrier status. Identify gate positions and opening directions so the quote covers the fence you'll use.
Specify the components that affect value
Board quality: State western red cedar, the required grade and the agreed heartwood proportion.
Drying: Require the supplier to identify kiln-dried or properly seasoned stock and its delivery condition.
Connections: Name the fastener material and compatible brackets rather than accepting unspecified exterior hardware.
Posts: Record the protection system and foundation detail.
Gates: Define framing, hinges, latch and any required pool-safety hardware.
Finish: Identify surface preparation, product system and responsibility for cut-end treatment.
Ask suppliers to confirm board grade, heartwood content, drying method and post treatment in writing. If a substitution is proposed, compare it against the specification before accepting a price reduction.
Compare complete totals
Quotes for the same run can differ because one includes removal, finishing and sturdy gate hardware while another prices only a basic assembly. Compare posts, rails, hardware, fasteners, finish, labour and exclusions line by line.
Keep the accepted specification with the contract and permit file where applicable. We use our own crew for every installation, so clear written requirements also give the installation team a consistent basis for the work.
The next step is a measured scope and a like-for-like quotation, not another comparison of isolated board prices.
FenceScape offers a free estimate for your western red cedar fence, with our own crew handling every installation. Visit FenceScape or call (613) 617-4414 to discuss your measured layout, material specification and any pool-enclosure requirements before you order.
Comments