
Chain Link Fence Post Installation: Spacing and Depth

Ontario's Building Code table gives 1.2 metres as the reference foundation depth for clay and undefined soils in foundations containing no heated space, subject to the frost-penetration minimum (2024 Building Code compendium). Hold that next to a four-foot chain link fence and the proportions change. The hole is deeper than most of the fence is tall, and the part you see above grade is the small part of the job.
That one number reframes chain link fence post installation. It isn't a digging task with a bit of measuring bolted on. It's a layout problem, a ground-reading problem and a checks-before-you-dig problem, and the steel and concrete only confirm decisions you already made. In Ottawa–Gatineau, the ground swings through freeze-thaw every winter, the soil runs from dense clay to rubble fill to rock at a spade's depth, and the rules change across the river. What follows is the sequence I'd run on any residential or light commercial job here, with the numbers that set the tolerances.
Post Spacing and Terminal Post Locations at a Glance
Canada's national installation benchmark, CAN/CGSB-138.3-2019, reaffirmed in May 2024, sets the geometry for commercial and industrial chain link fences installed in earth, rock, or rock with overburden. Line posts run no more than 3.1 metres (10 feet) centre to centre, measured between terminal posts. The standard doesn't let you improvise the ends either. Terminal posts, meaning end, gate, corner and straining posts, go where the fence layout puts them, and line posts fill the distance in between.
Those terminals carry the load. A corner post is required wherever the fence changes direction by more than 10 degrees, and a straining post wherever the grade breaks by more than 30 degrees. On a long straight run you add straining posts at intervals of 150 metres (500 feet) or less, spaced equally so fabric tension stays even from one end to the other. Uneven spacing is what produces a fence that looks straight in July and drums in October.
If an Ontario public-works style specification governs the job, line posts go in tighter, at a maximum of 3,000 millimetres centre to centre. On anything residential in Ottawa, plan around 3 metres and you'll never be caught out by a tighter spec.
How to count posts on a real run
Walk the line before you order a single length of pipe. List every corner, every grade break, every gate and every run length, then count. Take a 40-metre run with a gate at one end and a corner at the other: two terminal posts, and 12 line posts at 3.1 metres, which makes 13 spaces. Order a spare line post and a spare terminal. The extra post costs far less than a second delivery.
Spacing sets three things at once: alignment, wire tension and wind resistance, plus the excavation and concrete that follow each hole. Push past the benchmark and the fabric sags between supports. Pull in tighter than you need and you've bought posts and bags you didn't have to.
Case | Requirement | Governing reference |
|---|---|---|
Straight line-post run | Maximum 3.1 m centre-to-centre | CAN/CGSB-138.3 |
Straight line-post run, Ontario spec | Maximum 3,000 mm centre-to-centre | OPSS 772 |
Corner post | Required where direction changes more than 10 degrees (OPSS: 10 degrees or more) | CAN/CGSB-138.3 and OPSS 772 |
Straining post for grade change | Required where grade changes exceed 30 degrees | CAN/CGSB-138.3 |
Long straight run | Straining post at intervals no greater than 150 m, equal spacing | CAN/CGSB-138.3 and OPSS 772 |
Corner footing depth | 300 mm (12 in) deeper than line-post footing | CAN/CGSB-138.3 |
Gate post | Terminal post, heavier assembly, set before line posts | Installation practice |
Practical rule: Split the layout into terminal-to-terminal runs on paper before you load the truck. Every later number, holes, bags, tie wires, comes off that count.
Keep that table on site. It decides how many holes you dig and how much concrete you buy, and it settles arguments with a helper faster than a level does.
Check Locates, Property Lines and Bylaws Before Digging
Four checks run before the first hole, and each one controls the next. Skip the order and you either dig in the wrong place or dig over something you can't hit.
1. Confirm the property line. A survey plan or surveyed stakes tell you where the fence may legally sit. A fence six inches onto a neighbour's land is a fence you remove for free, and it's the single most expensive error on a residential job. If ownership of an existing boundary is unclear, read up on who is responsible for a fence on a property line before anyone marks a stake.
2. Check the municipal rules. Ottawa doesn't require a building permit to build or replace a fence, but the Fence By-law No. 2003-462 still applies. Residential chain link, and chain link on a non-residential lot abutting residential property, must be vinyl-coated or powder-coated rather than bare galvanized. Residential fences are generally limited to 1 metre in front yards and 2.13 metres elsewhere. Gatineau runs its own process, so a permit-free Ottawa fence proves nothing across the bridge.
Here's where the checks belong inside post installation rather than beside it.
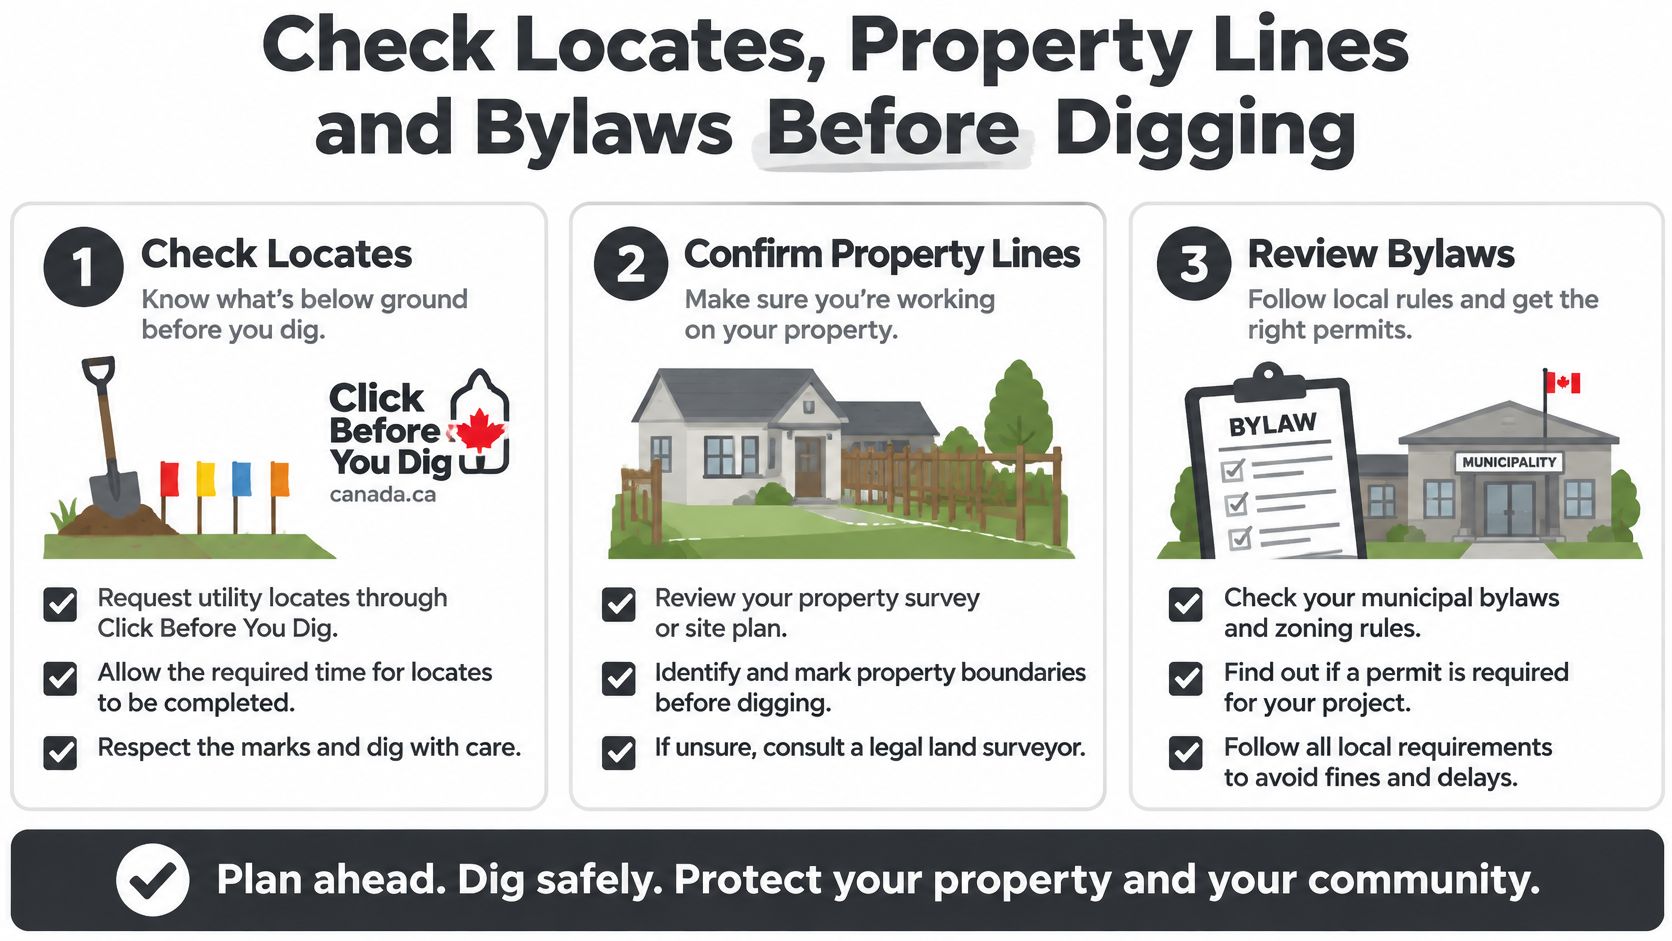
3. Request the locate and wait for it. Fence work is on the list of projects that need a locate. The City of Brampton's utility-locate guidance puts it at least five business days before digging, at no cost to the requester, and notes that locates are generally valid for 60 days from receipt. A long multi-lot project has to schedule excavation inside that window or request fresh marks. Ontario's Underground Infrastructure Notification System Act is blunt about the legal side: no excavation until the locate request is submitted and the affected owners or an authorised locator have completed the required locating steps. An unmarked site is not a safe site.
4. Mark the alignment and inspect it. Mark the full run, photograph it against the locate marks, then auger. The common failures are skipped locates, posts sunk over buried services, and alignment changes made after digging started. Ask the owner to list private services too, pool electrical feeds, irrigation, lighting, and gas lines running to a detached garage, because public markings often stop at the meter.
Write the whole sequence down as a safe work method statement so the locate reference, the bylaw answer and the dig plan live in one signed document.
Before the crew arrives, confirm five items: property line checked, bylaw height and finish checked, locate reference recorded, alignment marked and photographed, private services listed.
Tools and Materials to Stage Before the Crew Starts
Stage by job stage, not by drawer. The layout kit goes out first: a 30-metre tape or a measuring wheel, mason's line rather than twine (twine stretches and your line bows), wooden stakes, and fluorescent marking paint.
Then the digging kit. A power auger handles most holes; a hand post-hole digger gets into the corners by walls, decks and pool cages where the machine won't fit. Add a spade for clean-up and a steel bar for probing rock or hard clay before you commit the auger to a depth it can't reach.
The setting kit is where jobs stall. Bring a 1.2-metre level for terminal posts and a torpedo level for line posts, plus temporary diagonal braces and clamps to hold terminals plumb while concrete sets. One level checked on one face only is how posts end up leaning sideways.
For materials, do the arithmetic per hole: a 300 mm hole, 0.9 metres deep, holds about 0.064 cubic metres of concrete, so a 20-hole job needs roughly 1.3 cubic metres before waste. Order gravel for drainage at the base, a tamping bar, terminal posts sized for the load, and waterproof caps for tubular posts.
Pool enclosures change the order. The City of Ottawa's pool enclosure requirements call for an enclosure at least 1.5 metres high, with chain link diamond openings no greater than 38 mm (1.5 inches), and posts that are non-frost-susceptible. Standard large-opening fabric fails that even when it's strong enough to climb.
The item most often forgotten is the waterproof cap. It gets left off the order until the tubes are already in the ground, and then it never goes on.
Ground Conditions That Change Depth and Footings
Ottawa-area yards rarely offer one soil type across a whole run. Clay holds water and lifts with every freeze. Rubble fill settles and takes a plumb post with it. Bedrock stops the auger a spade short of design depth. Probe every hole with a steel bar and note the first layer you hit, because that layer decides the rest.
Clay is the common case. It drains poorly, it heaves, and it rewards a hole dug to frost-resistant depth with a crowned, sloped top that sends water away from the shaft. Fill and disturbed ground fail differently: they settle, and a post that was plumb on day one tilts under wire tension by the following spring. Loose spoil left in the hole does the same thing faster.
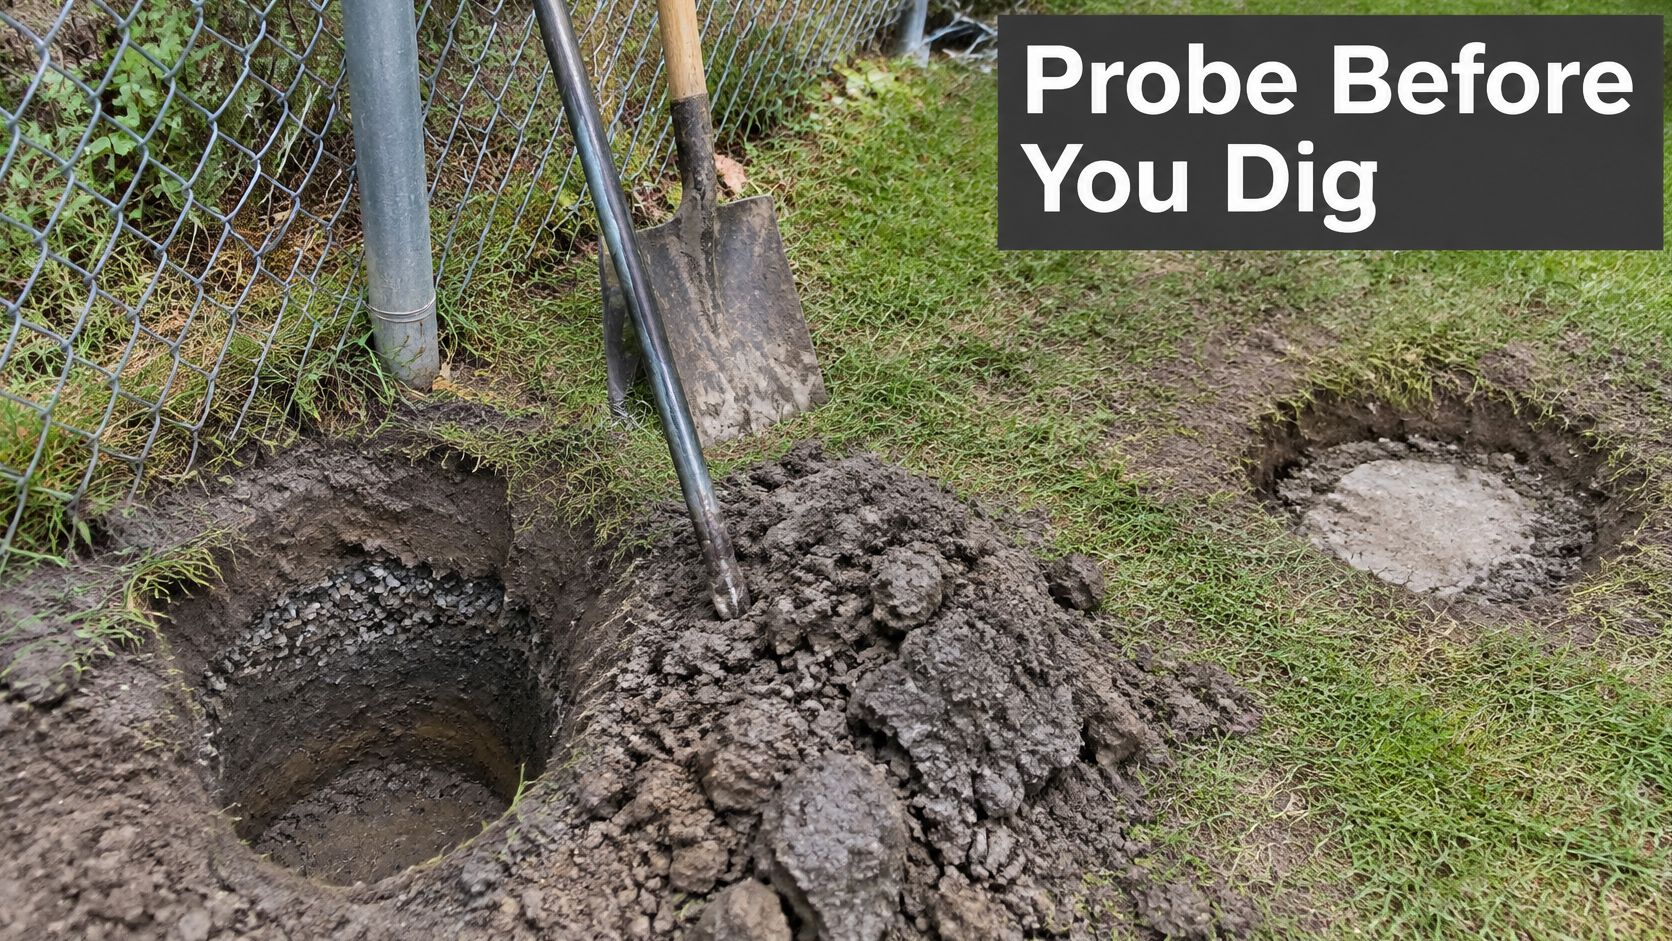
Shallow bedrock is the moment to stop, not to force. An auger that spins on rock at 400 mm isn't going deeper, and a post sitting on a ledge with 200 mm of concrete around it will move. Either get an engineered base detail or revise the layout so the terminal lands on better ground.
Ground condition | Main risk | Adjustment |
|---|---|---|
Dense clay | Frost heave and poor drainage | Dig to frost-resistant depth and slope the crown away from the post |
Poorly drained fill | Settling and post tilt | Compact backfill in lifts or deepen the footing |
Shallow bedrock | Hole cannot reach design depth | Stop and get an engineered base or revised layout |
Disturbed or loose soil | Post shifts under wire tension | Remove loose spoil and tamp backfill in lifts |
Frozen ground at pour | Concrete fails to cure, voids form | Delay the pour and warm or dry the hole |
Waterlogged hole | Concrete washout and weak footing | Pump out water and pour once the hole is dry |
A post that moves in April wasn't set badly. It was set in the wrong material.
Where one run crosses more than one condition, build to the weakest ground on that run. A single soft hole pulls a whole line out of alignment. Record each hole's depth and soil type as you go, because if the fence ever fails, those notes are the first thing an engineer asks for. The same frost logic applies to footings, and there's a good working explanation of how to prevent frost heave worth reading before you set a single terminal.
How to Set Each Post Plumb, Deep and Consolidated
A small lean at a terminal post can throw off fabric tension along the whole run. Set terminal posts first, then fit the line posts between them. That keeps the layout fixed while spacing and alignment are still easy to check.
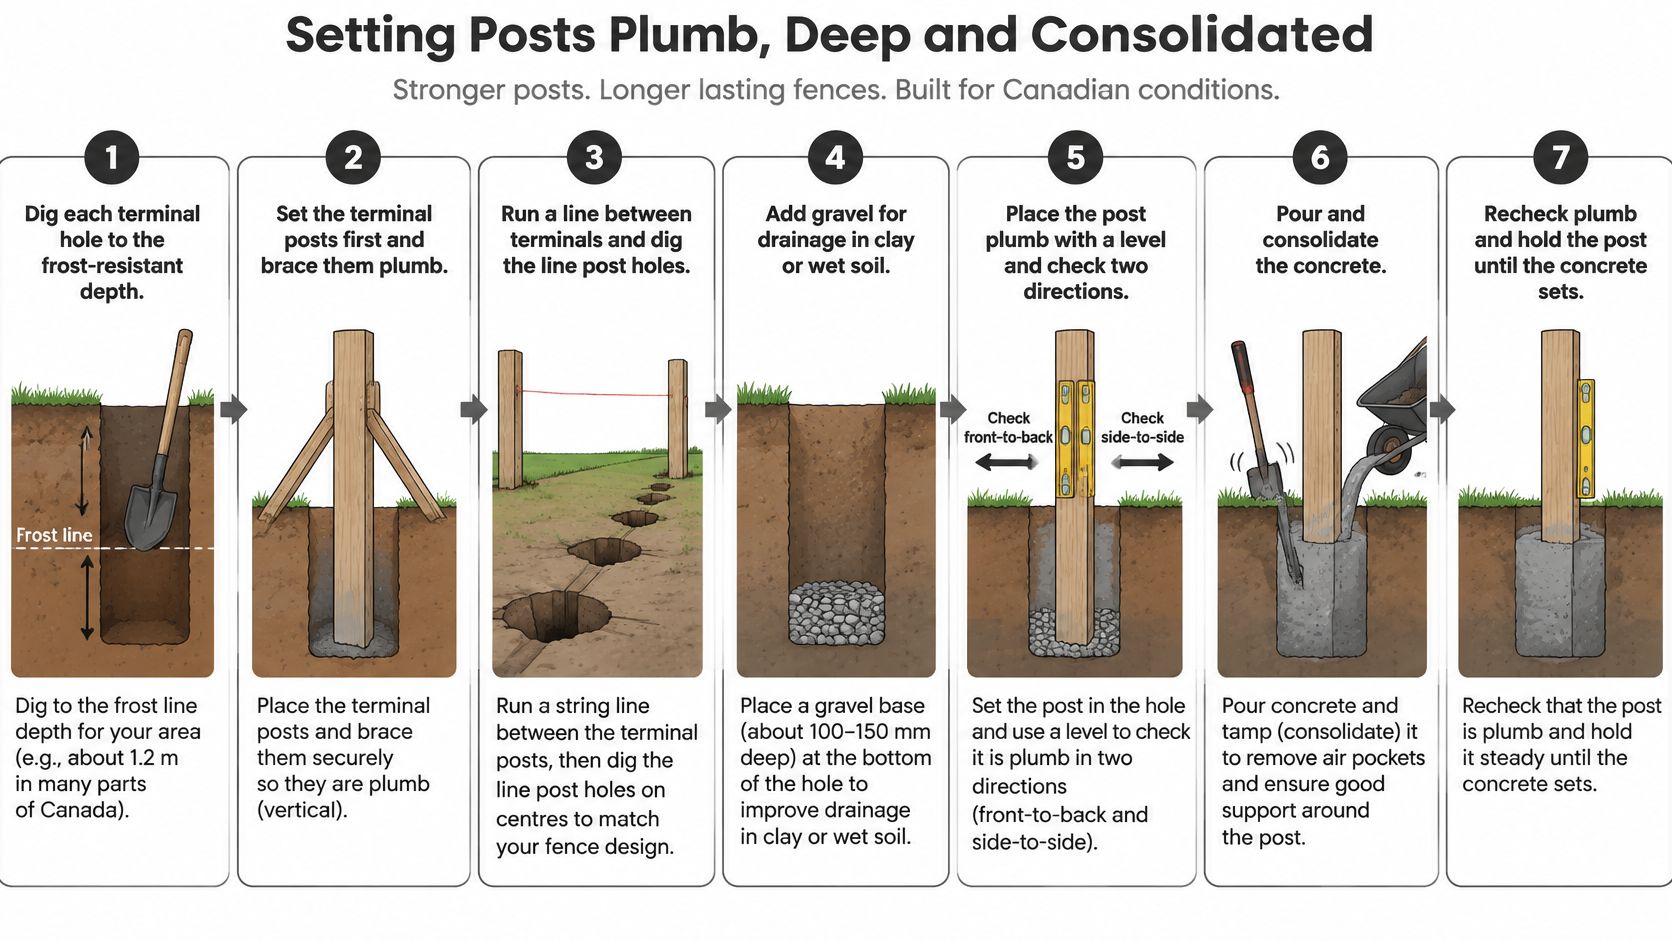
Dig each terminal to the frost-resistant depth established by the ground check. In clay or undefined soil, treat the planned depth as a minimum and confirm it against local frost penetration. A shallow post can heave, changing the height and tension of the attached fabric.
Clean the bottom of the hole and add about 75 mm of gravel. The drainage layer helps keep water from sitting against the steel at ground level.
Set the post plumb and brace it. Check two adjacent faces with a level. A post that leans sends fabric tension sideways and can pull the run out of line.
Backfill in lifts of roughly 150 mm and tamp each lift, or pour concrete just below grade and work it to remove voids. Loose material lets the post rock under wire tension. Use the Modern Yard Landscapes compaction guide for practical compaction methods.
Crown the top of the footing to direct water away from the post instead of letting it pool at the base.
Recheck plumb as the concrete begins to set. The pour can shift a post, so correct any movement before the concrete firms.
Set line posts to the string line at equal spacing after the terminals are positioned. Consistent spacing helps keep fabric tension even along the run.
Wait until the concrete has cured before tensioning the fabric. Pulling fabric against a footing that has not cured can draw the post out of position.
The sequence is straightforward, but each check controls a different failure point: depth limits frost movement, compaction resists shifting, and alignment keeps wire tension from pulling posts out of line.
Ontario's Building Code ties frost-penetration depth to local experience and requires foundations in several soil conditions to extend below it. No single depth suits every yard. Set corner and brace posts with enough size and depth to resist heaving and fabric tension, and tamp each augered hole properly. Shallow holes, loose spoil, poor consolidation, and concrete placed in frozen or waterlogged ground can leave the fence leaning, the mesh slack, or the gate out of alignment when the ground shifts.
Fixing Tilted Posts, Slack Mesh and Gate Drift
A tilted post is a reset, not a brace. A brace only covers the lean and leaves the soft footing in the ground. Before the auger goes back in, treat the locate, the property line and the local bylaw the same way you treat the hole: part of the post work. A post that crept in frost can sit off the line, and digging again without those checks can put a sound footing in the wrong place.
Ontario's OPSS 772 requires posts installed plumb and to the depth shown in the contract documents, line posts at equal horizontal distances, and tubular posts fitted with waterproof caps that fit and fasten securely. Those caps matter more than they look. Water trapped inside a tube freezes, expands, and splits the post from the inside. Equal spacing is what keeps fabric tension even. A post set too shallow lets frost lift one end of the run, and the mesh goes slack between the posts that stayed put.
Excavate a leaning post, re-plumb it and retamp in lifts. Budget most of a day for one post, plus cure time if concrete is involved. Slack mesh on a long run usually means the run is missing a straining post or a post has crept, so add the post and retension the fabric once the footing has cured. Gate drift almost always traces back to a corner or gate post that has shifted. Reset that post and reinstall the diagonal brace before you touch the latch. I would not adjust hardware on a post that is still moving.
Symptom | Likely cause | Fix |
|---|---|---|
Post leaning toward the fence | Shallow hole or loose backfill | Excavate, re-plumb and retamp in lifts |
Slack mesh along a long run | Missing straining post or post moved | Add a straining post and retension the fabric |
Gate drags or will not latch | Corner or gate post has shifted | Reset the post and reinstall the diagonal brace |
Cracked or tilting after spring thaw | Concrete poured in frozen or wet ground | Excavate and recast when the ground is workable |
Water pooling at post base | No crown or grade toward the post | Regrade away from the post and add a crown |
Water inside a tubular post | Missing or loose post cap | Fit a waterproof cap that fastens securely |
Reset, never brace: a brace only hides the lean. A reset post with a crowned, drained footing lasts far longer.
Log every repair with a date and a note on the ground condition. Repeat movement in the same spot in consecutive springs means the original footing was too shallow or too wet, and that is a signal to rebuild the assembly rather than patch it again. Depth that stops frost lift, and spacing that holds wire tension, are what keep the repair from showing up next spring. When the drifting post is a gate post, the hardware side has its own tolerances, and this guide to chain link gate installation covers hinge and latch adjustment after the reset.
Decide Between DIY and a Crew Before You Order
The DIY-or-crew call belongs before the order, not after the concrete arrives, because it decides who owns the locate follow-up, who digs, and who signs off the final checks. Use the opening layout count to fix the post schedule, add a spare or two, and confirm the locate reference and bylaw answer are complete before anything is purchased.
A DIY build means buying materials and running the steps above in order. A handover still needs someone to own the property-line confirmation and the locate, so put that in writing with a name against it. That's the gap that turns a good fence into a dispute.
FenceScape offers a free estimate, and our own crew handles every installation from the first layout pass to the final walkthrough. The contact form at FenceScape lets you request a Material Quote if you're building it yourself or an Installation Quote if you'd rather hand it over. Group projects across neighbouring lots are worth asking about at the same time.
A post set in the right place, to the right depth, is the part of the fence nobody sees, and it's the part that keeps the line straight for years.
When you want the spacing, the footing depth and the frost detail handled by people who do this every week in Ottawa–Gatineau, FenceScape can take the job from property-line check to final walkthrough with our own crew on site. Start with a free estimate and we'll confirm the post layout, the locate sequence and the bylaw details for your property before anything gets ordered. Visit FenceScape to request a Material Quote for a DIY build or an Installation Quote for a full crew install.
Comments