
Cementing in Fence Posts The Right Way for a Lasting Build
- Eric Lafleche
- Dec 24, 2025
- 10 min read

Properly cementing your fence posts is the single most important step for building a fence that will stand tall for decades. It isn't just about digging a hole and dumping in concrete. The real work is in the preparation—from mapping your fence line with precision to understanding your local soil and code requirements. A solid concrete base is your best defence against leaning, shifting, or heaving posts when the seasons change.
Why a Solid Plan Is Your Most Important Tool
Before you open a single bag of concrete, understand this: the success of your entire fence project hinges on your plan. Rushing the planning stage leads directly to crooked posts, neighbour disputes, and expensive mistakes that are a nightmare to fix once concrete hardens. A good plan ensures structural integrity and a smooth, headache-free installation.
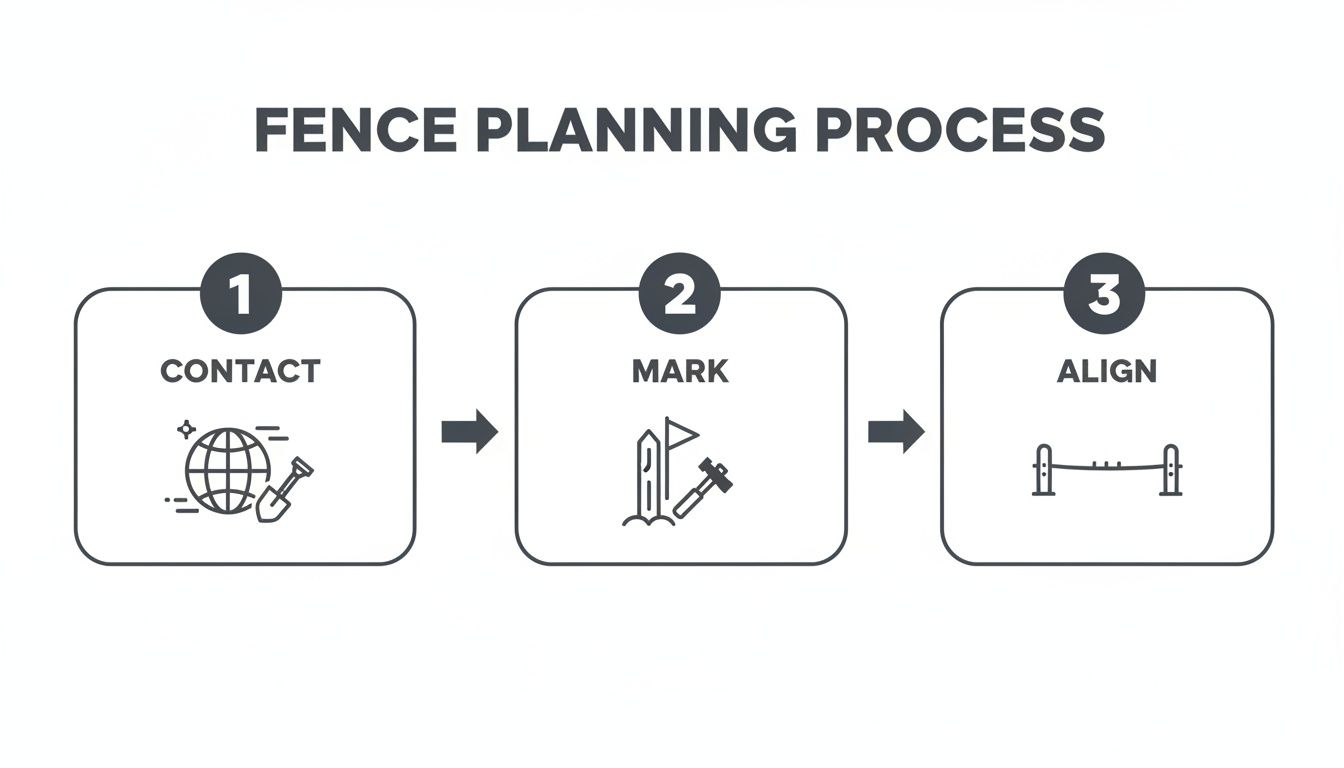
Map Your Fence Line Accurately
First, establish a perfectly straight fence line. Use wooden stakes and a mason's string, pulling the line taut between the corner points of your planned fence. This string is your definitive guide for aligning every post. Skipping this step is a classic DIY mistake that results in a wavy, unprofessional-looking fence.
With your string line in place, mark the exact center for each post hole using spray paint or small flags. The standard spacing is six to eight feet on centre, but always verify the requirements for your specific fence panels. Maintain consistent spacing to ensure a clean look and even weight distribution.
The Critical First Call You Must Make
Before touching a shovel, you must call your local utility locating service. In Ontario, this is Ontario One Call. It’s free, mandatory, and prevents you from hitting a buried gas line, water pipe, or electrical cable. Digging without this clearance is a dangerous gamble that can result in serious injury, massive fines, and costly repairs.
Many homeowners assume their yard is clear, but utility lines often cut through residential properties. Making the call is not a suggestion; it is an essential safety action for any digging project.
You also need to know what you're digging into. Understanding local ground conditions, especially the frost depth, is crucial for fence stability in the Ottawa-Gatineau region. For detailed information, review our guide to frost depth in Ontario. This guide explains why you must dig below the frost line to prevent the winter freeze-thaw cycle from pushing your posts out of the ground.
Getting the Groundwork Right: How to Dig Your Post Holes
A fence is only as strong as its foundation, and that starts with properly excavated holes. Before you mix any concrete, focus on getting the digging right—it's the most critical step for a long-lasting fence, especially in regions with harsh winters.
For digging, your main options are a manual post-hole digger or a gas-powered auger. A manual digger is sufficient for a few posts in soft soil. However, if you are digging more than five holes or dealing with dense, rocky clay, renting a powered auger will save you significant time and physical effort.
As you can see, a successful dig starts with planning. Always call or click before you dig to locate underground utilities, then mark your fence line precisely.
Beat Frost Heave: Dig Deep Enough
In the Ottawa–Gatineau area, the frost line is your primary challenge. This is the depth to which the ground freezes in winter. If your post footing is not below this line, the force of "frost heave" from the seasonal freeze-thaw cycle will push your posts upward over time.
For this region, you must dig a minimum of 42 to 48 inches (107 to 122 cm) deep. Do not take shortcuts. A shallower hole will lead to a wobbly, leaning fence by spring.
I've seen it countless times: someone follows the general "bury one-third of the post" rule but ignores the local frost line. That rule is a decent guideline for warmer climates, but up here, frost depth is king. Always dig below the frost line.
Why Hole Width Matters Just as Much
With depth established, focus on width. A wider hole allows for a thick, solid concrete "collar" around the post's base, which provides the stability needed to resist high winds and impacts.
A practical rule of thumb is to make the hole diameter about three times the width of your post.
For a 4x4 inch post (actual size 3.5x3.5 inches), dig a hole 10 to 12 inches in diameter.
For a 6x6 inch post (actual size 5.5x5.5 inches), aim for a 16-inch diameter hole.
This ensures enough concrete volume to create a solid anchor that will not move. While general rules are useful, understanding exactly how deep a fence post should be for your project involves balancing post height with these non-negotiable frost line requirements. Spending an extra hour to dig deeper and wider is a worthwhile investment in your fence's longevity.
Choosing and Mixing Concrete Like a Pro
With the holes dug, it's time for the concrete—the step that solidifies your fence's foundation. The strength and longevity of your posts are determined here. The process is straightforward, but attention to detail is essential for success.
Your first choice is between a standard or a fast-setting mix. This decision typically comes down to your available time and experience level.
Choose Your Concrete Mix
Selecting the right concrete mix is a key decision. One offers more time for adjustments, while the other speeds up the job. Here is a direct comparison to guide your choice.
Feature | Standard Concrete Mix | Fast-Setting Concrete Mix |
|---|---|---|
Working Time | Provides 20-30 minutes before it starts to harden. | Sets very quickly, often in under 20 minutes. |
Best For | Beginners, large projects, or anyone needing time for precise adjustments. | Professionals, small repairs, or when working against impending bad weather. |
Cost | More affordable and budget-friendly. | Typically more expensive per bag. |
Curing Time | Needs 24-48 hours before it is strong enough for fence panels. | Can often bear weight within a few hours. |
Forgiveness | High. The extended time is crucial for plumbing posts perfectly. | Low. You have almost no time to correct mistakes. |
Mixing Method | Mixed with water in a wheelbarrow or mixer before pouring. | Often poured dry into the hole, with water added on top (always follow the bag's instructions). |
Final Strength | Excellent compressive strength when mixed correctly. | Also provides very high strength, designed for structural support. |
For most DIY fence projects, a standard mix is the most practical choice. It provides the necessary time to ensure every post is perfectly straight without the pressure of a ticking clock.
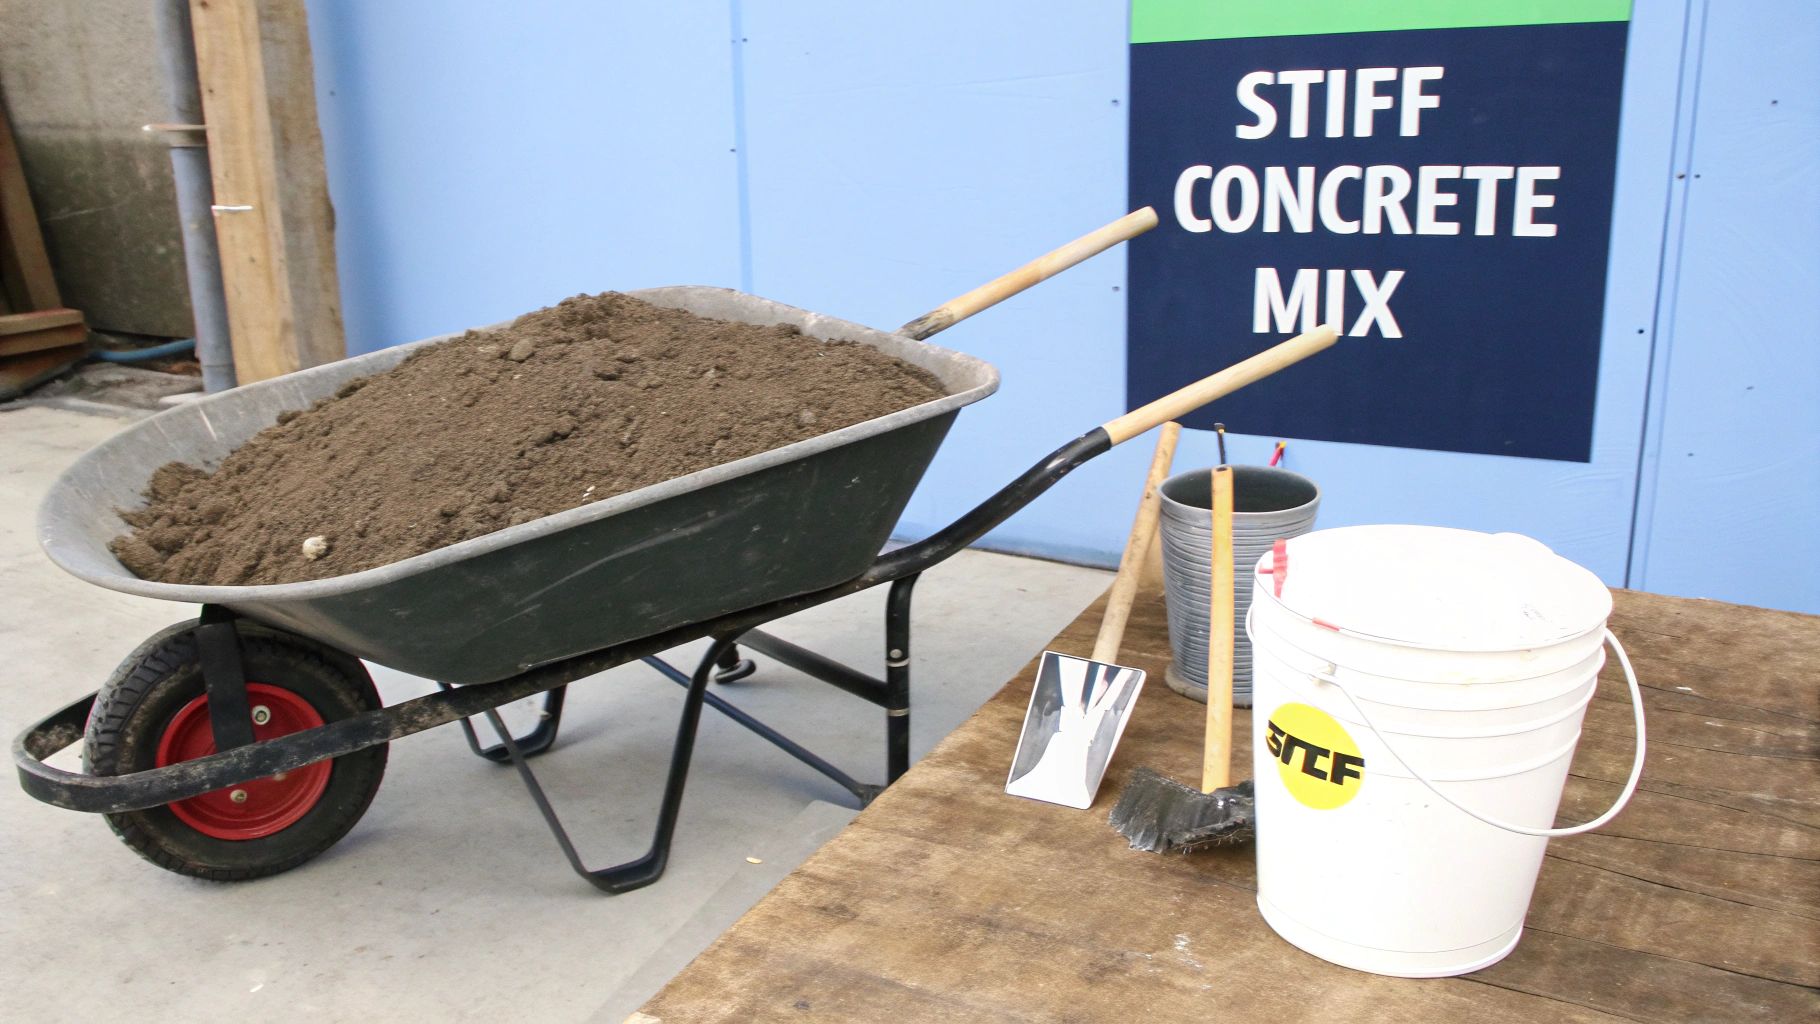
Nail the Perfect Concrete Consistency
The most common mistake is adding too much water. A soupy, pourable mix is weaker and prone to cracking. Aim for a consistency like thick, stiff oatmeal or peanut butter—it should hold its shape on a shovel, not slide off.
For a standard 50 lb bag of concrete mix, start by adding about 2 to 2.5 litres of water to your wheelbarrow. Then, add the dry mix. Use a hoe to pull the dry powder into the water, preventing dry clumps at the bottom. Add more water only in small splashes if absolutely necessary to eliminate dry spots.
A key takeaway for DIYers: If you're building a fence, do yourself a favour and stick with a standard mix unless you're under a serious time crunch. The reduced stress and extra adjustment time are invaluable for getting a dead-straight fence line.
A proper ratio is critical for strength. Some building codes require a precise 1:2:4 ratio (cement:sand:gravel) for structural work. Adding just 20% too much water can significantly reduce the concrete's final strength, leading to wobbly posts.
Professional Pouring and Waste Reduction
With the right consistency, you are ready to pour. The objective is to pack the concrete tightly around the post, eliminating air pockets that create weak points.
Work in layers. Shovel about six inches of concrete into the hole to start.
Tamp it down. Use a scrap piece of 2x4 to poke and jab the concrete repeatedly. This "rodding" technique removes air bubbles and ensures the mix fills every space.
Repeat the process. Continue adding and tamping concrete in layers until the hole is full.
To estimate your material needs, a standard 4x4 post in a 10-inch wide, 3-foot deep hole requires about two 50 lb bags of concrete. Always buy one or two extra bags to avoid running out mid-project. For more on concrete for larger jobs, this guide to rural concrete for NSW farms offers useful insights.
Setting and Bracing Posts for a Perfect Finish
You have prepped the holes and mixed the concrete, bringing you to the most critical stage of the installation. Precision and patience here will differentiate a DIY fence from a professional one. Getting your posts perfectly straight and keeping them that way is paramount.
A plumb post is the signature of quality work.
After pouring the concrete, work the post into the center of the hole. Use your level to check for plumb on at least two adjacent sides. A common mistake is checking only one side. A post can appear straight from one angle while leaning forward or back—an error you won't notice until you try to install the panels.
The Art of Bracing
Once the post is perfectly vertical, it must be braced to hold that position while the concrete cures. Even a light wind can cause it to shift. Scrap 2x4s are ideal for creating temporary braces.
Follow this simple, reliable bracing method:
Cut two pieces of 2x4 lumber long enough to reach from halfway up the post to the ground at about a 45-degree angle.
Attach one end of each brace to adjacent sides of the post with a single screw.
Drive a stake into the ground at the bottom end of each brace.
Screw the braces securely to the stakes.
This creates a rigid triangular support that prevents movement. Perform a final check with your level to make any micro-adjustments before walking away.
A common mistake is just eyeballing the post and hoping for the best. Don't do it. Always trust your level and take the time to brace every single post. One crooked post can throw off the entire visual line of your fence, creating a jarring flaw that's impossible to ignore later on.
Curing Time Is Not a Suggestion
With your posts set and braced, the final step is to wait. You must allow the concrete to cure—the chemical process that gives it strength. Rushing this stage will result in wobbly posts and a weak foundation.
For standard concrete mixes, wait a minimum of 24 to 48 hours before attaching heavy rails or fence panels. The surface may feel hard after a few hours, but the core is still hardening. Attaching weight too early transfers pressure into the soft concrete, compromising the plumb position you worked to achieve.
Getting this right matters, especially when you consider the volume of materials. As pointed out by fencing pros, a standard 4x4 post needs about one cubic foot of concrete, while a beefier 6x6 post needs closer to 1.5 cubic feet. For a large suburban fence with 100 posts, that could mean anywhere from 270 to 400 bags of concrete mix—a big investment you’ll want to protect by letting it cure properly. You can learn more about calculating concrete needs for fence posts from the experts.
Avoiding Common Pitfalls and Exploring Alternatives
Even with a solid plan, simple mistakes can compromise your fence's stability. Knowing what not to do is as important as knowing the correct procedures. It is also worth noting that concrete is not always the only or best option.
One of the most frequent mistakes is an incorrect concrete mix. A watery mix results in weak concrete that will crack. Another critical error is not digging deep enough, especially in areas like Ottawa-Gatineau where frost heave is a significant issue. A shallow post is an unstable post.
Don't ever assume more water makes concrete easier to work with or stronger—it does the exact opposite. You're aiming for a stiff, oatmeal-like consistency for maximum strength. That’s what locks your posts in for the long haul.
When Concrete Isn’t the Best Answer
While concrete provides exceptional stability, it is not a universal solution. Alternative methods can offer better drainage, simpler installation, or easier future repairs, depending on your project and soil conditions.
Gravel, for example, is an excellent alternative when drainage is the top priority. Packing crushed stone tightly around the post allows water to drain freely, which helps prevent rot in untreated wood posts. While a different application, understanding principles like avoiding common mistakes when applying concrete sealers provides a broader understanding of working with cement-based products.
Smart Alternatives for Setting Posts
Beyond backfilling with gravel, several engineered solutions may be a better choice than traditional concrete for specific situations.
Sonotubes: These heavy-duty cardboard forms create a uniform concrete pier. They are ideal for footings that must extend above ground level or for ensuring consistency, which is particularly useful when building a fence on a slope.
Metal Post Anchors: These steel anchors are driven or screwed into the ground, and the post is then bolted to a bracket. This is an effective solution for lighter fences or temporary installations, as they can be removed. Crucially, they keep the wood post completely clear of ground moisture.
Structural Foam: This two-part mix is poured into the hole, where it expands and hardens within minutes. It is fast and lightweight but more expensive and may not be suitable for heavy-duty applications like gate posts.
The best method depends on your local conditions. For example, in areas with expansive clay soil, a typical 4x4 fence post may require one 50 lb bag of concrete mix for a 2-foot deep hole to remain stable.
Answering Your Top Questions About Cementing Fence Posts
Questions often arise mid-project. Here are answers to some of the most common inquiries about setting fence posts, based on our extensive field experience.
How Deep Should a Fence Post Hole Be?
The general rule is to bury one-third of the post. For a 6-foot high fence, you would use an 8-foot post and sink it 2 feet.
However, in Ottawa–Gatineau, this is insufficient. You must account for our winters. The local frost line is about 42 to 48 inches deep, and your footing must be below it. Failing to do so will allow frost heave to push your posts out of the ground, potentially ruining your fence in a single season.
Should I Put Gravel in the Bottom of the Post Hole?
Yes, absolutely. Always add a 4 to 6-inch layer of crushed gravel at the bottom of the hole before placing the post. This small step has a significant impact.
The gravel layer serves as a drainage bed, preventing water from pooling at the base of the post. This protects wood posts from rot and concrete footings from cracking due to freezing water.
Think of the gravel base as an insurance policy for your post. It’s a simple, inexpensive step that dramatically improves drainage and can add years to the life of your fence by keeping the post’s base drier.
Can I Just Pour Dry Concrete Mix in the Hole and Add Water?
While some "fast-setting" products advertise this method, it is not recommended for a durable fence. The proper technique is to pre-mix the concrete and water in a wheelbarrow before pouring.
Pre-mixing ensures every particle of cement is hydrated, which is necessary for achieving maximum, uniform strength. A dry pour often results in weak, powdery pockets where water did not penetrate. For a foundation that will last for decades, take the extra five minutes to mix it correctly.
At FenceScape, we build fences that last because we never cut corners on the foundation. If you want a professionally installed fence with perfectly cemented posts that will stand strong against Ottawa's seasons, our in-house crews are ready to help. Get in touch with us for a free, no-obligation estimate and let's plan a fence you'll be proud of for years to come. Visit us at https://www.fencescape.ca to get started.
Comments