
Wrought Iron Fence with Wood Design Guide

It's late March in Sandy Hill or Aylmer. Ice still patches the lawn, the cedar siding looks warm in the afternoon sun, and you're deciding how to screen the patio without turning the street frontage into a solid wall. Bare metal pickets won't give you privacy, but a full board fence feels too closed in.
A wrought iron fence with wood can solve both problems, provided you treat it as a complete assembly. The frame, foundations, wood infill, gates, and drainage must work together. Before choosing a colour, settle the yard limits, pool requirements, construction method, maintenance expectations, and scope of the quote.
Read Your Block and Local Precedent
Start by walking a nearby block. Notice where neighbours leave views open, where wood screens private outdoor space, and which face of each fence meets the sidewalk. On your own sketch, separate the front, side, and rear rather than drawing one uniform perimeter.
Ottawa has a useful precedent for this material mix. Heritage Ottawa's account of Rideau Hall records cast-and-wrought-iron gates built in 1867–1868 under Frederick Preston Rubidge, later used as the model for perimeter fencing rebuilt in the late 1920s and early 1930s. It also describes mid-19th-century wood-clad buildings and surviving stone-and-wrought-iron fence remnants in Sandy Hill and Lowertown, including Sir Robert Borden's former residence at 211 Wurtemburg Street.
Design principle: Borrow the neighbourhood's balance of open metalwork and warm materials, not necessarily its ornament.
The federal heritage record for 15–17 Lisgar Road, a Queen Anne residence constructed in 1876, identifies the wrought-iron-and-stone boundary's relationship with the neighbourhood as part of its heritage value. That's a reminder that a fence shapes the street, not just your yard.
In a designated heritage area, confirm review requirements before replacing existing work. Matching established metal colours and avoiding an abrupt solid street wall are sensible starting points, not substitutes for approval.
Ottawa Yard Heights You Can Actually Build
A standard residential fence in Ottawa generally needs no building permit, but the City of Ottawa's building-permit guidance requires compliance with Fence By-law 2003-462 and sets the following residential height limits.
Location | Height rule | Building permit | What to order |
|---|---|---|---|
Front yard | Maximum 1 metre | Generally not required | Low open iron; only a thin wood accent |
Side or rear yard | Maximum 2.1 metres | Generally not required | Iron frame with wood privacy infill |
Gate | Up to 30 centimetres above the fence | Same as the fence | Heavier, deeper gate posts, sized for the gate |
City right-of-way | Fence not permitted | Not applicable | Stay inside the property line after it is confirmed |
Ottawa residential fence limits for a hybrid layout
Read the layout from the street inward. At the front, an open picket design with restrained wood accents preserves the character of a boundary without pretending to provide backyard privacy. Don't order tall panels and assume the installer can just sink them farther into the ground.
The side and rear are where wood infill becomes useful. Position the screening around actual sightlines, such as a neighbouring kitchen window or a path beside the patio. A fully screened perimeter isn't always necessary when a carefully placed solid bay would solve the problem.
Lay out the face and the boundary
Put the finished, more attractive face outward, toward the street and neighbouring property, with structural rails and brackets facing your yard. Discuss this before fabrication, particularly when decorative metalwork and removable wood panels have different finished faces.
Confirm the property line before locating holes. The grass between a sidewalk and your house can look like private land without being yours, and a fence cannot occupy the municipal right-of-way. Where the boundary is uncertain, obtain a survey rather than treating an old fence as proof.
Front transition: Show where the low run changes to backyard screening.
Gate position: Check the swing, access route, and relationship to steps or a driveway.
Corner visibility: Ask the City about location-specific restrictions before committing to a corner-lot layout.
Specify security without prohibited deterrents
The City's land-development guide prohibits barbed wire and electric fences in residential zones. Use sound construction, appropriate permitted height, and controlled gate access instead.
A heavier gate needs a post and footing designed for its weight, width, wind exposure, and hinge loads. Taller doesn't automatically mean stronger, and a decorative post cap doesn't compensate for an undersized footing.
Don't buy one panel height for the entire property. Mark every transition on the drawing and shorten the street-facing run before anyone cuts rails or welds frames. These are Ottawa rules; for an Aylmer or other Gatineau property, confirm the applicable municipal requirements separately.
Pool Fences That Pass the Ottawa Test
A handsome privacy hybrid can fail as a pool fence. An existing yard fence doesn't grandfather a new pool, and adding solid boards doesn't automatically turn ornamental fencing into an acceptable enclosure.
The permit distinction comes first.
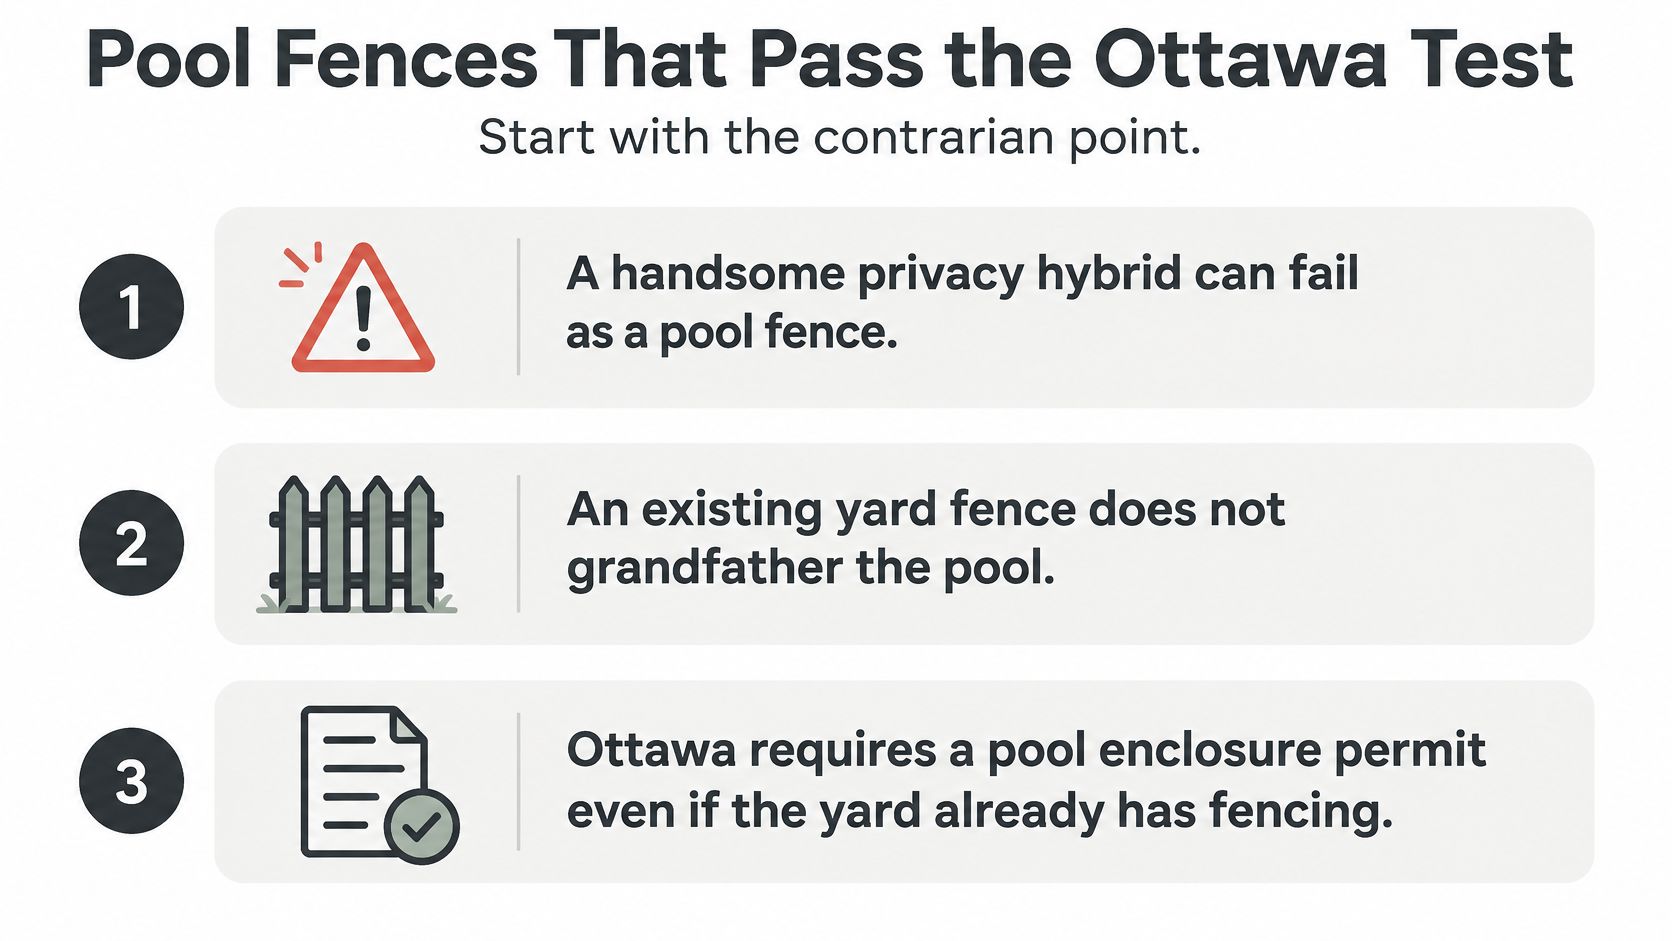
The City of Ottawa's pool-enclosure brochure requires a pool enclosure permit even when yard fencing already exists; the enclosure generally must be at least 1.5 metres high, prevent passage of a 100 millimetre sphere, and have structurally adequate, securely embedded posts.
Test | Ordinary yard fence | Pool enclosure |
|---|---|---|
Permit | Generally none if the fence by-law is met | Required even if a yard fence already exists |
Height | Maximum 1 metre in front; 2.1 metres at side or rear | Generally at least 1.5 metres |
Openings | Not the pool-enclosure opening test | Must prevent passage of a 100 millimetre sphere |
Wood | Privacy panels are a design choice within applicable rules | Must not add climbable rails, ledges, or gaps |
Iron | Used as ornamental fencing | Expressly permitted when the enclosure is adequate |
Gate | Hardware selected for the yard's needs | Self-closing and self-latching, with operation checked at grade changes |
Ordinary yard fence versus Ottawa pool enclosure
Turn each safety test into a construction detail
Specify vertical pickets with clear openings that satisfy the sphere test, including beside posts and at transitions. Don't judge spacing from a photograph. Ask for a dimensioned elevation showing the actual clear openings after assembly.
Wood needs the same scrutiny. A horizontal support rail on the accessible face can become a foothold, even when the boards themselves form a solid screen. Use a configuration that avoids climbable projections, and have the complete assembly reviewed rather than asking whether wood alone is permitted.
The ground matters too. A gap that looks acceptable on level lawn can become larger where the grade falls away. Show those changes on the drawing instead of leaving the crew to improvise with offcuts.
Privacy and pool safety are separate tests. Passing one doesn't establish the other.
Keep the gate inspectable
Use the required self-closing and self-latching arrangement, with latch placement confirmed for the approved design. Check operation from the pool side as well as the approach, and don't assume a gate that closes from fully open will close properly from a partly open position.
Solid infill can conceal hardware or damaged metalwork. Preserve practical access to inspect the latch and hinges, without creating a new opening or compromising the barrier.
Use this video as a visual companion, not as a replacement for municipal review.
For project preparation, the pool fence installation guide can help organise the questions to bring to your installer. Freeze the drawing and confirm it with the City before ordering posts. An improvised wood addition can introduce the very foothold the original enclosure avoided.
Three Ways to Join Iron and Wood
Build | Where it fits | Privacy | Climb risk | Climate note |
|---|---|---|---|---|
Iron frame with wood panel infill | Side and rear privacy | High | Moderate if rails form footholds | Keep panels above grade and off the soil |
Alternating iron bays and wood bays | Street plus a screened patio | Medium | Lower when wood faces are flat | Lets a corner lot change character without a second fence |
Iron pickets with narrow wood slats | Front yard and light screening | Low to medium | Low if there are no horizontal footholds | Works inside the short front-yard height |
Hybrid builds compared for an Ottawa yard
Choose the construction row before discussing stain. These are layout comparisons, not pool-compliance ratings. Every pool assembly still needs approval as a complete barrier.
The visual comparison below can help you discuss the frame and infill as separate components.
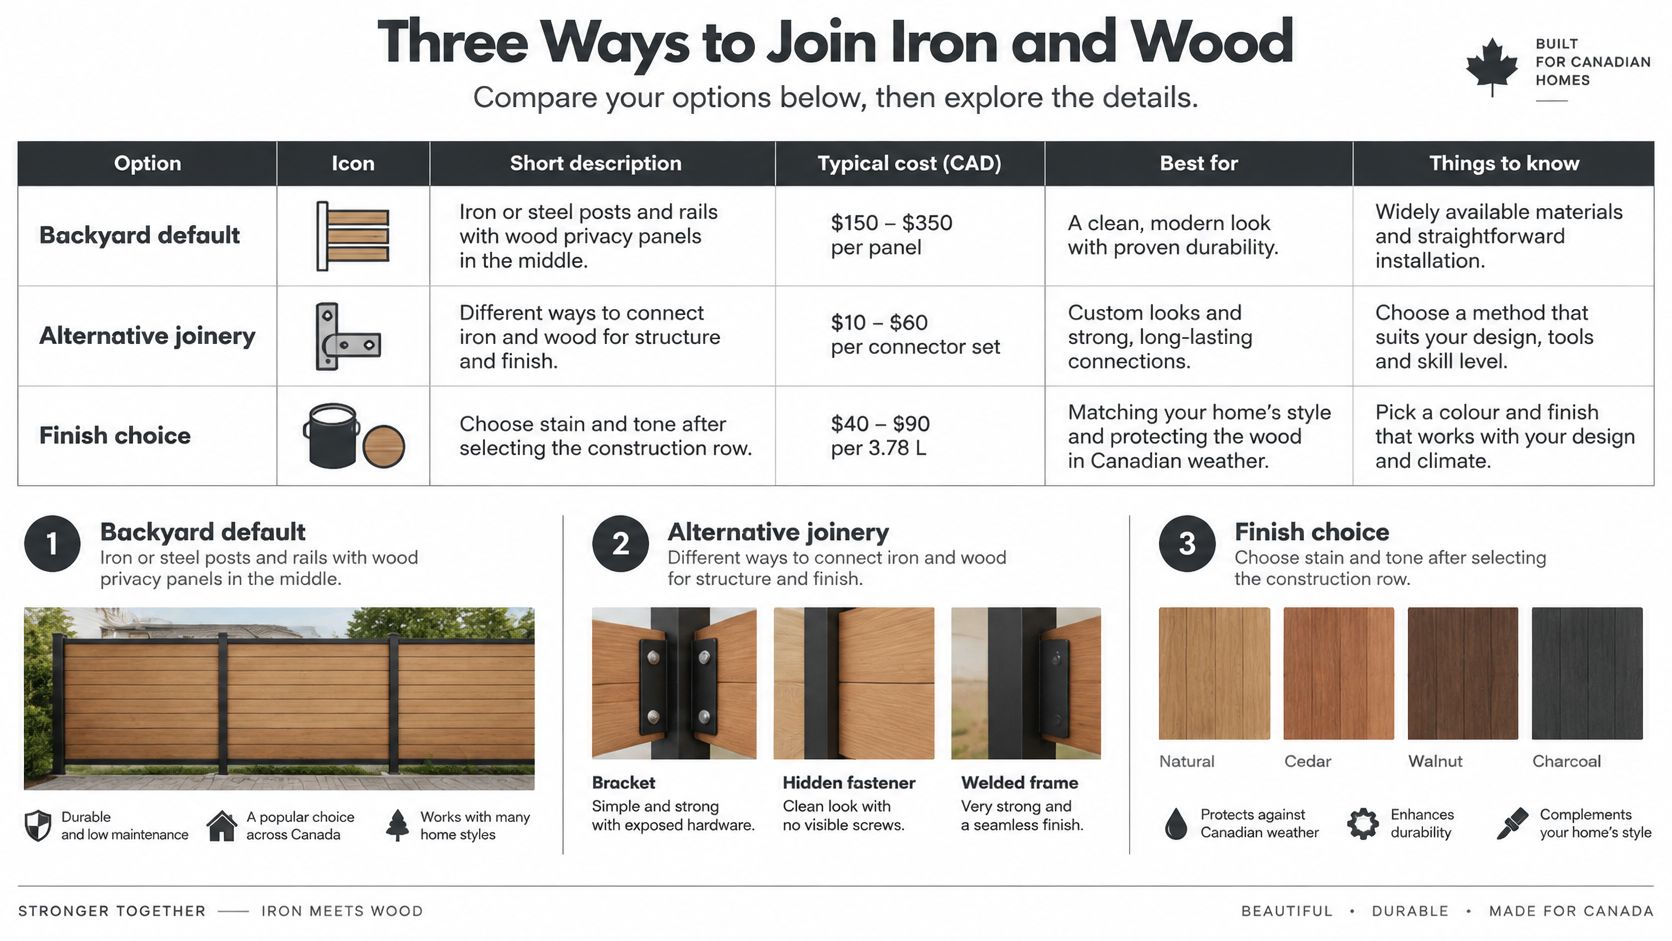
Match the build to the view
Frame with wood infill is the straightforward backyard choice. Metal posts and rails carry the assembly, while replaceable wood panels block views through the bays. Specify a fastening arrangement that lets a damaged board or panel come out without cutting the frame apart.
Alternating bays work when you want a screened seating area without closing the entire boundary. Say the dining table sits beside the house while the garden occupies the far end. Solid wood can protect the table, with open ornamental bays around the planting.
Pickets with narrow wood slats suit a dressed boundary and partial screening. They filter views rather than eliminate them. If privacy is your main requirement, look through a physical sample at an angle before accepting this option.
The wood privacy fence materials guide is useful when comparing the timber portion. Ask to see the proposed board profile, not just a species name.
Detail the joint before choosing the colour
Wood moves as its moisture content changes. Don't jam boards tightly into a welded opening or trap their ends in a pocket that holds water. Use stainless steel or suitable hot-dip galvanized fasteners, selected for the timber treatment and metal coating, and leave the assembly a clear drainage route.
Keep timber away from soil and wet mulch. At the bottom rail, avoid an upward-facing channel that collects meltwater against end grain. Any isolation strips or spacers should separate materials without forming a concealed water reservoir.
Wood posts carrying heavy iron panels deserve caution. Decay around the ground or concrete interface can undermine an otherwise sound metal panel. For a metal-led hybrid, a properly designed metal skeleton makes later timber replacement more practical.
Choose the frame for structural loads and the wood for screening. Don't ask thin decorative boards to brace the fence.
On a corner lot, you might combine a slatted front with solid side-yard bays. The shared corner post must accommodate the taller run and its wind load, while the transition must respect visibility requirements.
Finally, ask what the supplier means by wrought iron. Modern ornamental products may use steel rather than traditionally forged wrought iron. Have the quote identify the actual metal, corrosion protection, coating, and repair method.
Set Posts, Footings, and Gates for Ottawa Frost
Start below ground, not with the panel catalogue. Confirm the local frost-depth requirement and suitable footing design for the site; shallow concrete in frost-susceptible soil can move the whole assembly.
Establish the foundations. Locate buried services before digging. Excavate to the specified depth and use an appropriate gravel base and concrete footing detail, with drainage suited to the soil.
Set the line posts. Match spacing to the engineered or manufacturer-approved panel width. Check plumb in both directions with a spirit level and brace posts until the concrete has cured sufficiently.
Design gate supports separately. Size the posts, embedment, and footings for the gate's weight and size. A wide wood-filled gate catches considerably more wind than open pickets.
Resolve clearance and slope. Keep wood clear of soil, but don't create an excessive opening beneath a pool barrier. Stepped panels may need a separate compliant lower-barrier detail.
Hang and test the gate. Adjust hinges after the run is secure. For a pool enclosure, verify self-closing and self-latching operation without dragging or binding.
Understand the foundation's job
For a broader introduction to concrete support work, home foundations by Atlanta Concrete Solutions provides context on residential foundations. It isn't an Ottawa frost-design specification; use locally confirmed details for the fence.
Metal posts don't prevent frost heave by themselves. Footing depth, soil, drainage, and installation determine whether they stay aligned.
Care That Survives Freeze and Road Salt
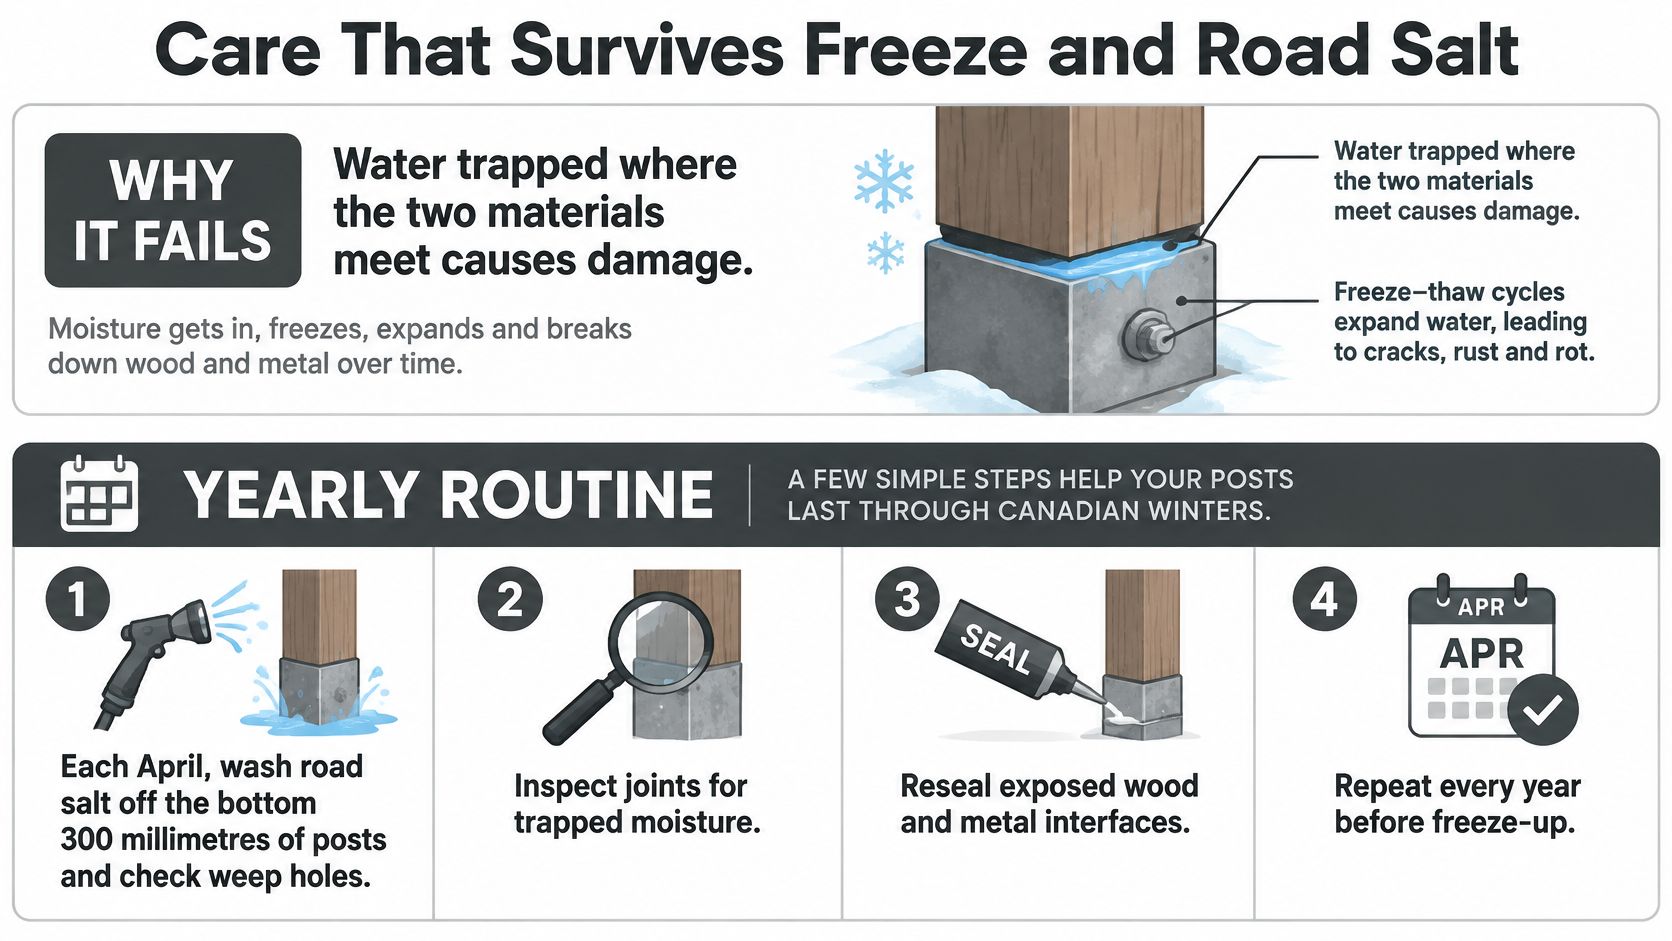
Water trapped where wood meets metal is a recurring failure point. Timber ends stay wet, coatings become difficult to inspect, and corrosion can develop behind an apparently tidy panel. Maintenance needs to reach those joints, not just the visible face.
Use a seasonal routine rather than waiting until the gate drags. The checklist below highlights the areas most easily missed.
Put inspection on the calendar
Wash after winter. In April, rinse road-salt residue from lower posts, rails, brackets, and nearby boards. Use fresh water and a mild cleaner compatible with the coating, not an aggressive pressure-washer jet directed into joints.
Check drainage and timber ends. Clear existing weep holes without enlarging them or drilling new holes casually. Gently probe suspicious wood with a screwdriver, especially at end grain and behind panels. Soft, crumbling fibre needs repair or replacement, not stain.
Repair coating damage before it spreads. Clean and dry chipped areas, remove loose rust with an appropriate abrasive, and use the coating manufacturer's compatible primer and touch-up system. Don't paint over salt, damp wood, or flaking coating.
Assess the wood finish. Look for peeling, exposed end grain, and uneven weathering. Wash and prepare the surface before recoating, and test a small area so the new finish doesn't create a blotchy patch.
Clear the base before freeze-up. In November, remove leaves and trim back accumulated soil or mulch. Check that drainage routes remain open and that gardening hasn't buried the bottom of the panels.
Separate a Saturday repair from a structural problem
Washing, touching up a small accessible chip, and tightening an otherwise sound fastener are reasonable homeowner tasks. Use the correct driver bit so you don't strip the screw head, and stop if the fastener spins in softened timber.
A heaved post, loose gate hinge connection, cracked weld, or panel swollen tightly inside its frame needs a more careful assessment. Don't force a binding gate shut or plane away timber before identifying whether the frame has moved.
Cedar: A useful choice when natural colour and visible grain matter. Accessible boards are easier to clean, sand, and refinish than timber trapped behind ornamental work.
Pressure-treated lumber: A practical option for exposed outdoor panels, but treatment doesn't make it immune to persistent wetting. Confirm fastener compatibility and let the timber reach a suitable condition before finishing.
Coated metal: Keep a record of the coating system and touch-up product. Factory powder coating and site-applied paint shouldn't be assumed to need identical preparation.
Keep separate maintenance records for wood and metal. Inspect them together, but refinish each according to its condition and coating requirements rather than putting the whole fence on an unsupported universal schedule.
What Moves the Quote
A useful quote explains the assembly, not just the price per metre. Custom frames, wood selection, site labour, and future access for replacement can change the scope substantially.
Custom-welded bays and gates require different fabrication work from straight stock panels. Ask the contractor to identify where custom work is necessary, especially at corners, steps, and unusual openings.
Compare like-for-like scopes
Wood specification: Name the species, grade, profile, and finish preparation. Compare cedar and pressure-treated alternatives against the same frame design.
Site conditions: Identify slope, restricted access, buried rock, and old concrete removal. These affect excavation and handling rather than panel quantity.
Gate work: Separate gate leaves, posts, hinges, latches, and any pool-specific hardware.
Replacement access: Ask whether future timber removal requires dismantling metalwork.
The wrought iron fence cost guide can help frame a pricing discussion, but request a site-specific scope before comparing totals.
If a designer is preparing visualisations for a shared-property approval, guidance on planning client presentation rendering deadlines can help schedule that presentation work. A rendering still needs a dimensioned construction drawing behind it.
Ask each bidder to separate metal, wood, gates, excavation, and removal. Then you can see what really changes when you simplify a gate or choose a different infill.
Confirm the Drawing Before Digging
An attractive elevation isn't enough to order from. The final drawing should tell the installer where the fence goes, how it stands, and how the wood can be maintained without compromising the barrier.
Sign off the buildable details
Label each yard. Mark front, side, and rear runs separately, with their confirmed permitted heights and any gate allowance. For Gatineau properties, use the applicable local rules rather than copying Ottawa's.
Identify the pool enclosure. Show the approved barrier line, gate details, openings, and grade transitions. Obtain the required permit before treating privacy additions as part of the enclosure.
Draw the material junctions. Identify the chosen hybrid build, wood clearances, drainage routes, fasteners, and access for replacing boards.
Confirm the boundary. Use the survey to establish placement, keep the fence outside the municipal right-of-way, and complete utility-location arrangements before excavation.
A complete drawing lets you change a detail with a pencil instead of replacing a welded frame.
Attach the material and coating specifications to the accepted quote. Keep the approved drawing, permit information, and maintenance instructions together so a later repair doesn't accidentally change the fence's safety or drainage details.
Once those checks are complete, request a measured quotation rather than a price based only on a photograph.
FenceScape offers measurement, design, and installation for ornamental metal and wood fencing, helping you plan the hybrid as one coordinated project. Visit FenceScape to request a free estimate, and bring your property sketch, privacy priorities, and any pool-enclosure requirements to the discussion.
Comments