
Western Red Cedar Fence Boards: Grades, Sizes and Finishes

If western red cedar resists rot, why do so many cedar fences fail at the bottom rail first? That question is the whole ballgame, and it's the one a grade label never answers. Homeowners shop by colour and species. Contractors count boards. What decides whether a fence line is still straight after eight Ottawa winters is the grade of each board, its moisture content when it went up, and whether water can leave the assembly after it gets in.
Western red cedar fence boards are sold in three working tiers that look nearly identical in a stack and behave differently on a fence. The species gets the reputation. The grade, the dimensions and the detailing do the work, and only one of those three shows up on a price tag.
Western Red Cedar Fence Board Grades Compared
Grade | Appearance | Typical fence use | Relative cost |
|---|---|---|---|
Clear | Tight grain, no knots, uniform colour | Gates, trim and visible premium faces | Highest |
Select or Premium | Few small tight knots, even colour | Visible privacy fence faces | Mid to high |
Knotty or Standard | Sound knots, more colour variation | Hidden sides, budget builds, rustic look | Lowest |
Mill names shift by producer, so read the grade stamp printed on the bundle wrap rather than the shelf sign. A board sold as "premium knotty" is a knotty board with a nicer face, not a select board, and paying select money for it is the most common quiet overpay in this trade.
Knots are not a defect in themselves. A sound, tight knot is fully bonded into the surrounding grain and doesn't weaken a fence board. A loose knot or a knot that has dropped out leaves a hole, and on a privacy run that hole lets wind load through and gives water a place to sit. Run a thumb over each knot on the face that will be visible from the neighbour's side. If any move, downgrade that board to the back run.
Clear faces stain evenly and show the grain as it was cut, which is why they belong on gates and trim where the eye lands. Knotty boards read well on rustic builds and disappear entirely on the side nobody looks at.
Practical rule: Select for the face your neighbours see, knotty for the back side and the hidden run, clear only for gates and trim.
Surfacing changes how the board takes finish
S4S (surfaced four sides) boards come planed flat and uniform, and they take a penetrating stain predictably. Rough sawn boards carry the saw texture, drink more finish on the first coat and look heavier on the fence. Neither is stronger. Pick surfacing by the look you want, then expect the rough board to need more product on that first pass.
Species labelling gets loose too. The USDA Forest Service western red cedar account puts California's sawtimber share at about 0.1 billion board feet against roughly 44 billion nationally, and it separates true western red cedar from incense cedar, a different species with different outdoor behaviour. When a quote says "cedar," ask for the species in writing.
Shortlist to one grade per part. Select or premium for privacy boards on the visible side, knotty for the back run and any infill, clear for a gate and its trim, and the same knotty grade for rails that will be hidden by the infill anyway.
Standard Cedar Fence Board Sizes and Lengths
Nominal size | Actual size (in) | Typical fence use |
|---|---|---|
1 x 4 | 3/4 x 3-1/2 | Pickets and narrow infill |
1 x 6 | 3/4 x 5-1/2 | Standard privacy boards and shadowbox |
1 x 8 | 3/4 x 7-1/4 | Wide privacy boards with fewer joints |
2 x 4 | 1-1/2 x 3-1/2 | Horizontal rails and stringers |
2 x 6 | 1-1/2 x 5-1/2 | Heavier rails and caps on longer spans |
Why the milled size is smaller than the label
Nominal size is the rough dimension the log was sawn to; actual size is what survives planing. A 1 x 6 measures about 3/4 in by 5-1/2 in (19 x 140 mm). Order by the label and calculate coverage from the label, and you'll come up short on a run or build an overlap that looks wrong from the street. Work every takeoff in actual millimetres.
The two common lengths are 6 ft (1.83 m) and 8 ft (2.44 m). Eight-foot boards give fewer joints and a cleaner line, but they cup and bow more in storage, so keep them flat, stickered and off the ground until they're up. On a 2.4 m post spacing, an 8 ft board lands on two rails with offcuts, and a 6 ft board only works if the rails are set to that rhythm.
Width sets the privacy strategy:
1 x 6, board-on-board: Two layers offset so the gaps behind are covered. Full privacy, more material, more weight on the rails.
1 x 6, shadowbox: Alternating boards on each face with a gap between. Good airflow and light through the top, partial privacy only.
1 x 8: Fewer boards per bay and a wider face to show grain, at a higher cost per board and more movement across the width.
1 x 4 pickets: The classic look, with the most gaps to manage if privacy is the goal.
Add a small allowance of extra boards for cuts, dropped knots and the one board that cups after a week in the sun. Then walk the layout before you buy: measure each bay from post to post, confirm the board length ends on a rail, and confirm the width plus gap combination closes the sightline you're trying to block.
Why Cedar Resists Moisture and Decay
Cedar's reputation is earned, but it's conditional. The heartwood carries extractives, thujaplicins among them, that inhibit the fungi responsible for rot, and the wood is light enough to handle easily and easy on framing. None of that travels into the sapwood, into a cut end, or into a board lying in wet soil.
The moisture mechanism explains the rest. Cedar's fibre-saturation point sits at roughly 18 to 23% moisture content, against roughly 25 to 30% for most Canadian softwoods, and below that point a board changes dimension as moisture moves in or out of the cell walls (Real Cedar panelling and moulding guide). A lower threshold and low shrinkage mean less movement, and less movement means fewer twisted boards, open joints and surface checks.
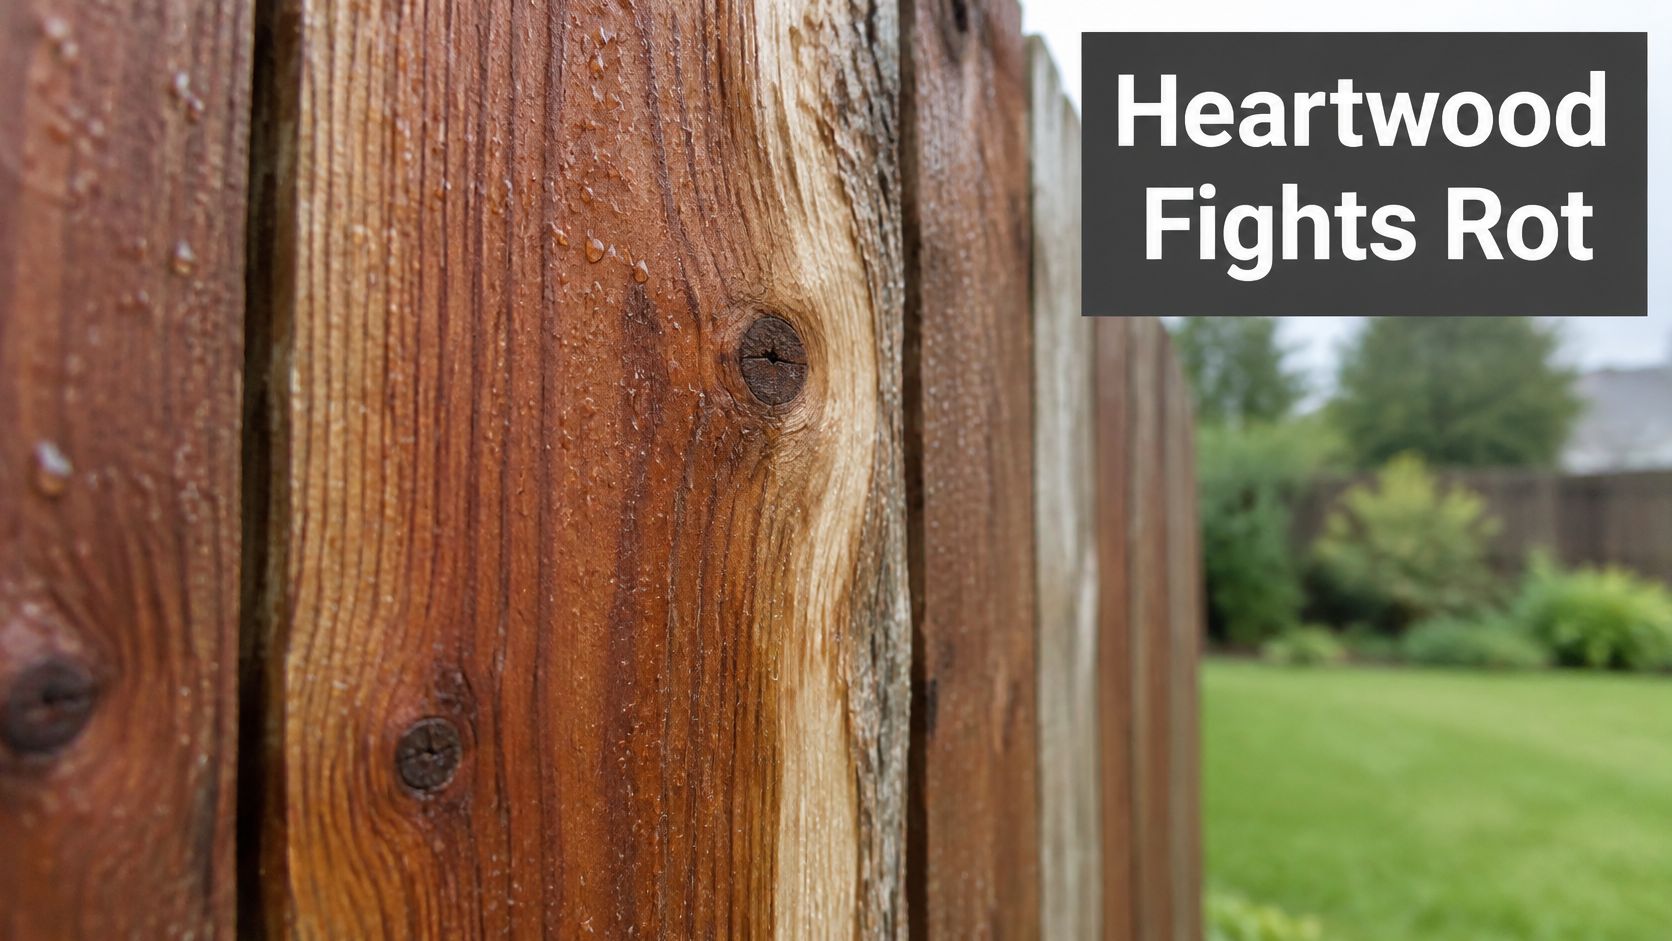
The same Canadian reference puts 19% moisture content as the ceiling before wood gets closed into an assembly, because wetter wood raises decay risk once drying is restricted. That's why acclimatizing boards on site before installation isn't fussiness. You're letting them shed moisture while air can still reach all four faces.
Where the protection stops
Cedar is not a ground-contact material. Decay starts where a board meets soil, where a crack or groove holds water, at cut ends, under fasteners, and on horizontal surfaces such as a top cap or rail. Ottawa's freeze-thaw cycle is the honest test: water enters end grain, freezes, opens the check wider, and repeats. The visible face can look sound while the bottom edge of the same board is already soft.
Three conditions you can check on site decide most of the outcome. Boards sit clear of soil and splash zones. Air can move behind the boards. Every field cut has been sealed with an end-grain sealer compatible with the finish going on top.
The posts deserve their own plan, and preventing fence post rot is where a cedar fence is won or lost before a single board goes up.
Cedar resists decay on the face. The detailing decides whether the rest of the fence follows.
How to Finish Cedar Fence Boards Step by Step
In Ottawa, cedar boards can legally stay bare. The fence by-law requires paint, preservatives or other weather-resistant protection generally, then explicitly exempts fences made from cedar, redwood or treated wood. Read that as permission, not as a maintenance schedule. An unfinished board greys, checks on the surface, and loses the warm colour the buyer paid a premium for. A finish buys you colour retention and slower water uptake, nothing structural.
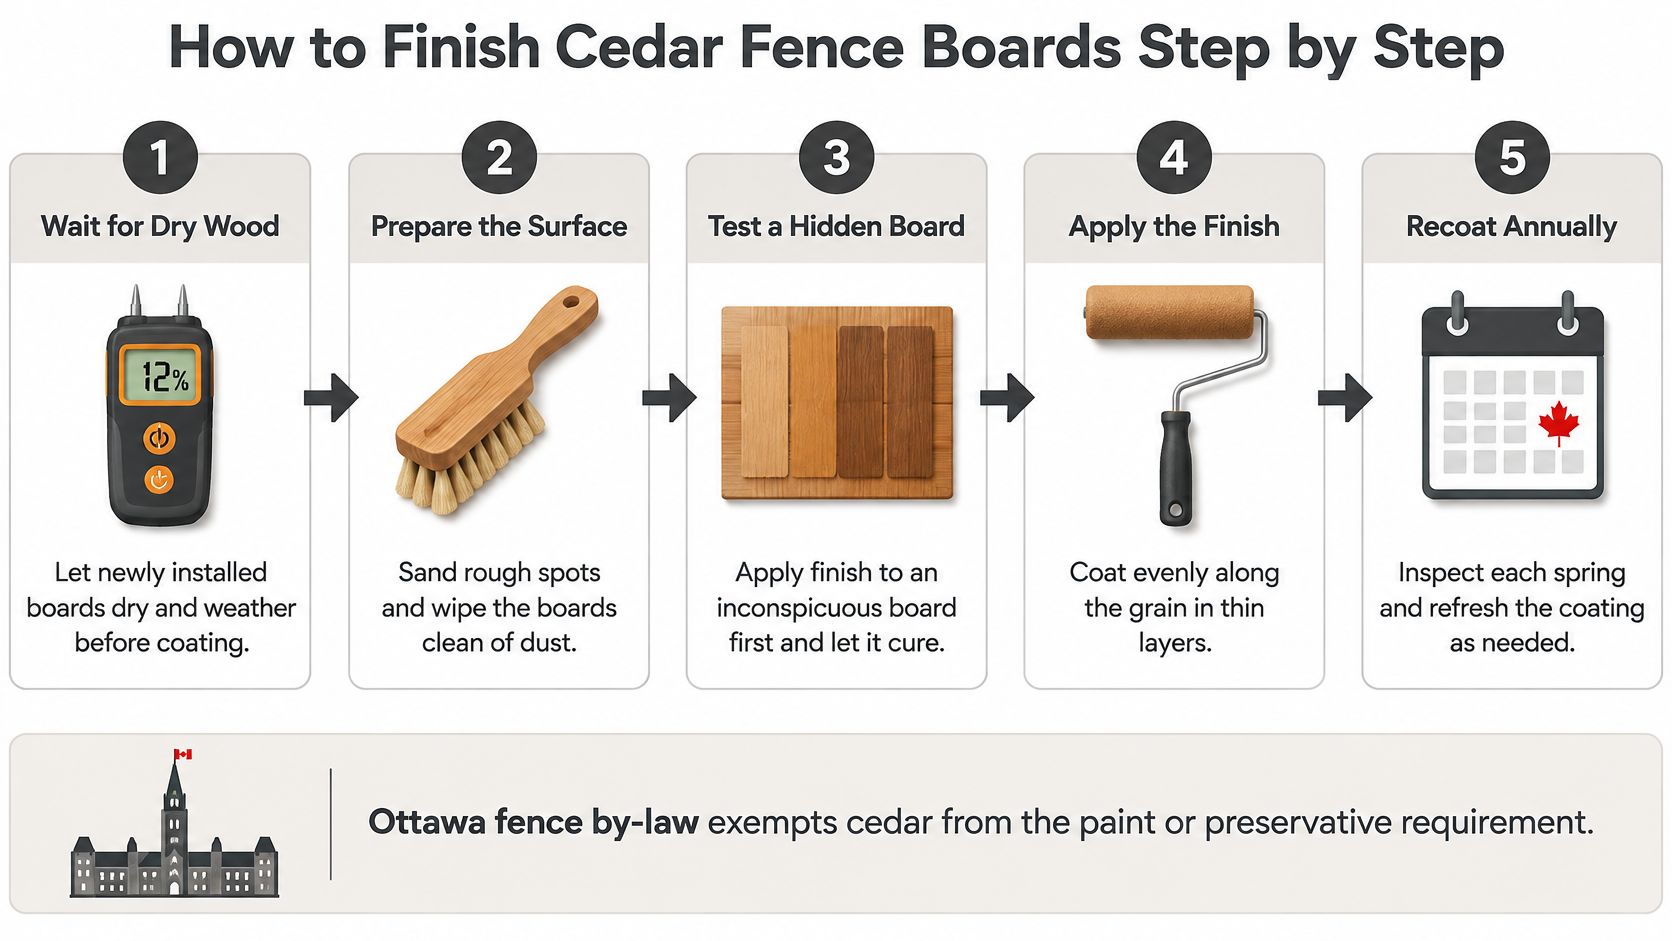
The sequence that works:
Acclimatize on site. Stack boards off the ground, out of direct sun, for several days before cutting, so they reach the moisture level of the yard rather than the lumber yard.
Seal every cut and drilled hole with a compatible end-grain sealer. End grain takes up water faster than any face, and a cut end is a direct path into the board.
Coat both faces and all edges before assembly. Once boards are nailed up, the back face and the edges between them are unreachable for the life of the fence.
Use corrosion-resistant fasteners, stainless or hot-dip galvanized. Zinc reacting with cedar tannins stains the wood and the fastener loses holding power over time.
Come back after a dry spell and apply a top coat to the exposed face, when the boards have finished their first big movement.
Recoat on a sun-driven schedule, usually every two to four years, cleaning with a mild cleaner first so the new coat bonds instead of sitting on dirt.
Here's the walkthrough of the coating process in practice.
A fence that's working looks boring: even colour across the run, boards lying flat against the rails, no soft spots at the bottom edge when you press a thumbnail in. If those three hold, the finish is doing its job and the detailing is sound.
Cedar Compared With Pressure-Treated Boards
Picture a homeowner with a 30 m backyard privacy fence, choosing board material for a design that's already drawn. Both materials will build that fence. They won't age the same way, and they won't fail in the same place.
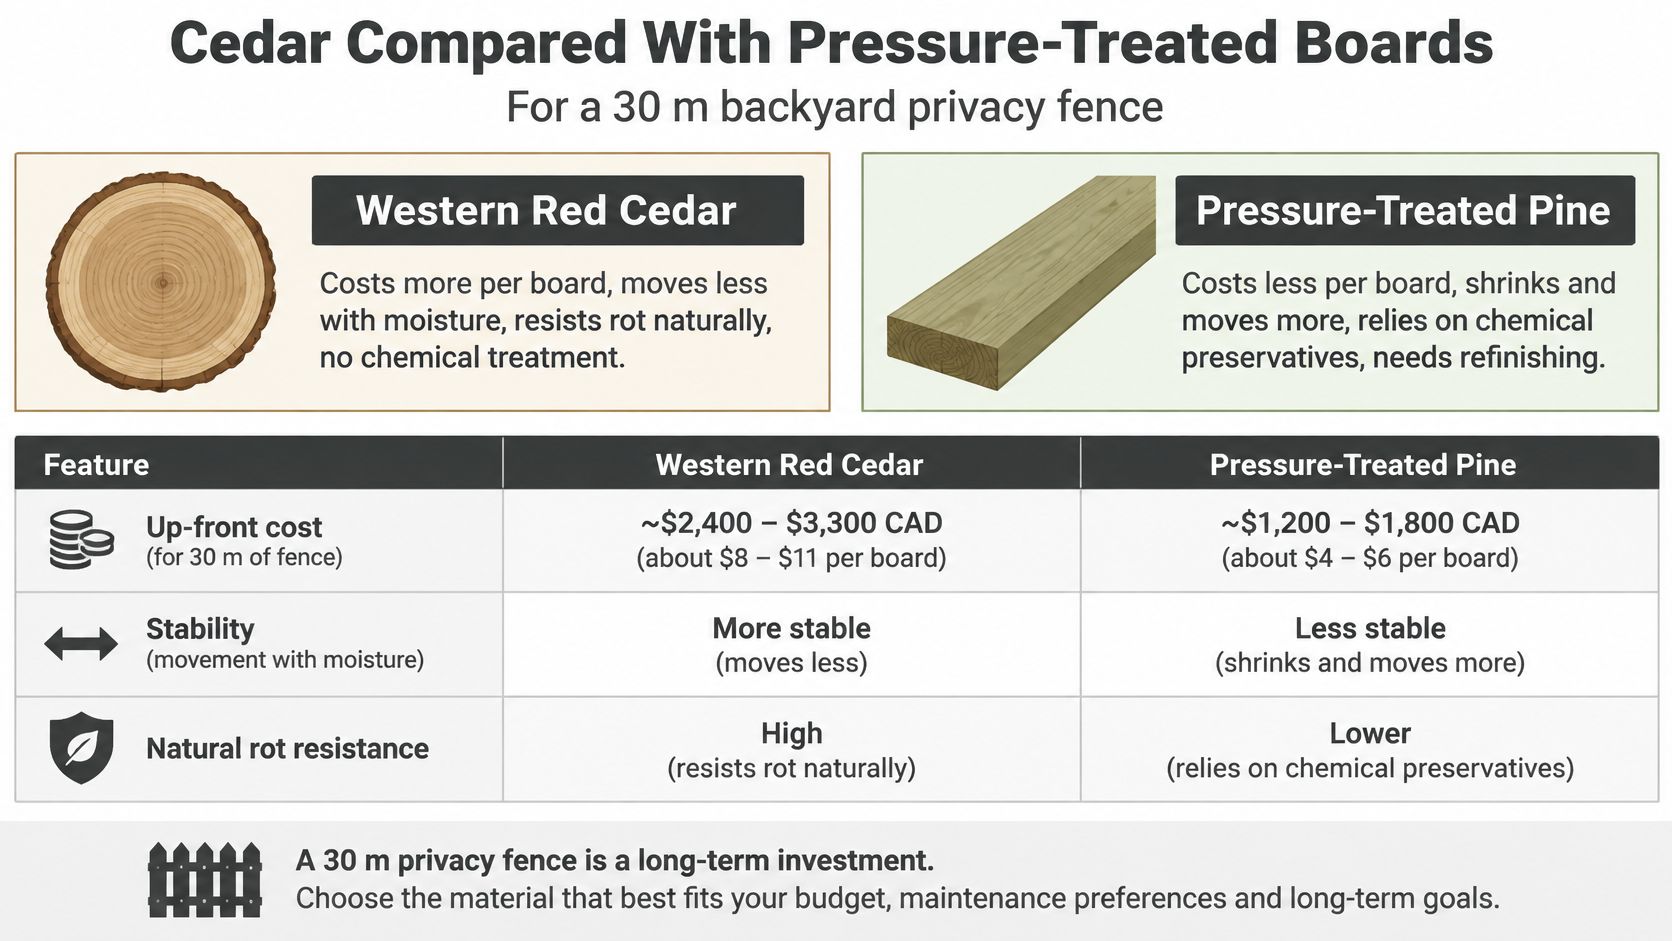
Factor | Western red cedar | Pressure-treated pine |
|---|---|---|
Service life when well detailed | Roughly 15–25 years | Comparable above grade; its real edge is in the ground |
Ground contact | Not suited; keep off soil | Chemically protected for ground contact |
Movement with moisture | Lower; more dimensionally stable | Higher; more twisting and checking as it dries |
Appearance | Natural grain, takes stain well | Greenish tint when new, often needs finishing |
Maintenance | Recoat to hold the colour you paid for | Usually needs sealing or staining |
Cost per board | Higher | Lower |
Where each material earns its place
Cedar wins on appearance, stability and natural resistance above grade. A Canadian wood-durability reference puts well-designed cedar fence boards at roughly 15 to 25 years when detailing and maintenance allow rapid drying, and notes cedar's low density, about 23 lb/ft³ at 12% moisture content, which keeps handling easy and dead load off the framing (WRC quick facts). That same guidance is blunt that decay becomes likely where wood contacts ground, where cracks and cut ends hold water, and on horizontal surfaces.
Pressure-treated lumber wins underground and on budget. It's also, alongside cedar, one of the two materials most Canadian wood fences are built from, so availability is rarely the problem. The sensible build uses each where it performs: cedar infill on pressure-treated posts and rails, buried members protected, cut ends sealed, fasteners matched to the chemistry.
On money, Home Depot Canada's fence board listings showed a 1 in. x 6 in. x 6 ft. premium knotty cedar fence board at C$5.07 per board in 2026. Put that against a local pressure-treated quote for the same dimension before you commit, and remember the first-year coating as part of the cedar budget, not an optional extra.
Decision rule: cedar where the fence is above grade and seen, pressure-treated or steel where it touches soil, and never assume the cheaper board is the cheaper fence.
Ottawa Pool Enclosure Rules for Cedar Fences
Cedar boards don't make a fence pool-compliant. Geometry does. Ottawa requires an enclosure for any outdoor pool able to hold at least 600 mm of water, and the enclosure must stand at least 1.5 m high (City of Ottawa pool enclosure requirements). Support posts should be at least 100 mm by 100 mm and no more than 2.4 m apart, and below grade they may be natural cedar, pressure-treated wood or an approved preservative-treated alternative.
Run this check before ordering anything:
Water depth: measure the pool against the 600 mm threshold that triggers the enclosure requirement.
Height and posts: sketch the 1.5 m minimum against a 100 x 100 mm post at 2.4 m spacing.
The sphere test: try a 100 mm template through every gap between boards and under the bottom rail.
Gate hardware: gates must self-close and self-latch, with the latch at least 1.35 m above the enclosure floor.
Permit and distance: a pool-enclosure permit is required even when a yard fence already exists, and the enclosure has to respect the required distance from the pool's wetted surface.
Confirm the layout with the city before boards arrive. The exemption that lets cedar go unfinished changes nothing about these dimensions, which is where most DIY pool fences fall short. Our guide to the pool enclosure bylaw walks through the permit side.
Mistakes to Avoid and Next Steps
Cedar can remain structurally sound even after its colour changes. Grey, weathered boards are usually a cosmetic issue; soft wood, deep splits, or a bottom edge that shifts under pressure call for repair. Probe a suspect board's lower edge with a screwdriver and press a thumbnail into the post near ground level. If either sinks in easily, the wood may be deteriorating.
Keep boards and rails clear of soil and standing water. Where the layout allows, leave about 150 mm (6 in) between the wood and grade, and slope the ground so water drains away from posts. Inspect the fence each year for loose fasteners, rocking posts, a deteriorating bottom rail, and boards that have shifted. Recoat faded faces before winter if the finish requires it.
For planting beds or sightlines, a free landscape design app can help you sketch the fence line before laying it out in the yard.
Before buying, match the board grade, dimensions, finish, and fasteners to the design. FenceScape's cedar fence installation guide explains the build process. Every project starts with a free estimate, so you can compare costs before you commit. Use the contact form to request a Material Quote for lumber or an Installation Quote for a complete fence; FenceScape's own crew handles installations.
FenceScape designs and installs cedar fences across Ottawa–Gatineau, with options suited to your property and style. Request a Material Quote or Installation Quote to plan your project.
Comments