
Chain Link Gate Installation That Actually Lasts

You close the chain link gate on a mild October afternoon, and everything feels right. The hinges are quiet, the latch catches, and the bottom clears the driveway. After an Ottawa winter, that same gate may drag across the ground, miss the latch, or lean far enough to make the whole fence look tired.
That outcome usually starts before the mesh is unrolled. Chain link gate installation is a system of posts, footings, grade, frame, fabric, hinges, latches, and seasonal movement. Treat the gate as an accessory and the weakest component will eventually show itself. Treat it as a structural opening, and the installation becomes much more predictable.
Planning Your Chain Link Gate Before You Dig
A durable gate begins with measurements, not a shovel. Measure the clear opening, identify the hinge side, and decide whether a single leaf is practical or whether a double gate better suits equipment, vehicles, or regular access. Record the finished driveway, walkway, or lawn elevation at the opening. Posts set against an unfinished grade often leave too little clearance once paving, topsoil, or landscaping is added.
Choose the swing direction with daily use in mind. A gate should open into a safe, usable area rather than into a sidewalk, roadway, pool deck obstacle, or neighbouring property. If the opening sits on a shared property line, ask the neighbour before ordering the frame and hardware. Agreeing on swing direction and access early is easier than resolving a gate that blocks one person's parking area or garden.
Confirm the site before ordering
Request utility locates before digging. Mark the proposed fence line, gate opening, hinge line, and any likely footing locations so the locate information applies to the actual work area. On older Ottawa properties, don't assume a visible service route tells the whole story. Private lines, irrigation, lighting, and older additions may require separate investigation.
Then clarify the municipal category. In Ottawa, a standard residential fence generally doesn't require a building permit, but a pool enclosure requires a separate permit even when an existing yard fence is being reused or replaced around a new pool. Confirm the current requirements through the City of Ottawa building permit guidance before fabrication.
Use this pre-order checklist:
Opening: Confirm the clear width, hinge side, latch side, and whether a single or double leaf fits the use.
Grade: Establish the finished surface under the gate and along its sweep path.
Property line: Confirm ownership, access, and any neighbour agreement needed.
Locates: Mark every proposed post and footing location before calling for utility information.
Pool status: Determine whether the gate forms part of a pool enclosure.
Hardware: Match hinges and latch hardware to gate weight, swing direction, and safety requirements.
Finish: Coordinate the chain link finish with the rest of the property. If the surrounding fence needs a broader appearance update, guidance on a fence refresh for your home can help you plan the finish alongside the gate.
A conventional yard gate and a pool gate may look similar in a catalogue, but they don't carry the same obligations. Make that decision before posts are ordered, because changing the gate after concrete is placed usually means compromising alignment or paying for rework.
Layout, Footings, and Setting the Posts Right
Most gate problems begin at the posts. A hinge post carries repeated movement and the weight of the frame, while the latch post receives impact every time someone closes the gate. Both are terminal posts, not ordinary line posts, and both deserve a layout and footing designed around the site.
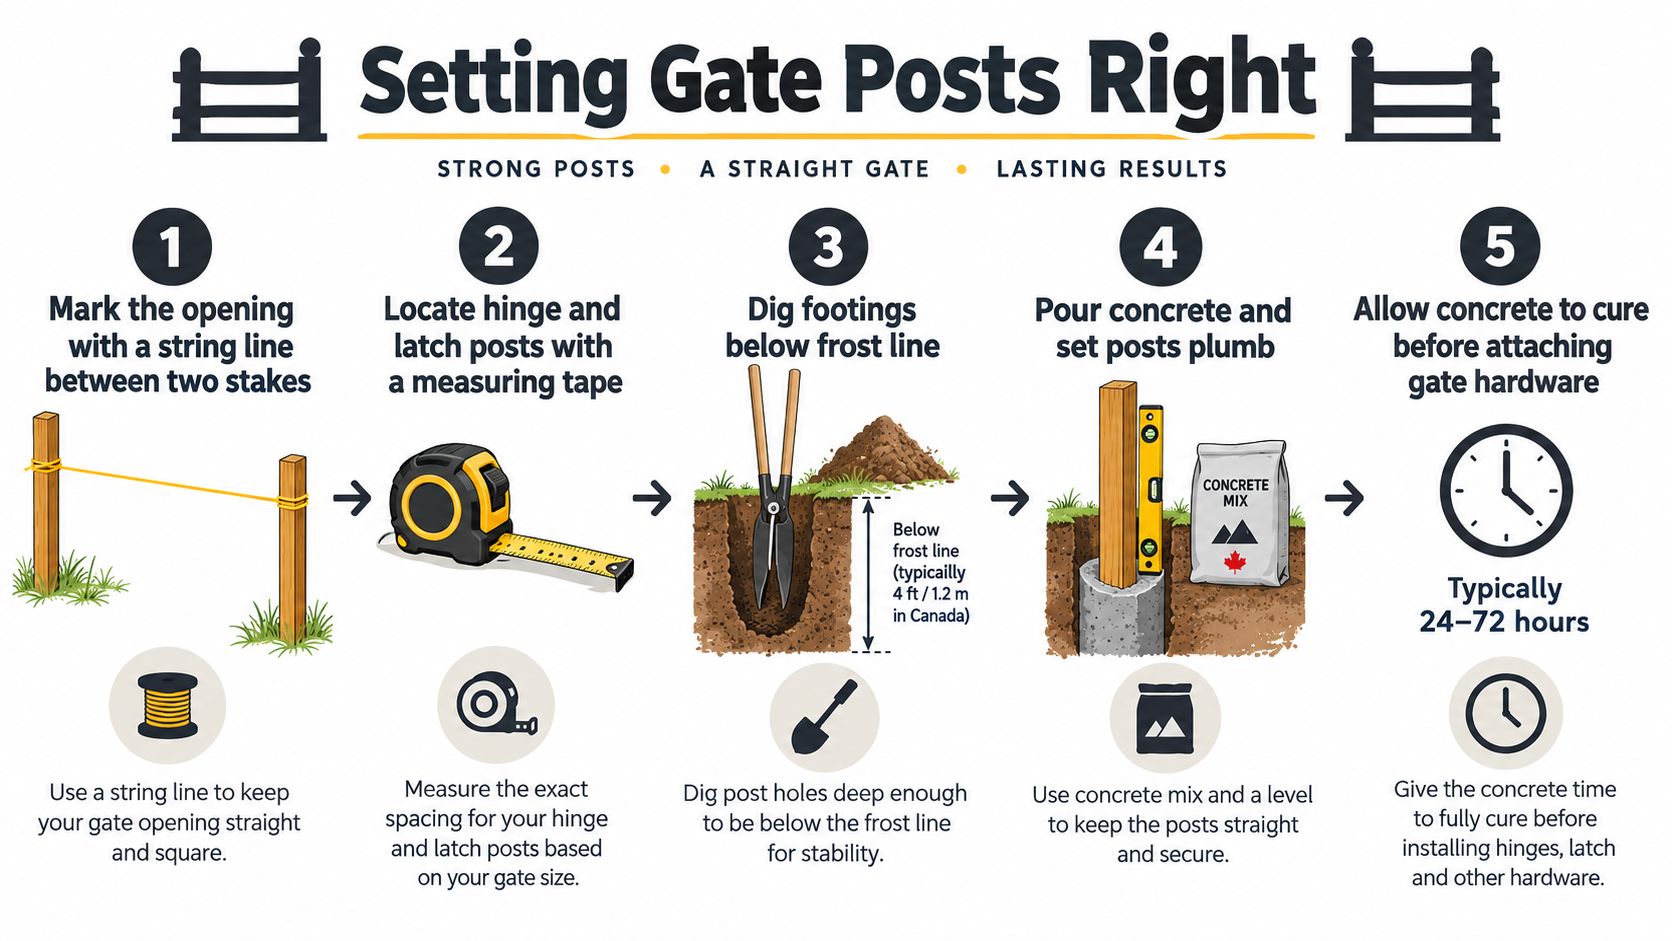
Start with a taut string line between fixed stakes. Mark the opening, hinge post, and latch post from that line, then check the line against the driveway edge, building face, and property boundary. A small error at the opening becomes obvious when the top rail reaches the gate and refuses to line up.
Follow a deliberate post sequence
The practical sequence is straightforward:
Mark the opening: Set the string line and identify the exact hinge and latch positions.
Assess the ground: Look for clay, fill, rock, water, and signs that the footing may move.
Excavate terminal footings: Size the gate-post foundations for the loads and site conditions.
Set and brace: Plumb both posts on two faces, brace them, and keep the opening dimension fixed.
Pour and cure: Consolidate the concrete and allow it to gain adequate strength before hanging the gate.
Continue the fence: Set line posts to the string line and maintain a consistent top-rail run.
For commercial and industrial work, CAN/CGSB installation requirements limit line-post spacing to 3.1 m, or 10 ft, maximum centre-to-centre between terminal posts, and require terminal-post foundations to be designed for structural loads under the National Building Code of Canada. See the CAN/CGSB chain-link installation requirements when the gate is part of a larger commercial system.
Design for Ottawa ground conditions
Ottawa and Gatineau sites can change character from one property to the next. Variable fill, clay, shallow rock, and rock with overburden all affect excavation and concrete placement. Frost heave becomes especially troublesome when water collects around a footing or when a post is set without accounting for seasonal soil movement.
A geotechnical or site-condition review is sensible when the opening is wide, the gate is heavy, the soil is visibly unstable, or excavation repeatedly meets rock. It can also prevent a false economy on commercial work, where a footing failure affects security and vehicle access rather than just appearance.
Don't pour around a post that has shifted out of plumb. Brace it, check both faces with a level, verify the opening again, and consolidate the concrete around the post. A gate can be adjusted at the hinges, but hardware can't correct a post that has rotated or heaved.
Building the Gate Frame and Choosing Hardware
A chain link gate needs a rigid frame that stays square under its own weight and through repeated opening. Use frame material appropriate to the opening and duty, make the corners rigid through sound welding or properly fitted brackets, and ensure the gate frame coordinates with the top rail rather than merely filling the gap.
Fit the chain link fabric to the frame after checking the frame diagonals and hinge-side alignment. The fabric should be tight enough to support the frame visually and resist slack, but it shouldn't be tensioned so aggressively that it pulls the frame out of square. The top and bottom rails should match the fence system where rails are specified, creating a continuous visual and structural line.
Match hardware to the load
Hinges need adequate strength and bearing surface for clamping or bolting. A small, inexpensive hinge may work during the first few openings, but it can develop play when the frame settles into regular use. That play turns into sag, latch misalignment, and repeated adjustments.
A chain hook is useful even on a residential gate. It holds the gate open instead of allowing wind or a visitor to push it beyond the intended travel. For double gates, install a steel centre rest and drop bolt so the leaves have a defined closed position. Ontario transportation specifications also identify the chain hook and centre-rest arrangement as part of a functional gate system. The Ontario gate and fence specification provides the relevant installation reference.
Pickering's pool-enclosure by-law offers useful component benchmarks, although Ottawa projects still require confirmation against Ottawa requirements. It specifies galvanized-steel top and bottom rails at least 32 mm in diameter, end and corner posts at least 48 mm in diameter extending 0.9 m below grade in concrete, and intermediate posts at least 38 mm in diameter. Those details illustrate why a gate system should be selected as a coordinated assembly rather than as a collection of unrelated parts. The Pickering fence and swimming pool enclosure by-law is a useful comparison point.
Galvanized fabric is practical and familiar. Vinyl-coated fabric adds a finished colour and can suit a garden residential property, but the coating must remain intact around cuts, fittings, and high-contact areas. For commercial openings, heavier fabric and stronger frame components may be justified. For a residential boundary gate, overspecifying every component can add cost without solving the true weakness, which is often a leaning post or poor grade.
For a coordinated overview of chain link systems and gate components, review chain link fencing options before selecting the frame and fittings.
Pool Enclosure Rules Every Ottawa Gate Needs
A pool gate isn't an ordinary yard gate with a different latch. It is part of the barrier, so mesh openings, enclosure height, bottom clearance, swing, and closing hardware must work together. Reusing an existing fence doesn't remove the need to verify the pool-enclosure requirements or the applicable permit.
Ottawa's pool-enclosure guidance requires the enclosure to be at least 1.5 m high. Chain-link diamond openings may be no greater than 38 mm, and openings through or below the enclosure must be too small for a 100 mm spherical object to pass through. The gate must self-close and self-latch, with the lock positioned at least 1.35 m above the bottom of the enclosure. These requirements are set out in the Ottawa pool enclosure brochure.
Quebec uses a tighter mesh threshold for affected pool fencing. For chain-link pool fencing installed or replaced since July 1, 2021, the mesh must prevent a spherical object larger than 30 mm from passing through, or wider mesh must use slats that achieve the same result. An Ottawa gate shouldn't be ordered for a Gatineau project on the assumption that the two standards are interchangeable.
Compare the two jurisdictions
Requirement | Ottawa | Quebec |
|---|---|---|
Pool enclosure height | At least 1.5 m | Confirm the applicable provincial and municipal requirements |
Chain-link opening | No greater than 38 mm | Maximum mesh width of 30 mm for the stated regulation |
Gate closing | Self-closing | Confirm the applicable pool-gate provisions |
Gate latch | Self-latching | Confirm the applicable pool-gate provisions |
Lock position | At least 1.35 m above the enclosure bottom | Confirm the applicable provincial and municipal requirements |
Gate opening checks | Check mesh, frame gaps, bottom clearance, and hardware | Check mesh, slats, frame gaps, and clearance against the 30 mm threshold |
On a sloped deck or settled lawn, measure the gap below the closed gate, not just the gap at the posts. Check the latch height from the enclosure bottom, confirm the gate swings in the permitted direction for the installation, and test that the self-closing mechanism works from every practical opening position. A double pool gate also needs one leaf fixed to the ground.
Landscaping can create a compliance problem after the fence is finished. Raised beds, decorative stone, and new surfacing can reduce clearance or interfere with the sweep. If the pool area is being redesigned at the same time, planning resources for artificial grass for pool areas can help coordinate the finished surface with the gate path.
Hanging the Gate and Tensioning the Fabric
Don't hang the gate while the posts are still moving. Once the concrete has gained adequate strength, attach the hinges to the hinge post and set the gate on temporary blocks. The blocks support the frame while you establish the bottom clearance, hinge position, and latch-side alignment.
Work from the finished grade, not the excavation. Check the driveway crown, walkway slope, and any planned landscaping under the full sweep of the gate. Ontario specifications require the sweep area to be graded low enough for unrestricted movement, so a gate that clears bare soil may still fail after paving or garden edging is installed.
Align before tightening
Set the gate on the hinge hardware, then open and close it through its full intended travel. Watch the bottom edge, hinge side, latch side, and nearby fence fabric. If the frame rubs, correct the hinge position or the post alignment before drilling final latch holes.
Install the latch only after the frame closes cleanly against the intended stop. The latch should engage without forcing the gate sideways. A latch that needs a shoulder shove will eventually be left unsecured, especially when the ground changes after freeze-thaw cycles.
For the fabric, install the tension bar through the end row of diamonds and secure it with the tension bands. Stretch the mesh evenly along the fence line, keeping the frame from bowing toward the opening. Attach the fabric to the top rail and posts with evenly tightened ties, then inspect for loose sections before trimming excess material.
A double gate needs a fixed reference leaf. Set the inactive leaf against the steel centre rest, engage the drop bolt, and then align the active leaf to it. This prevents the two leaves from sharing an undefined centre position and makes latch adjustment much easier.
Practical rule: establish the finished grade before the final hardware pass. Paving and landscaping added later can turn a correctly hung gate into a dragging gate.
Leave enough seasonal clearance for the actual site, while keeping safety and enclosure requirements in view. The final test should include opening against the chain hook, releasing it, closing from different positions, checking the latch, and confirming that no future surface work will enter the sweep path.
Troubleshooting Sags, Latch Failures, and Frost Damage
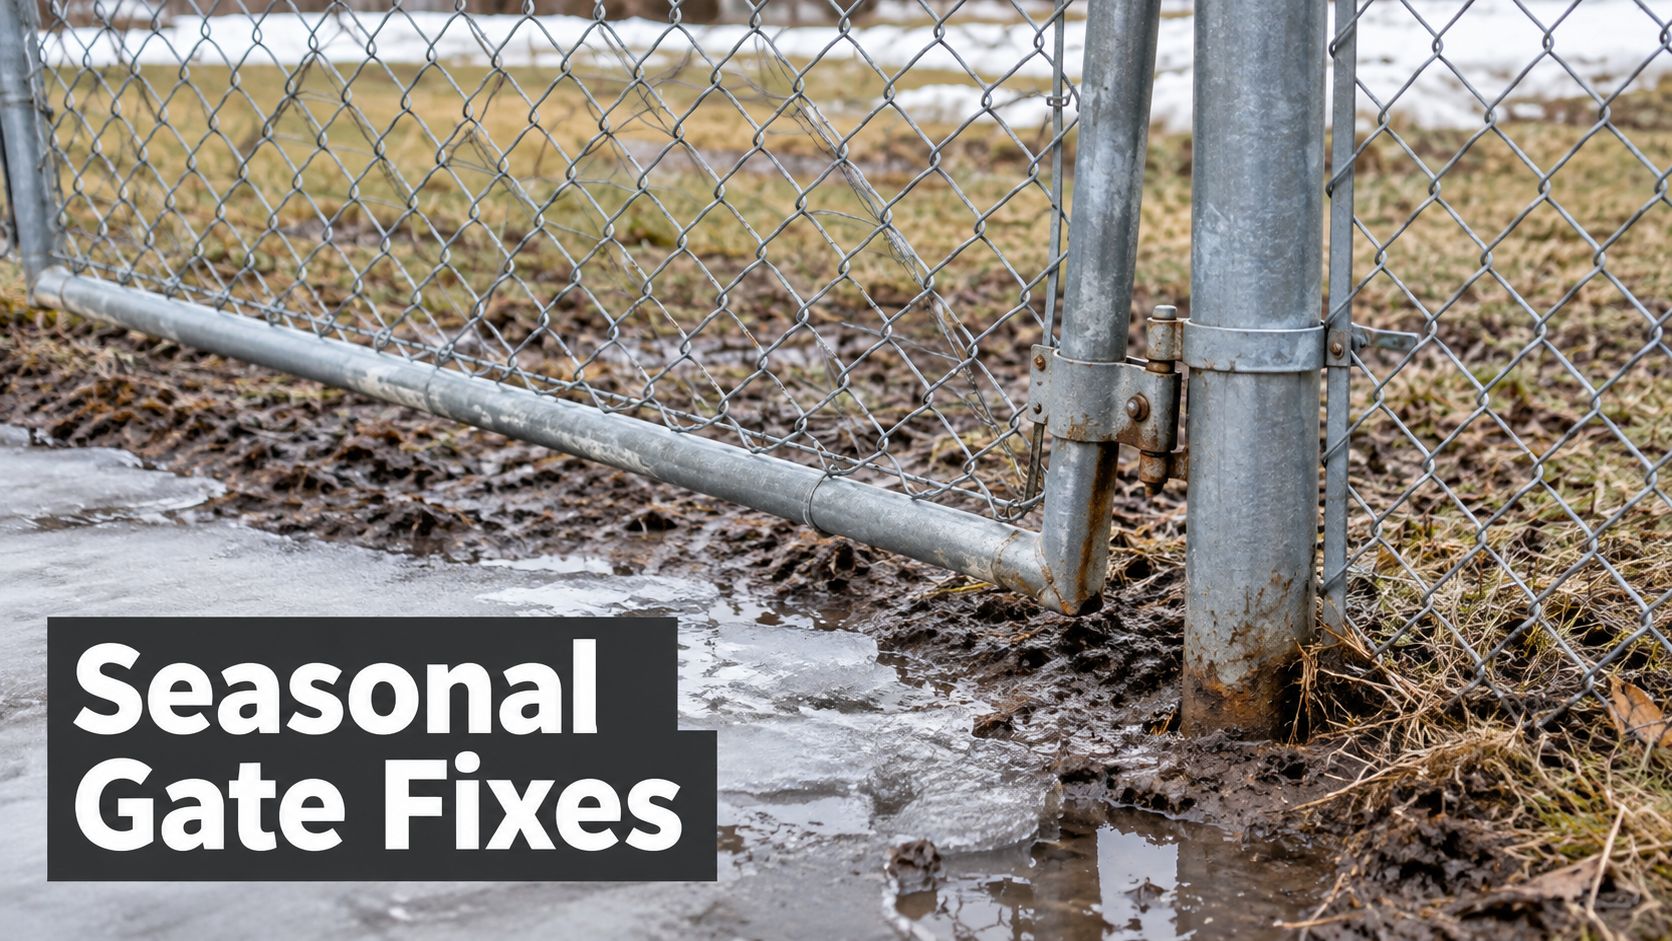
A gate can swing perfectly in October and drag by March. On Ottawa–Gatineau properties, that change usually points to movement at the footing or post, not a mysterious failure inside the latch.
Start with the symptom. If the latch side has dropped, inspect the hinge post for rotation, frost lift, or a footing that never consolidated properly. Then check the hinge bolts and bearing surfaces. Undersized hinges, loose set screws, and a gate frame that has lost its square can all contribute, but tightening hardware won't repair a post that has moved.
Match the symptom to the repair
The gate sags: Check the hinge post, hinges, and frame diagonals. If the post has heaved or rotated, reset the post rather than adding random washers or forcing the latch.
The latch misses: Look for a leaning latch post, shifted frame, or seasonal ground movement. Realign the latch only after confirming the posts are stable.
The gate drags: Inspect finished grade, ice buildup, landscaping, and footing movement. Remove the obstruction, restore clearance, or correct the post if it has lifted.
The gate stops short: Check fabric tension, post rotation, hinge travel, and the stop position. A stretched or poorly secured fabric edge can interfere with the closing line.
The open gate moves in wind: Add or repair the chain hook. Without a positive hold-open point, visitors and wind can push the gate past its designed travel.
Rust around the ground line deserves attention, especially where water and winter ice remain against the post. Clean minor surface corrosion, identify the source of trapped moisture, and inspect the concrete crown and drainage. If the post wall has weakened or the footing is moving, cosmetic treatment won't restore structural capacity.
For recurring Ottawa–Gatineau fence and gate maintenance questions, the FenceScape blog is a useful place to compare repair approaches before deciding whether an adjustment is enough.
The right fix is sometimes less convenient than a hardware adjustment. If a gate post leans each spring, the durable repair is usually excavation, resetting, bracing, and properly consolidating the new footing. Replacing the latch repeatedly only hides the movement until the next freeze.
Final Checks and When to Bring in a Pro
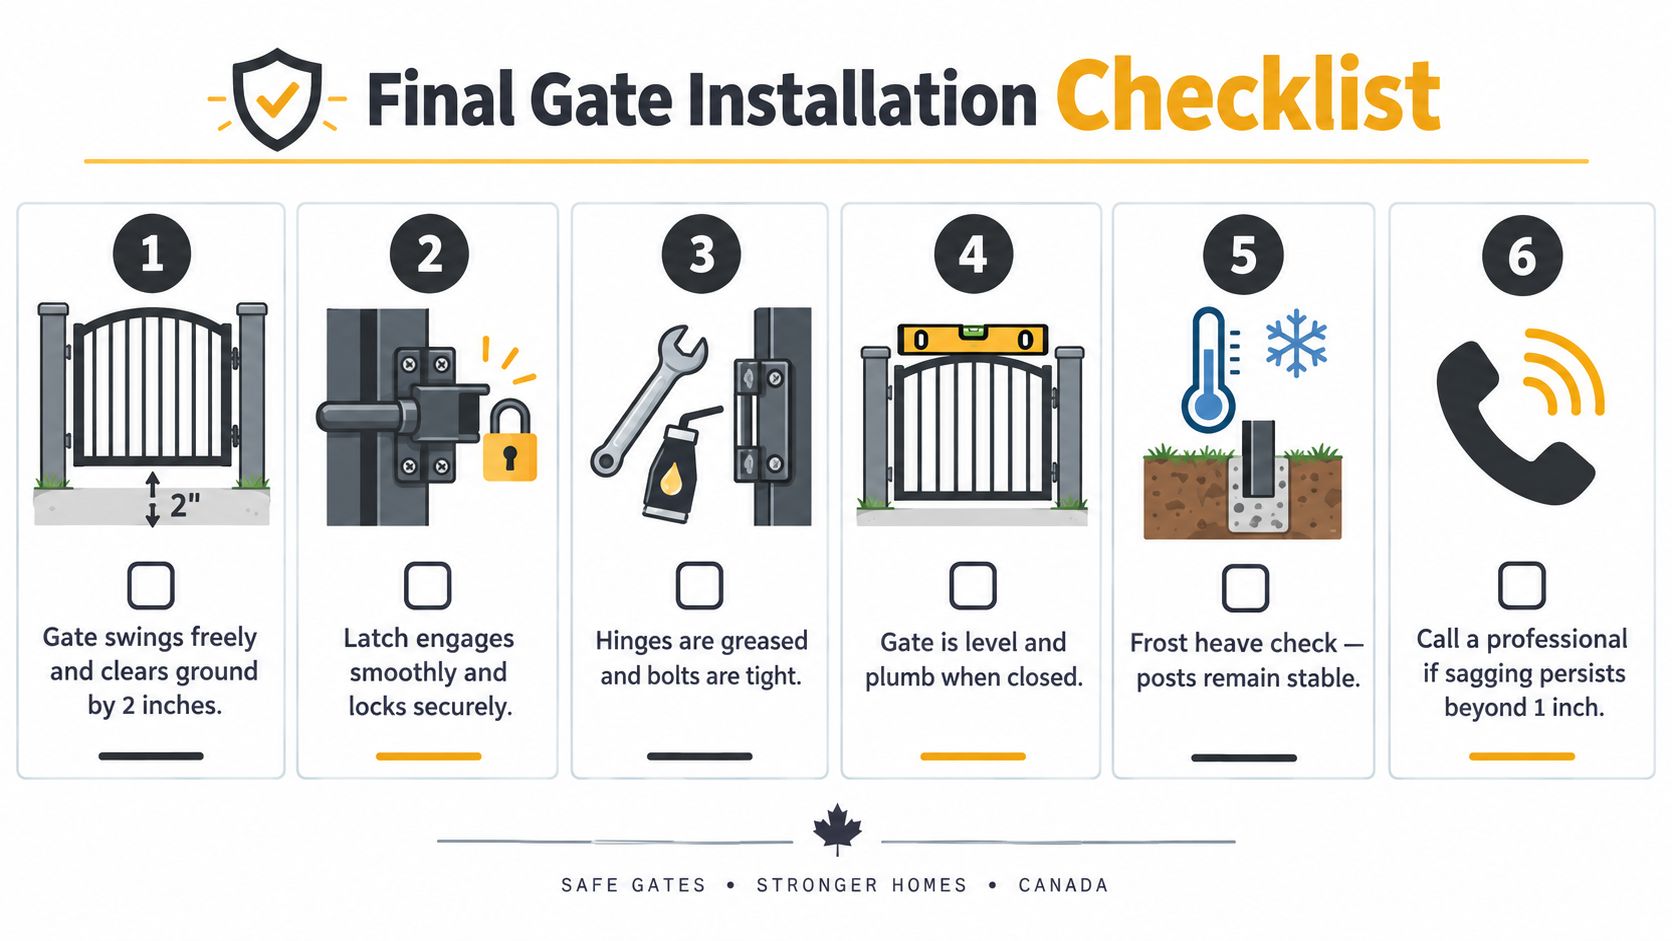
Before handing over the gate, walk it like a demanding user:
Permit: Confirm the applicable municipal or pool-enclosure permit.
Mesh: Verify the opening size against the governing requirement.
Posts: Check both terminal posts for plumb and movement.
Frame: Confirm the gate is square and closes without forcing.
Swing: Test the complete sweep against the finished grade.
Hardware: Check hinges, latch, lock position where applicable, drop bolt, and chain hook.
DIY chain link gate installation runs out of runway when excavation reaches rock, the opening carries commercial loads, or the gate forms part of a pool enclosure. A professional crew can coordinate layout, site conditions, compliant hardware, and post-install adjustments. For readers comparing local construction companies, ask who performs the work, how they handle difficult soil, and what warranty-backed workmanship includes. Ottawa–Gatineau property owners can also use FenceScape's contact page to discuss a project from layout through final testing.
FenceScape plans and installs chain link fence systems with coordinated gate placement, hinges, latches, and post-install support across Ottawa–Gatineau. Visit FenceScape to arrange a project discussion and get a gate designed around your grade, soil, access needs, and applicable enclosure requirements.
Comments