
Inexpensive Fence Options in Canada: Costs Compared

Published Canadian pricing puts installed fencing across approximately C$15 to C$155 per linear foot, according to RenoQuotes pricing guidance on fence costs. That spread is why inexpensive fence options can't be ranked by sticker price alone. A cheap run that needs staining every few years, fails a pool inspection, or heaves out of frozen ground can cost more over ten years than a fence that looked pricier on day one. I'd rank every option the same way, installed price first, then upkeep, compliance, and winter wear.
Cost Per Foot for Each Inexpensive Fence Option
Price per foot is where every budget comparison starts, and the table below lines up the main budget families on the three things that decide real cost: installed price, typical lifespan, and the upkeep that shows up after the invoice is paid.
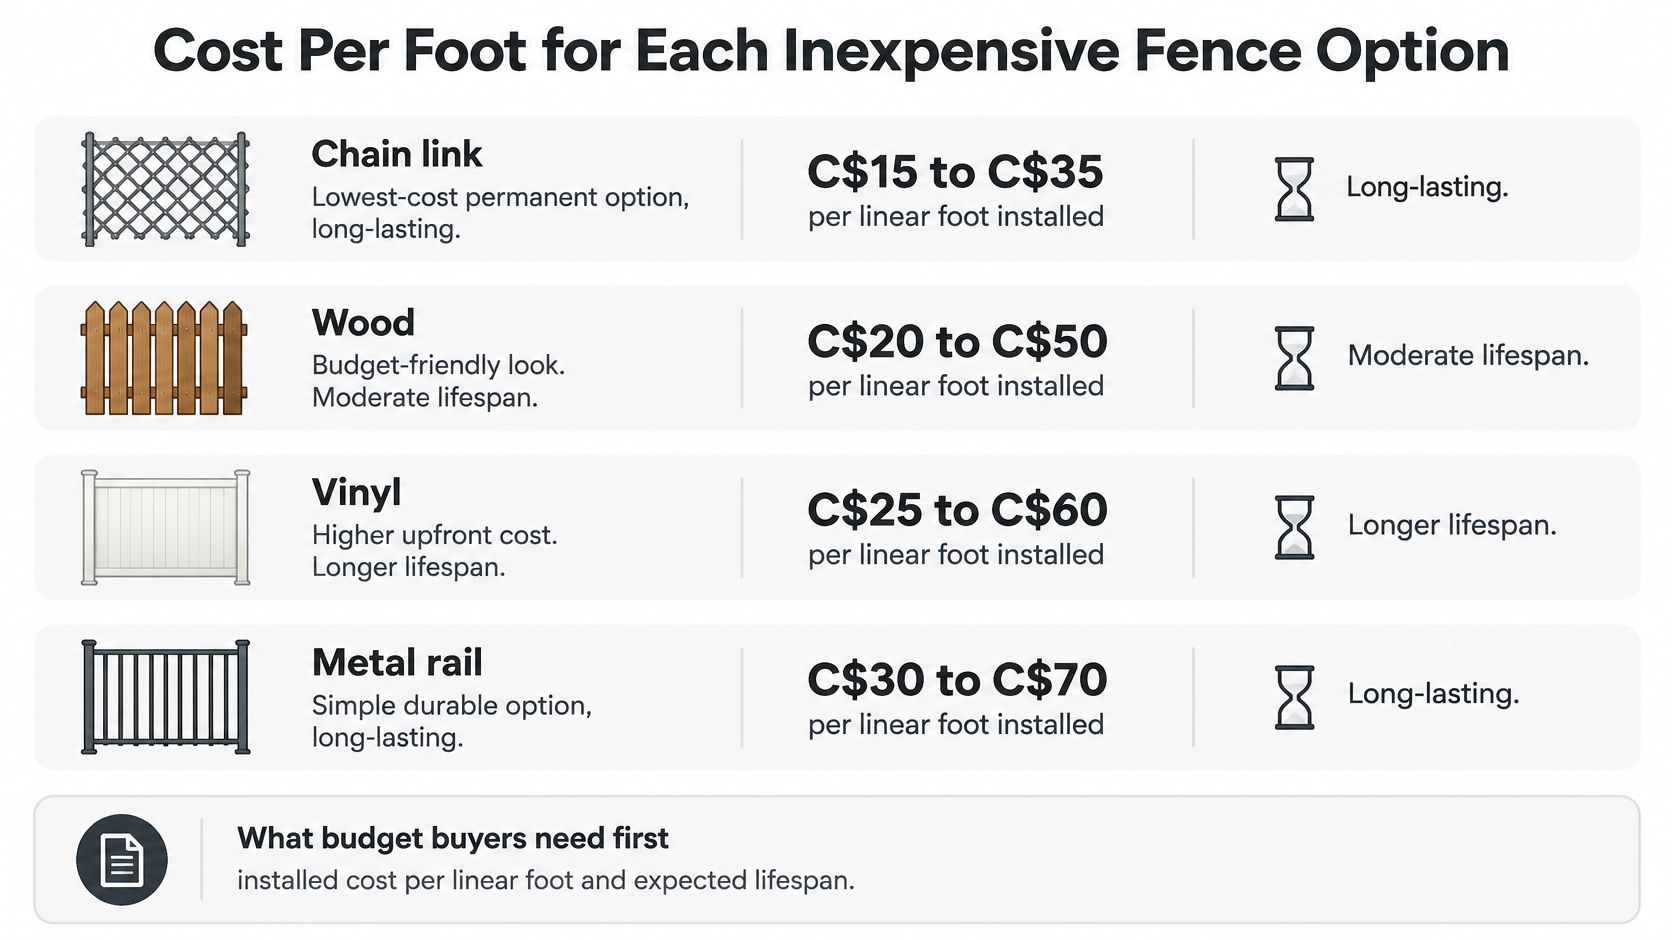
Option | Installed cost per linear foot (CAD) | Typical lifespan | Upkeep |
|---|---|---|---|
Chain link | C$15-35 | 20-30+ years | Low; touch up rust spots |
Pressure-treated wood | C$25-55 | 10-15 years | Clean or stain every 2-3 years |
Basic vinyl or PVC | C$40-75 | 20+ years | Low; wash occasionally |
Prefab panels (vinyl or steel) | C$30-60 | 15-20 years | Low; check hardware yearly |
Temporary or split-rail | C$5-15 | 5-10 years | Moderate; reset posts after frost |
Chain link usually posts the lowest installed price of any permanent option here. It uses little material per metre of boundary, goes up fast, and never asks for stain or paint. The trade-off is obvious: you get containment and sightlines, not privacy, unless you pay extra for slats.
Pressure-treated wood is the budget privacy fence most Canadian backyards default to, and individual boards are cheap to swap when one warps or rots. You're buying a lower first invoice in exchange for the cleaning and staining cycles listed above. Divide its installed price by that shorter lifespan and its annual cost climbs well past chain link.
Basic vinyl or PVC prices itself out of the cheapest tier on day one. It earns its place in a budget ranking because it needs no staining and doesn't fade, twist, or crack the way wood can, so the higher per-foot number buys back its upkeep column. Prefab panels in vinyl or modular steel sit in the same middle band and suit flat lots where sections rack cleanly between posts; uneven ground adds cutting and labour.
Temporary or split-rail fencing marks a boundary for very little money, and that's all it does. Almost no privacy, almost no security, and the shortest service life in the table, so it suits short-term needs better than a fence you plan to keep.
How to turn a per-foot range into a real budget
Do the arithmetic in two passes. First, multiply the per-foot price by your measured fence length to get the installed figure. Second, carry the upkeep column forward over the years you plan to own the fence, because the refinishing cycles in the table are priced events, not chores you can ignore in the budget.
Keep the estimate structured: one measured length, one rate per foot, and every extra on its own line. Estimating tools in other trades exist for exactly this discipline, and Exayard plumbing estimating software applies the same one-rate-plus-line-items logic to plumbing jobs. The method is identical whether you're pricing pipes or posts.
Practical rule: A range is a starting point, not a quote. Region, site access, soil, old fence removal, and gate count move the final figure, so confirm your number in a written quote for your own yard.
Ten-Year Cost of Each Budget Fence
Take a typical 100 linear foot backyard run and the ranking starts to shift. At the ranges above, installed cost alone lands at C$1,500 to C$3,500 for chain link, C$2,500 to C$5,500 for pressure-treated wood, C$4,000 to C$7,500 for basic vinyl or PVC, C$3,000 to C$6,000 for prefab panels, and C$500 to C$1,500 for temporary or split-rail.
Count the events, not just the install
Over ten years, each material asks for a different number of paid or unpaid events:
Wood maintenance cycles: Cleaning or staining every two to three years means three to five cycles in a decade, each priced as its own line for product, rental gear, or hired labour.
Chain link touch-ups: Expect rust treatment only where cut edges or damaged coating corrode, so most years cost you an inspection walk and little else.
Vinyl washing: Occasional washing with a hose and mild detergent, no refinishing cycle at all.
Prefab hardware checks: A yearly pass with a drill and wrench to tighten clamps and brackets before wind works them loose.
Split-rail resets: Posts reset after frost heave, with full replacement possible between years five and ten, which can double the original spend.
Use one formula for every quote you collect. Ten-year cost equals installed cost plus (number of events multiplied by the quoted cost per event), then divide by ten for a cost per year. Say a 100-foot wood run installs for C$3,500 and needs four stain cycles, you price those four cycles from your own quotes and add them before comparing against a vinyl bid for the same run. Chain link usually wins this math outright, vinyl often beats wood by year ten despite the higher start, and split-rail only stays cheap if you accept that replacement is part of the plan.
How Each Budget Fence Handles Canadian Winters
Four stresses decide whether a budget fence survives here. Freeze-thaw heave pushes shallow posts up and out of line. Heavy wet snow loads panels and rails sideways. Spring wind gusts find loose fasteners and wide, solid surfaces. Summer sun then bakes coatings and dries wood, opening the cracks that next winter's moisture will exploit. Judge each material against those four, not against a showroom photo.
The infographic below maps those stresses to the three most common budget materials.
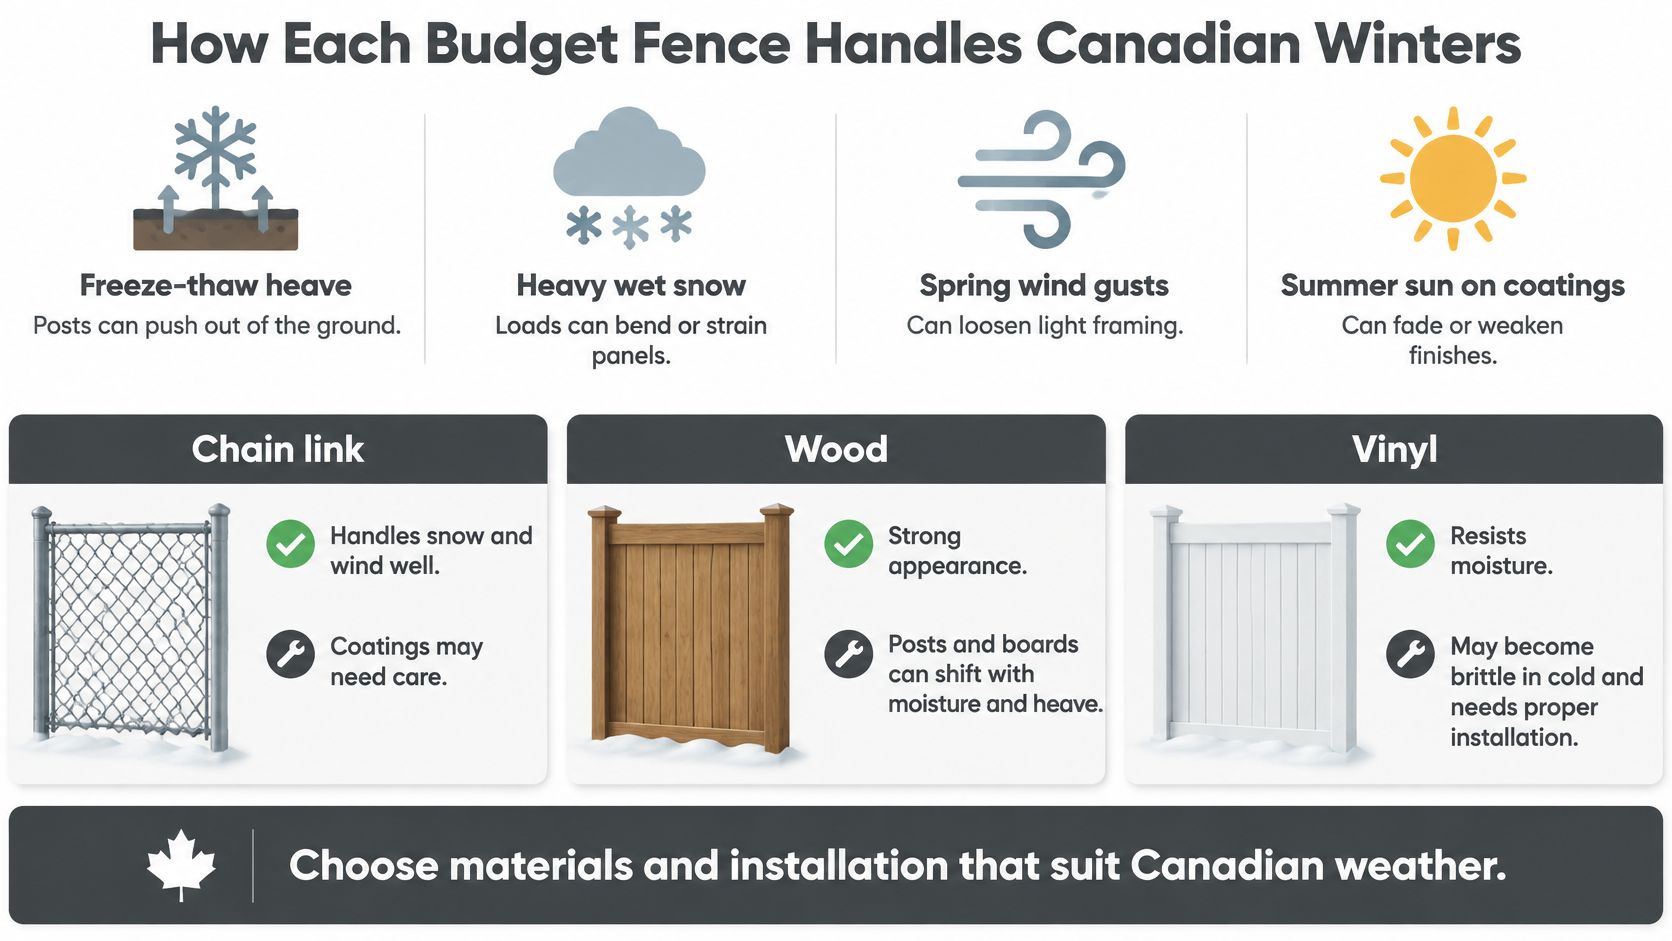
Failure modes by material
Chain link handles snow and wind best because both pass through the mesh instead of pushing on it. Its weaknesses are rust at cut edges and fence-line damage, plus zero privacy without slats, and slats turn an open mesh into a sail that loads posts harder in gusts.
Pressure-treated wood gives privacy, a warm look, and easy board-by-board repairs with a pry bar and drill. It also warps, cracks, and rots where boards sit against soil, and solid panels catch the full force of spring wind. Keep boards off grade, cap post tops, and the same fence lasts noticeably longer. Our guide to all-season fencing choices for Canadian yards walks through the detailing that makes that difference.
Basic vinyl never needs paint and shrugs off moisture, but it turns brittle in deep cold, so a hockey puck or a falling branch in January can crack a panel that would flex in July. Shallow posts are its other failure point, since a solid vinyl panel in a gust levers hard on whatever holds it. Prefab panels install fast with tidy lines, yet height choices are limited and the connections between panel and post are where movement starts. Split-rail is cheap and suits rural lots, but it offers no security and children climb it like a ladder.
The short video below shows what these stresses look like on real fence lines through a season.
The buried post decides the replacement date
Boards and panels are the visible part, but buried posts set the clock. Canadian government technical guidance on fence posts identifies Jack pine and Lodgepole pine as major species used for Canadian fence posts and reports average life expectancies of 40 years or more for posts treated with creosote, pentachlorophenol, or copper-arsenic combinations. That guidance is historical, so verify any proposed treatment is still permitted and sold under current Canadian rules before you spec it.
Buried posts and drainage decide replacement timing more than board price does. Spend on soil-contact-rated posts, gravel drainage at the base, and depth below frost, then save money on the infill if you must.
DIY or Professional Install for Budget Fences
Labour makes up a large share of most fence quotes, so doing the work yourself can cut the bill in a real way. It only saves money when the fence type matches your tools and your soil. Before any digging, contact Ontario One Call or your provincial equivalent to locate underground utilities, even if you're digging with a hand shovel. That locate is free, and a severed line erases every dollar of DIY savings in one afternoon.
Option | DIY difficulty | Key tools | Where a pro earns the fee |
|---|---|---|---|
Chain link | Moderate | Post-hole digger, tension bar, stretcher | Gate hanging and fabric tension |
Pressure-treated wood | Moderate to hard | Level, saw, post-hole digger, concrete mix | Plumb posts on slopes and deep footings |
Basic vinyl or PVC | Moderate | Level, drill, post-setting kit | Warranty compliance and gate alignment |
Prefab steel panels | Easy to moderate | Clamps, level, drill | Rarely needed for flat lots |
Temporary or split-rail | Easy | Mallet, post driver | Usually not worth hiring out |
Where hiring out actually saves money
Three situations flip the math in favour of a crew. First, deep holes in clay or rocky soil, where a powered auger and experience reading the ground turn a two-day fight into a morning. Second, sloped lots, where posts must stay plumb while panel heights step or rack, and small layout errors compound into a visible wave. Third, gates and inspections, since a gate that's hung out of square sags within a season, and a fence that must pass a pool-enclosure inspection has no tolerance for almost right. If you're weighing that call, our overview of professional fence installation and what it includes sets out what a crew handles beyond the digging.
There's also a warranty angle with vinyl and PVC. Terms often depend on correct installation, post depth, spacing, and concrete work done to spec, so a DIY error can void coverage you'd otherwise lean on. Read the warranty conditions before you decide, not after a panel cracks.
My rule of thumb is simple. DIY the fence that needs only a level, a drill, and a driver on flat ground. Hire out the parts where a small error costs more to fix than the labour you saved, and don't be shy about splitting the job, paying for post setting and gates while you hang panels yourself.
Permits and Height Rules That Change the Budget
Height is a cost lever you control before you buy a single board. Every extra increment adds material across the whole run, taller posts, and more labour, so a homeowner who only needs street separation can spend far less than one building a full privacy perimeter. The photo below shows the first step, measuring what you've got and what the limit allows.
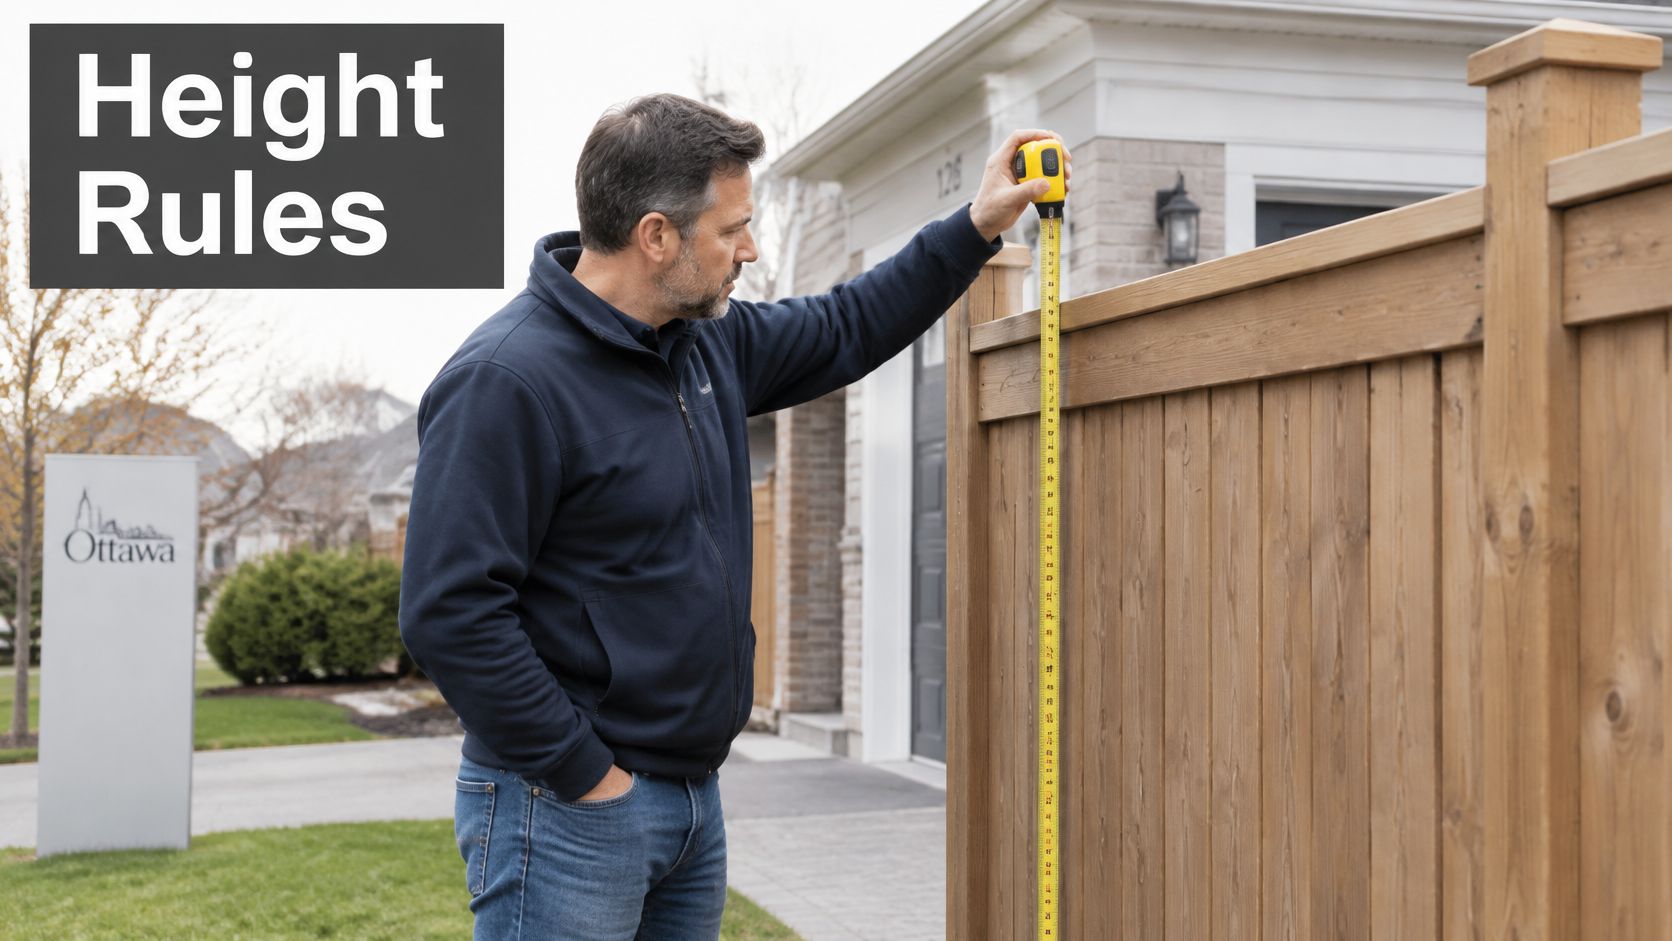
In Ottawa, an ordinary fence generally doesn't require a building permit, but it must still comply with the city's fence by-law. The City of Ottawa building permit guidance confirms the major exception is a pool enclosure, which does require a pool-enclosure permit. The by-law sets different maximum heights for front, side, and rear yards, and gates may be allowed to run taller than the fence itself, so check the current limit for the specific yard you're fencing before you settle on a panel height.
That check takes minutes. Getting it wrong means rebuilding.
Boundary checks before you buy materials
Fences can't sit in the city right-of-way, and property lines should be verified before construction. That isn't paperwork for its own sake. Moving a misplaced fence means paying for removal and a rebuild, which can erase the entire savings from choosing a budget material. Ottawa also requires underground utilities to be located before digging through Ontario One Call, a free step that protects you from a very expensive mistake.
Run this checklist before money leaves your account:
Confirm the height limit: Check the limit for the specific yard, front, side, or rear, since they differ.
Confirm the property line in writing: Use a survey or stakeout rather than a neighbour's memory.
Check whether a permit applies: Ordinary fences and pool enclosures follow different rules.
Confirm your municipality: Height limits and permit triggers change outside Ottawa, so don't import another city's numbers.
Choosing only the height and coverage you need, on a verified line, is the cheapest compliance strategy there is. It also feeds straight into the ten-year math from earlier in this guide: a fence built once, in the right place, at a legal height, never shows up twice in your cost column.
Pool Enclosures Where the Cheapest Fence Fails
A pool enclosure is where a low purchase price stops predicting the actual cost. A decorative panel with wide gaps can look fine on the rack and still fail the inspection that decides whether the pool can be used at all. The redesign or rebuild lands inside your ten-year total, not the store's. You are buying an enclosure that has to pass, and every budget decision runs through that test first.
The thresholds are specific. The City of Ottawa pool enclosure brochure states every pool enclosure must be at least 1.5 metres, or 5 feet, high, and a grading plan is required for pool-enclosure permit applications when an in-ground pool and its surrounding apron are within 1.2 metres, or 4 feet, of a property line, in both rural and urban areas.
Rules that shape which materials qualify
Beyond height, three requirements narrow the material list:
Openings a small child cannot pass through: Wide-spaced pickets and coarse mesh fail this test regardless of how cheap the panel looks.
Posts that resist frost heave: A post that lifts can open a gap at the bottom edge or throw a gate out of alignment, so post spec matters as much as panel spec.
Self-closing, self-latching gates: The latch needs to sit well above a young child's reach, which rules out bargain gate hardware mounted at convenient adult height.
Four budget materials can comply when they are specified correctly. Galvanized chain link with tight mesh is usually the lowest-cost compliant route, and chain link suits pool enclosures because it keeps sightlines open for supervision. Vertical-board wood with narrow gaps adds privacy as long as the spacing stays within the opening rule. PVC panels sized to the height rule work where low upkeep matters, since PVC does not fade, twist, or crack like wood. Ornamental metal with closely spaced bars costs more but keeps the view open while adding security. Our breakdown of pool safety fence requirements in Ontario covers how these choices play out on real lots.
Compliance-first rule: The cheapest compliant option comes from measuring gaps, heights, and latch positions before you buy, not from picking the thinnest mesh or lightest posts on the shelf.
Budget the whole enclosure rather than the panels alone. Confirm the 1.5-metre minimum, measure every opening, check the latch position, verify your distance to the property line, and carry the permit and any grading plan as line items beside materials and labour. Frost-resistant footings and decent gate hardware add a little to the purchase price and prevent the larger expense: an enclosure that drifts out of compliance between inspections. Panels bought for a design under the minimum height are wasted money at any sale price, because a fence below that line cannot serve as the enclosure.
Group Discounts and Payment Plans That Lower the Price
Per-foot pricing rewards volume because the fixed costs don't repeat. One mobilisation, one delivery, and one crew already on your street can serve several lots, so neighbours, townhouse owners in a shared HOA, and property managers covering multiple addresses are well placed to ask for group pricing. We offer exclusive neighbourhood group discounts for customers who coordinate their fencing needs as a group, and conditions apply, so get the terms in writing before anyone commits.
Setting up a group that gets a real quote
Agree on one fence style and height first. A crew can't price efficiency into five different designs on one street. Collect the measured length of each lot, note gate counts and any removal of old fencing, then ask for one quote that still lists each household's own length and total. That keeps cost sharing on shared property lines straightforward and prevents disputes when the bill arrives.
Group savings cut the purchase price, which lowers your ten-year cost directly. Financing works differently: it spreads the same cost out and only saves money if the promotion is free. In Ontario, we offer 6 months of interest-free financing, and in Quebec, 3 months with no payments and no interest. Promotional periods and deferred payments only help if fees and conditions don't give the savings back, so compare the total cost, not the monthly payment. The same discipline applies to any large home project, whether you're weighing a fence payment plan or financing a new roof in 2026.
Two timing habits protect the budget further. Quotes gathered in the off-peak season can leave room to negotiate, and no deposit should go out before permit and boundary checks are complete.
Pick Your Fence and Request a Quote
Match the material to the job, not the lowest number on the page. Judged on ten-year total cost, I'd take chain link for the lowest-cost permanent perimeter on a backyard or large lot where security matters more than screening. I'd take pressure-treated wood when privacy is the point and you accept staining every two to three years as part of ownership. I'd take PVC when low upkeep outweighs the higher upfront price, since it resists the fading, twisting, and cracking that age a wood fence.
Pools shrink the shortlist fast. Choose galvanized chain link with tight mesh or vertical-board wood with narrow gaps, checked against the enclosure rules before purchase. Choose split-rail only for temporary or rural boundaries where containment isn't the goal. And if a post line runs near a hose bib or outdoor water line, contact your local plumber to locate and check the pipe before digging, not after a post hole finds it.
What your quote must show
Ask for these items in writing so DIY and professional options compare cleanly:
Measured length and height: Listed for each run, not one blended total.
Gate count and locations: With hardware specified, since gates drive both cost and failure rates.
Included extras: Whether the price covers the permit, utility locate, and removal of old fencing.
Split pricing: Material and installation figures shown separately, so the labour portion is visible per foot.
Then do the fieldwork before anyone prices it. Measure every run on your lot, mark gate positions, and note any old fencing that needs removal, because a quote built on guessed lengths is the one that grows on install day.
If you're pricing inexpensive fence options in Ottawa–Gatineau, we offer a free estimate. Our contact form lets you request a Material Quote if you're buying for DIY, or an Installation Quote for a full build, and every installation is handled by FenceScape's own crew. Visit FenceScape to send in your measurements and get a real per-foot number for your yard.
Comments