
Cedar Fence Gate: How to Build One That Lasts

You notice the problem on the first cold morning: the cedar fence gate looks excellent, but it drags across the paving, the latch misses, and someone has to lift it to close it. In Ottawa–Gatineau, that usually isn't just a board problem. It can be a post, footing, hinge, clearance, drainage, or compliance problem.
A cedar fence gate is a moving wooden assembly exposed to moisture, ice, snow, and seasonal ground movement. If it borders a pool, it's also a regulated access point. The reliable approach is to define the gate's job first, then size the opening, choose compatible materials, set rigid posts, build a square frame, and test the finished system before winter finds its weaknesses.
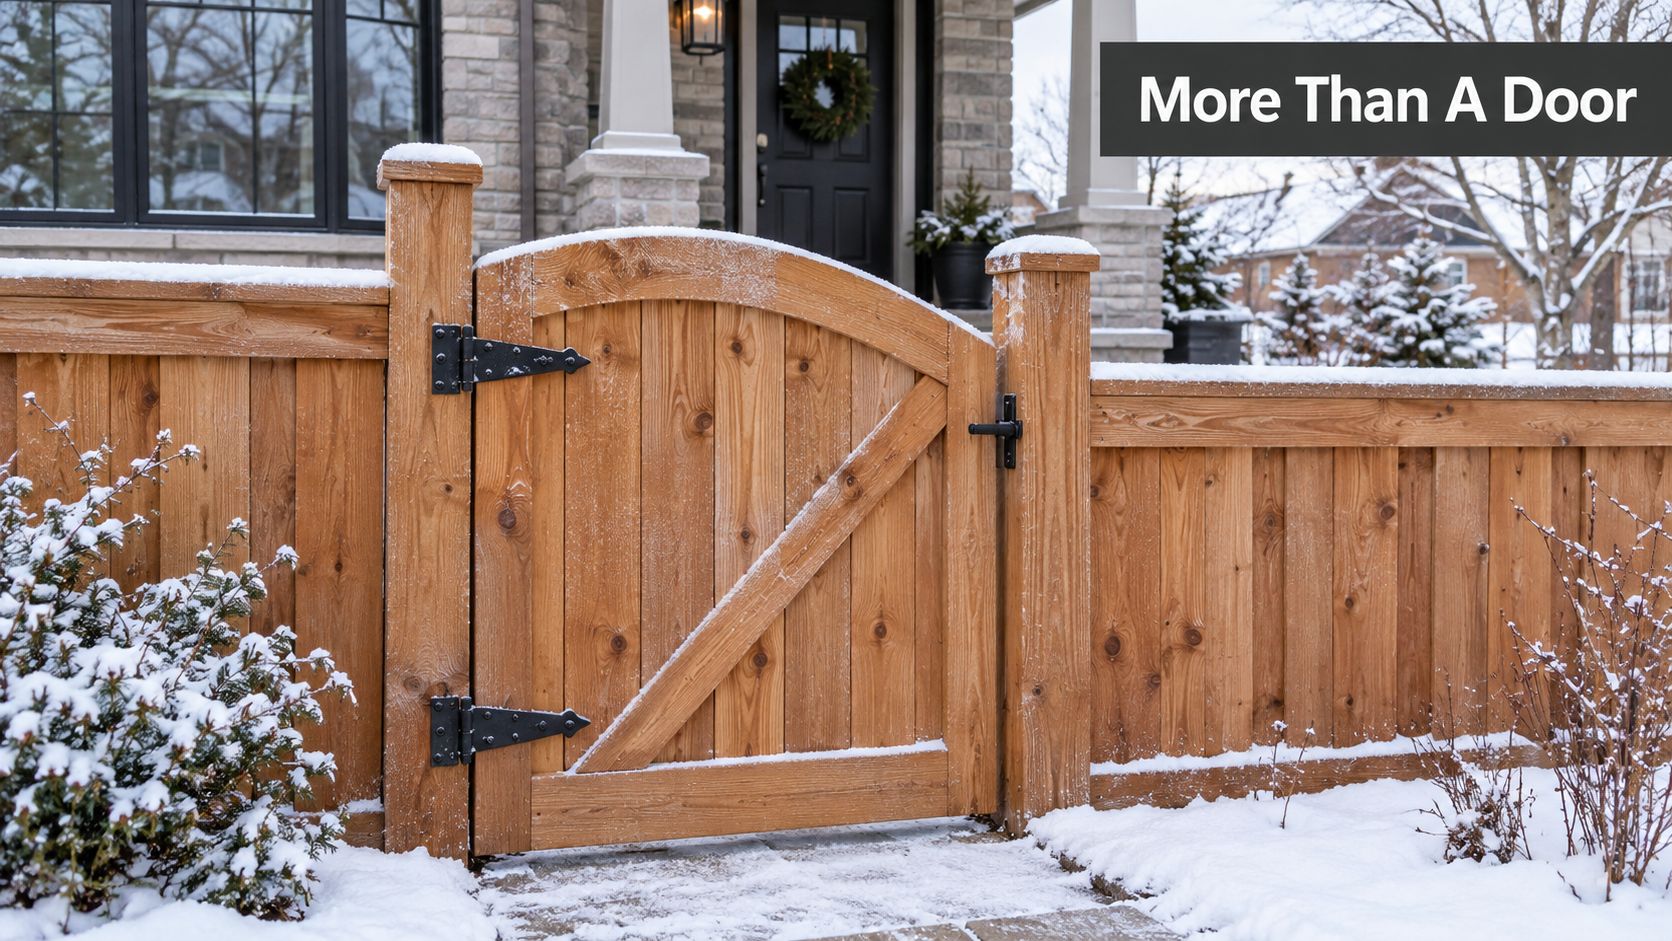
Why a Cedar Fence Gate Is More Than a Pretty Door
A gate may be the most attractive part of a fence, but it also carries the most demanding workload. Fence panels stand still. A gate swings, stops, latches, absorbs impact, and transfers its weight into the hinge post every time someone uses it. A cedar face can remain beautiful while the frame twists, the post moves, or the latch loses alignment.
The location changes the design. A side-yard privacy gate has different demands from a rear-yard pool gate, and both differ from a driveway double gate. Before ordering cedar, identify whether the gate controls privacy, pets, vehicles, or access to water. That decision determines the frame strength, hardware, opening direction, and inspection details.
Start with the site, not the lumber
For an Ottawa pool enclosure, the City requires a permit for every new or replacement enclosure, even where an existing yard fence is already present. The city lists the 2025 pool-enclosure permit fee as $241 in its building-permit information (Ottawa's building-permit guidance).
That requirement changes the order of work. You don't first build an attractive gate and then ask whether it qualifies. You confirm the municipality, enclosure layout, finished height, openings, latch position, and self-closing action before fabrication. If you're still planning the surrounding yard, a visual planning resource such as design your backyard online free can help you test the gate position and circulation before you commit to posts and paving.
Practical rule: Treat the gate as a complete access-control system. Cedar is the visible finish, not the safety mechanism.
Seasonal movement adds another layer. A hinge post can shift as wet soil freezes and thaws, while cedar boards swell and dry at a different rate. Two gates with the same pattern can perform very differently because one has drainage, rigid framing, adjustable hardware, and a stable post, while the other relies on appearance to hide weak geometry.
Choosing the Right Cedar and Hardware Combination
Cedar selection should follow the gate's load and exposure, not just the colour you want. Clear cedar gives a clean, consistent face with fewer knots, but it costs more and still needs a properly built frame. Knotty cedar suits a rustic or budget-conscious fence, provided the boards are sound and the knots don't fall near critical fastener lines. Finger-jointed material can produce a uniform appearance, but inspect the joints and use it where the supplier specifically rates it for exterior gate work.
Match the wood to the moving parts
For a typical Ottawa side-yard privacy gate, a sound cedar face over a rigid frame is usually a sensible balance. A wider, heavier gate deserves more attention to frame stiffness and hinge-post construction than to upgrading every visible board. If the gate will sit beside a pool, prioritise predictable dimensions, secure attachment, corrosion-resistant hardware, and reliable self-closing action.
Ask the supplier whether the boards are kiln-dried or air-dried, how they were stored, and whether the stock has been protected from rain before delivery. Damp boards can shrink after installation and change the spacing at the latch. Reject boards with excessive twist, deep checks at the ends, or soft areas around knots.
Ottawa's residential side- and rear-yard fences have a maximum height of 2.1 metres, and a gate can be 30 centimetres taller than the associated fence. Where the fence is at its maximum, a side- or rear-yard gate can therefore reach 2.4 metres, subject to the applicable rules (Ottawa landscaping guidance). A tall gate needs a proportionally serious hinge post and frame. Don't treat the extra gate height as free visual privacy.
Hardware is part of the cedar specification
Use stainless steel, hot-dipped galvanised, or another corrosion-resistant system suited to exterior exposure. Plain steel can stain cedar and deteriorate quickly around wet joints. Choose hinges with enough adjustment to correct minor seasonal movement, and use fasteners that suit both the cedar and the supporting frame.
For a practical comparison of hinge, latch, and fastening options, review the Xtreme Edeals gate hardware picks from XTREME EDEALS INC. The useful question isn't which hinge looks heaviest. It's whether the hinge can carry the finished gate, hold its adjustment, and allow the gate to close without lifting.
Cedar selection also benefits from understanding how the material behaves as a fence system. The cedar fencing guide is useful when you're matching the gate face to surrounding panels and deciding where premium material will have the greatest effect.
Measuring, Sizing, and Setting the Gate Post
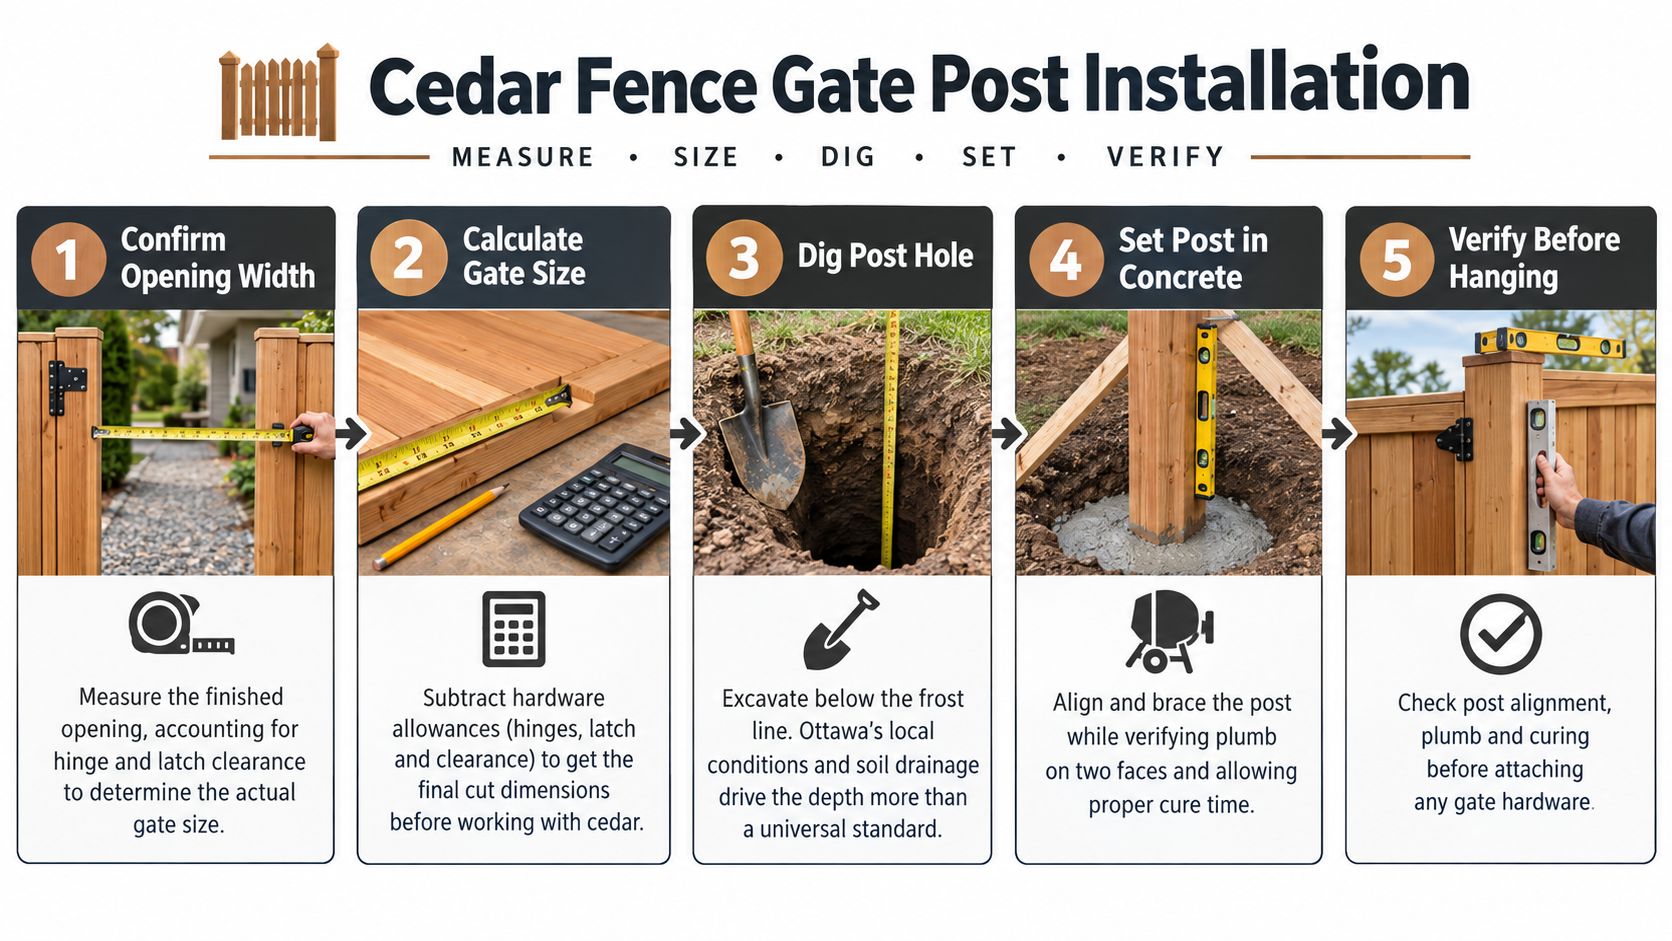
Most gate failures begin before the frame is assembled. The opening gets measured between posts, but the finished gate is cut as if the hinges and latch take up no space. The result is a gate that binds on one side, leaves an uneven gap, or needs force to reach the latch.
Measure the finished opening at the top, middle, and bottom. If those readings differ, correct the posts or fence line before building the gate. Mark the hinge side and latch side clearly, then account for the actual hinge leaf, latch clearance, seasonal movement, and the clearance beneath the gate. Don't cut cedar from a single measurement taken at eye level.
Set out the geometry
Write the finished gate dimensions on a cut sheet before buying boards. Include the face boards, frame, hinge positions, latch position, and the direction of swing. A double gate needs a deliberate meeting line, enough clearance for both leaves, and a reliable way to hold the inactive leaf if the opening serves a controlled area.
The post matters more than a deeper hole on paper. Ottawa guidance notes that the Ontario Building Code doesn't prescribe one universal fence-post depth, local experience governs frost penetration, and Ottawa-area conditions can produce substantial seasonal movement (regional frost-depth guidance). Soil, drainage, snow cover, and bearing conditions all influence performance.
Build a footing that stays useful
Remove loose or organic soil, establish the required bearing depth with the municipality or an engineer, and provide drainage beneath the footing where the site calls for it. Set the hinge post plumb on two faces, brace it in position, and consolidate the concrete so the post doesn't rotate during curing.
Don't hang the gate just because the concrete looks firm at the surface. Verify that the hinge post remains plumb, the latch post is aligned, and the opening hasn't narrowed while the footing cured. The Ontario fence-post depth guide can help frame the discussion, but local soil and site conditions still govern the final decision.
Use an adjustable hinge and latch system where possible. Minor seasonal movement can often be corrected through hardware adjustment. A post that has moved substantially, however, may need structural correction rather than another round of latch tweaking.
Building the Gate Frame and Hanging It Right
A cedar gate should be built as a rigid, positively braced assembly. Diagonal trim placed on the face may look like reinforcement, but it won't stop sag unless it transfers load properly from the latch-side corner toward the supported hinge side. The frame must remain square while the boards and hardware are added.
Start on a flat work surface. Assemble the rails and stiles, check both diagonals, and clamp the frame before driving the final fasteners. If the diagonals don't match, the frame isn't square, even if the cedar boards make the face appear straight.
Use a real brace, not decoration
A compression brace should bear against the frame in the direction that carries the latch-side load back toward the hinge side. Fasten the brace into sound framing, not just thin cladding. On a wide or heavy gate, increase frame stiffness and use hardware designed for the load rather than expecting a decorative brace to compensate.
Keep board ends sealed and keep the cedar clear of standing water. Leave consistent clearance at the hinge side, latch side, and bottom. Uneven gaps create rubbing in one season and excessive exposure in another.
The installation sequence matters. Fit the hinges to the frame and post with the gate supported, seat every fastener properly, then adjust the leaves before attaching the latch. A hinge carrying a partly supported gate can pull the frame out of square before the latch has a chance to align.
Test the complete swing
Open and release the gate from several angles. It should return toward the closed position without scraping, bouncing away from the latch, or requiring a lift. Test the latch with the gate moving slowly and at normal speed, then check that the latch stays engaged.
Quebec pool regulations require a gate to be self-closing and self-latching, with an exterior passive latch at least 1.5 metres above grade (Quebec residential-pool regulation). That makes hinge-set geometry and latch reach installation decisions, not finishing touches. A gate that only latches when pushed or slammed isn't ready for inspection or everyday use.
Cedar-Only Versus Hybrid Gate Construction
A cedar-only gate gives you a consistent appearance and a straightforward repair path. The face, frame, and trim can all be stained together, and a damaged component can usually be replaced with compatible wood. The trade-off is that the frame must carry the weight while resisting twist, moisture movement, and hinge leverage.
A hybrid gate uses cedar where appearance matters and another material where stiffness or dimensional stability matters. That might mean cedar boards over a metal frame, a PVC-based frame, or a reinforced composite structure. The face still needs proper drainage and fastening, but the internal support can reduce the risk of a frame drifting out of square.
Choose by application
Situation | Practical choice | Main reason |
|---|---|---|
Narrow privacy walk gate | Cedar face with a rigid cedar or compatible wood frame | Simple repairs and a unified appearance |
Pool enclosure gate | Rigid frame with corrosion-resistant, adjustable hardware | Reliable self-closing and self-latching action |
Wide driveway double gate | Hybrid or heavily reinforced construction | Better control of weight and meeting-line alignment |
Gate exposed to difficult drainage | Hybrid frame with carefully protected cedar face | Separates structural support from moisture-sensitive detailing |
Cedar over PVC can look clean, but inspect how the hinges and latch attach. A beautiful face won't help if the fasteners rely on a thin skin or if the frame flexes at the hinge points. Metal frames can provide stiffness, yet they may complicate field modification and require careful isolation between dissimilar materials.
For most standard walk gates, a well-built cedar frame is reasonable. For a wide driveway gate, a tall gate, or a gate that must maintain precise pool-control performance, a hybrid system is often easier to keep aligned. Ask for the frame detail, not just a cedar sample.
Staining, Sealing, and Protecting the Wood
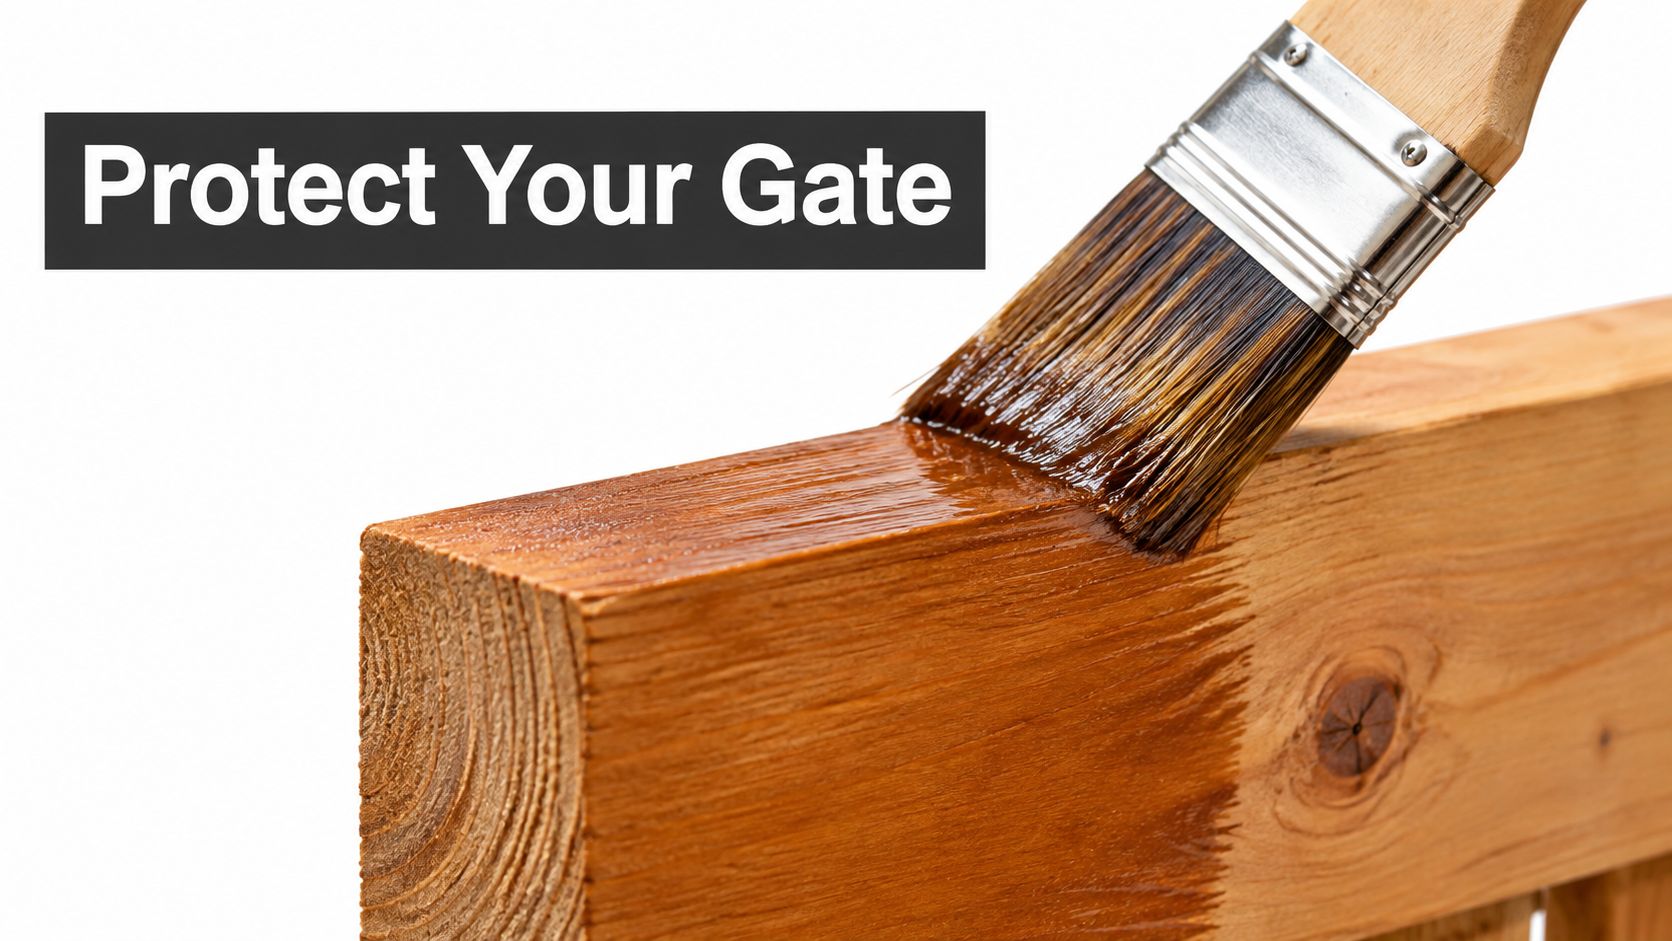
Finish protects the gate from wetting and drying cycles, but it can't correct poor drainage or damp lumber. Coat the end grain, the underside of rails, the back of boards, and the joints that collect water. Those hidden areas often decide whether the visible face stays sound.
For a new gate, let the wood reach a suitable moisture condition before finishing, then follow the product's preparation and application requirements. Penetrating oil and hybrid stains generally preserve cedar's texture while allowing future maintenance. Film-forming products can provide a stronger visual layer, but peeling becomes difficult to repair if moisture enters through end grain or unsealed joints.
Make the finish part of the assembly
Apply finish before installation where access will be limited, especially on board ends and the bottom edges. Protect hinge leaves and latch mechanisms from coating buildup. A pool gate still needs its hardware to move freely and close reliably, so don't let stain turn the latch, hinge knuckles, or drainage gaps into sticking points.
Environment and Climate Change Canada identified prolonged freezing rain across Ontario and Quebec from March 28–31, 2025, producing severe ice buildup (regional freezing-rain information). That kind of loading can stress a gate even when the cedar boards themselves look healthy. The finish should shed water, while the frame and post carry the structural demand.
Don't seal a drainage gap just to create a more finished appearance. Water trapped at the bottom edge can damage the gate faster than an exposed but well-drained edge. Homeowners dealing with broader wood and insect concerns can also consult this guide to South Florida termite prevention, while remembering that local climate and construction details still determine an Ottawa gate's maintenance needs.
For application technique and preparation, use this practical guide to staining a cedar fence. On an existing gate, clean and inspect before recoating. If the old finish is peeling, remove unstable material rather than sealing it under a fresh layer.
Seasonal Maintenance and Pitfalls to Watch For
A cedar fence gate doesn't usually fail because cedar is unsuitable. It fails because the moving parts receive less attention than the fixed fence line. The most useful maintenance question isn't, “Has the wood aged?” It's, “What changed between the last season and this one?”
Spring thaw is the critical inspection point. Snow and ice can add temporary weight, wet ground can move a hinge post, and repeated freeze-thaw cycles can alter the gap at the latch. Clear ice before forcing the gate. Forcing a frozen gate can loosen fasteners, bend hardware, or shift a post that was already vulnerable.
Diagnose the movement correctly
A sagging latch corner doesn't automatically mean the cedar boards have failed. Check the frame diagonals, hinge screws, post plumb, and latch-post alignment in that order. If the hinge post has moved, tightening the gate's diagonal brace may only disguise the cause.
Use this quick diagnosis:
Hinge-side post movement: The post is no longer plumb, the footing or surrounding soil has shifted, and the gate geometry changes across the opening.
Frame movement: The gate diagonals no longer match, joints have loosened, or the brace isn't transferring load through the frame.
Hardware movement: Hinge leaves or fasteners have loosened, causing the gate to drop even though the posts remain aligned.
Cedar movement: Boards have swollen, shrunk, checked, or changed their fit, while the frame and posts remain square.
Latch-side obstruction: Ice, snow, paving settlement, or a displaced latch post prevents full closure.
A gate that needs lifting to latch is giving you a measurement. Find out whether the measurement changed at the post, frame, hardware, or clearance.
After the spring thaw, check hinge screws, post plumb, latch engagement, and the bottom gap. Confirm that the gate closes without lifting, pushing, or slamming. Adjust an accessible hinge or latch when the post and frame remain sound, but don't use adjustment to compensate for a visibly displaced footing.
Make winter operation deliberate
Keep the gate's drainage path open. Remove snow from the swing area before it freezes into a berm. Don't chip aggressively against cedar boards or hardware, and don't force a latch packed with ice. A short inspection after a major ice event can prevent a damaged hinge from carrying the extra load for weeks.
Property managers should inspect gates consistently across a group of homes or townhouse lots. Record the hinge-post condition, latch engagement, clearance, and visible frame movement for each address. Repeated failures in the same area may indicate soil, drainage, or installation conditions rather than a material defect.
Confirm pool requirements before ordering
For an Ottawa pool enclosure, the enclosure must be at least 1.5 metres high, every opening must prevent passage of a 100-millimetre sphere, the gate must self-close and self-latch, and the latch must be at least 1.35 metres above the bottom of the enclosure (Ottawa pool-enclosure brochure). Check the complete installed gate, including the bottom gap, hinge side, latch reach, lock, and closing force.
Gatineau changes the planning sequence for ordinary residential fencing. A residential fence can generally sit directly on a property line unless that line borders a street right-of-way, but the fence must remain on private land and not encroach on public space. A residential fence generally doesn't require a permit there, except when it protects a swimming pool (Gatineau residential-fence guidance). Confirm the lot edge and municipal role before setting posts.
Use a practical decision test
A DIY build makes sense when the opening is straightforward, the posts are stable, the gate isn't part of a regulated enclosure, and you can build and test a square frame accurately. Use a turnkey installer when the gate is wide, tall, pool-adjacent, attached to uncertain posts, or part of a multi-lot project where consistent alignment matters. Keep the permit information, hardware specifications, measurements, and final test notes with your property records when compliance or insurance may matter.
Before ordering materials, answer these questions:
Which municipality governs the property?
Is the gate part of a pool enclosure?
What is the finished opening at the top, middle, and bottom?
Will the gate be a single leaf or a double gate?
Where will the hinge and latch loads transfer?
What drainage and frost conditions affect the posts?
Can the finished gate close and latch without force?
Can the hardware be adjusted after seasonal movement?
FenceScape offers planning and installation for custom cedar and hybrid gates, including reinforced hinge posts, diagonal bracing, pool enclosures, privacy fencing, and double driveway gates across the Ottawa–Gatineau area. Visit FenceScape to request a project assessment that details the opening, materials, hardware, seasonal exposure, and installation requirements before you order the cedar.
Comments