
Residential Fence Installation: The Complete Guide

You've just bought a home in Kanata, or you're ready to reclaim privacy in a Gatineau backyard. The project sounds simple until a neighbour questions the boundary, the ground turns to frozen clay, or a proposed gate falls under pool-enclosure rules instead of ordinary fence rules.
Residential fence installation in the Ottawa–Gatineau region demands more than attractive panels and straight posts. Ontario and Quebec apply different municipal requirements, frost changes how posts must be designed, and a fence placed a few centimetres on the wrong side of a property line can create an avoidable dispute. A sound project starts with the site, the jurisdiction, and the way the fence will be used.
Starting Your Residential Fence Installation Journey
A typical Ottawa homeowner starts with a practical goal. Perhaps the backyard needs privacy from a nearby road, the dog needs a secure run, or an old fence has begun to lean after several winters. The first contractor visit often reveals that the proposed line crosses a grading change, runs close to buried services, or meets a neighbour's existing fence at an awkward angle.
That's why the first decision shouldn't be “wood or PVC?” It should be “what exactly am I allowed to build, and where?” Confirm the municipality, identify the property boundary, establish whether the fence will enclose a pool or hot tub, and then assess the soil and access conditions. This order prevents homeowners from paying for a design that must later be shortened, moved, or rebuilt.
Start with the boundary, not the post holes
A fence can sit on your property, near the line, or directly on a shared boundary. Those choices affect ownership, maintenance access, snow clearing, gate placement, and future repairs. If the deed, survey, or lot plan leaves room for doubt, use a licensed surveyor rather than relying on an old hedge, landscaping edge, or a neighbour's assumption.
Written neighbour consent is sensible before placing posts on or close to the line. The agreement should identify the fence location, material, finished side, gate access, ownership of each section, and responsibility for repairs. It should also address who can enter the adjoining property for maintenance. A friendly conversation is useful, but written records prevent a later disagreement from becoming the centre of the project.
Practical rule: A shared fence is not automatically a shared responsibility. Record the arrangement before construction starts.
Ottawa's ordinary fences generally don't require a building permit, but they still need to comply with the city's Fence By-law 2003-462 and its good neighbour policy, which requires the more attractive side to face the neighbour or the street. Gatineau follows a different set of requirements, including placement rules tied to sidewalks, curbs, yards, and street rights-of-way. Treat the municipal address as a design constraint, not an administrative detail.
Turn the idea into a workable plan
A useful project plan should show the fence line, corners, gates, grade transitions, existing structures, trees, decks, pools, sheds, and underground services. It should also state the intended privacy level and whether the fence needs to contain pets, screen mechanical equipment, secure a pool, or improve street appearance.
For homeowners comparing local installers, ask for a measured layout and a written estimate that separates materials, excavation, post setting, gates, disposal, grading adjustments, and any required permits or locates. A contractor who can't explain how the design responds to the site is asking you to approve a product, not a finished boundary.
Choosing the Right Fence Material for Your Home
Material selection determines how the fence will look after repeated freeze-thaw cycles, snow clearing, summer moisture, wind, and regular use. Ottawa and Gatineau homeowners should judge each option against four practical questions: How much privacy do I need? How much maintenance will I accept? How will the material handle movement? Does the design fit the local rules?
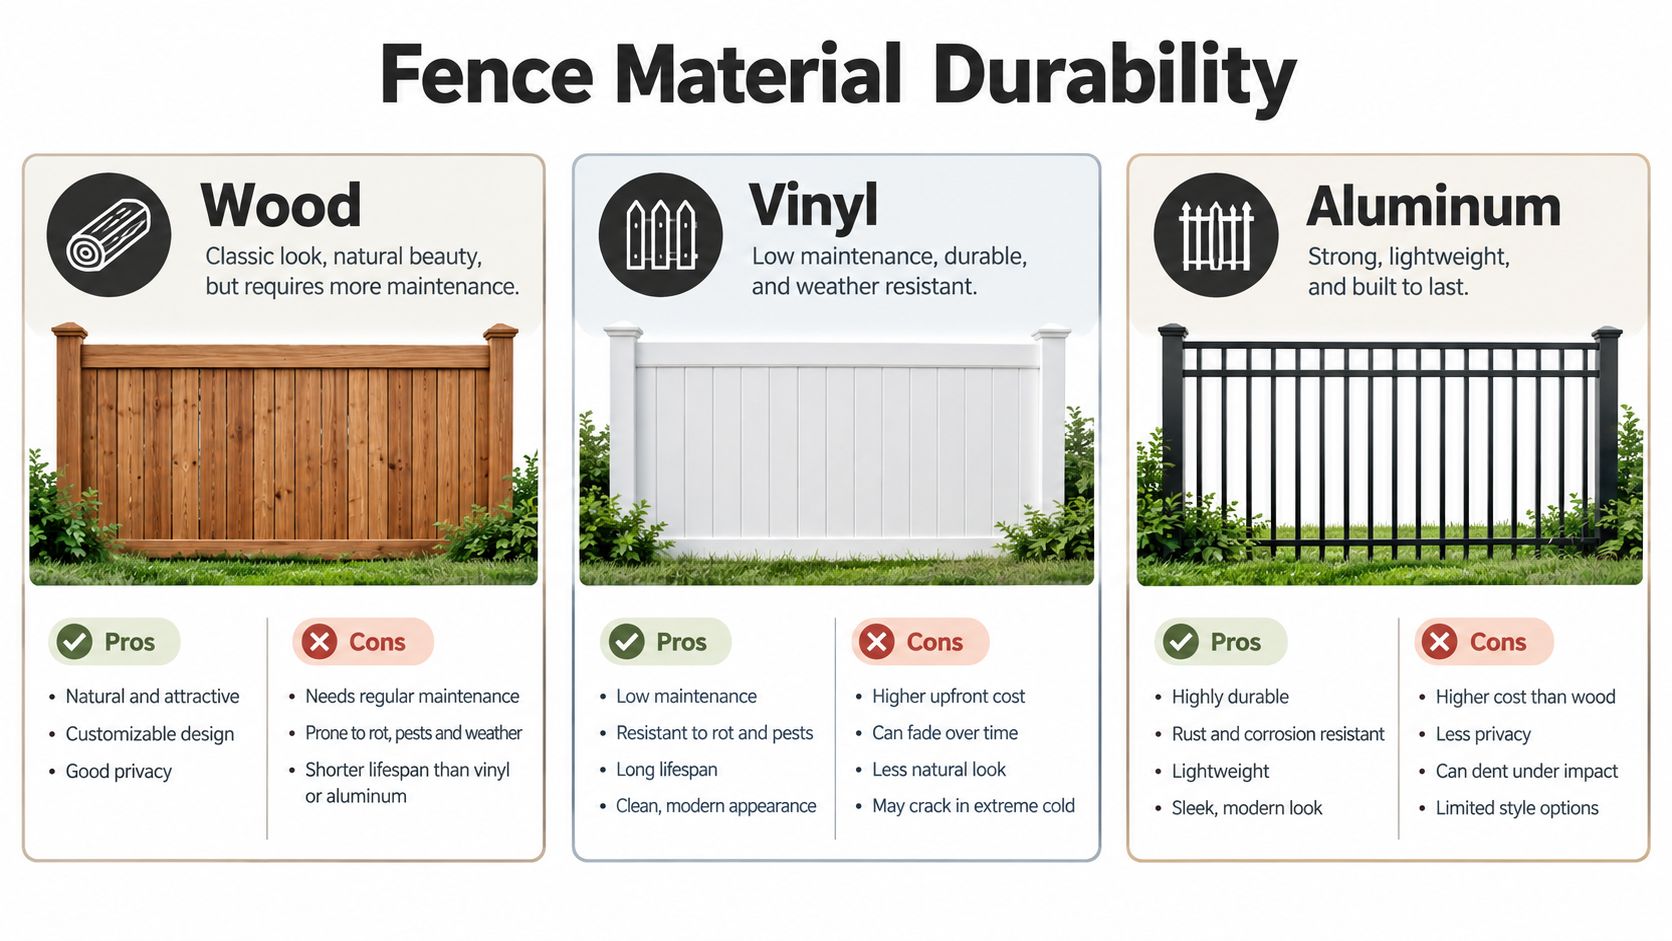
Material | Durability | Maintenance | Cost Range | Best For |
|---|---|---|---|---|
PVC | Resists rot, twisting, and routine moisture exposure | Low, usually cleaning and hardware checks | Mid-range | Privacy, clean lines, low-maintenance yards |
Hybrid PVC and wood with steel | Combines structural steel with a warmer exterior appearance | Moderate, with attention to wood components and connections | Mid to higher | Homeowners wanting strength and a wood-inspired finish |
Wood | Can be repaired or modified easily, but reacts to moisture and movement | Regular staining, sealing, and inspection | Low to higher, depending on design | Traditional privacy, custom layouts, natural appearance |
Ornamental iron | Strong and visually open, with durable structural performance | Periodic rust prevention and coating maintenance | Higher | Security, formal entrances, open sightlines |
Chain link | Practical, resilient, and easy to repair | Low, with checks for mesh, posts, and hardware | Lower to mid-range | Pets, boundaries, utility areas, broad coverage |
Glass | Clear, modern, and suitable for carefully designed pool areas | Frequent cleaning and hardware inspection | Higher | Visibility, contemporary patios, pool enclosures |
Match the material to the job
Wood offers the most adaptable appearance. Cedar and pressure-treated lumber can create a warm privacy screen, and a crew can adjust the design around trees, grades, and irregular lot shapes. The trade-off is ongoing care. Unsealed wood can weather, warp, or absorb moisture, so staining and sealing must be part of the ownership plan rather than an afterthought.
PVC suits homeowners who want a consistent finish without routine staining. It works well for privacy applications and resists common moisture-related problems, but the layout still needs properly designed posts, gates, and transitions. A low-maintenance surface won't compensate for poor frost protection or a gate post that moves.
Hybrid fencing, typically PVC or wood combined with steel, occupies the middle ground. Steel can add stiffness where a long privacy run or heavy gate needs support, while the visible finish provides a less industrial appearance. This is a strong choice when structural performance matters but a fully metal fence feels too severe.
Ornamental iron provides security without blocking views. It works particularly well at front entrances, around formal landscaping, or where the homeowner wants the property boundary to remain visually open. Inspect the coating, welds, fasteners, and post details, especially where salt, snow, and standing water can collect.
Chain link remains a sensible utility material. It's practical for pets and service areas, though privacy additions can increase wind exposure and visual weight. Glass creates an elegant, transparent barrier, especially beside a pool or modern terrace, but it requires careful engineering, precise hardware, and more cleaning than opaque systems.
For a deeper look at practical low-maintenance choices, compare these materials with low-maintenance fence options. Choose the system that suits the site, not the material that looks best in a catalogue photograph.
Navigating Permits and Local Regulations
A fence can be perfectly acceptable in Ottawa and still fail inspection in Gatineau. The same drawing may face different setback, height, permit, and pool-enclosure rules on opposite sides of the river. Confirm the municipality before ordering materials or setting posts.
Ottawa and Gatineau are not interchangeable
Gatineau requires the fence to sit entirely on private property. It may be placed directly on the property line unless that line borders a street right-of-way. A fence beside a sidewalk must be at least 1 metre from it. Where no sidewalk exists, keep the fence at least 1.5 metres from the street curb, according to Gatineau's residential fence regulations.
Gatineau's standard maximum heights are 1.2 metres in a front yard, 1.5 metres in a side yard adjoining a street, 2 metres in a non-street-adjoining side yard, and 2 metres in a rear yard. For buildings with more than four dwelling units or collective housing, the non-street-adjoining side-yard limit rises to 2.5 metres. A residential fence usually does not require a Gatineau permit unless it encloses a swimming pool.
Ottawa generally does not require a building permit for an ordinary fence, but the project must comply with Fence By-law 2003-462 and the city's good neighbour policy. Check Ottawa's building permit frequently asked questions before assuming the work qualifies as ordinary fence construction. Formal site controls may also require organised approval and safety documentation. Contractors can use Safety Space work permits as a reference for that process.
Property-line disputes are cheaper to prevent than to repair. Confirm the survey or municipal records, discuss the alignment with the neighbour, and keep the finished fence on the agreed property. Do not rely on an old hedge, driveway edge, or assumed boundary.
Pools create a separate compliance system
Ottawa requires an enclosure for every privately owned outdoor pool, and a permit is required even when an existing yard fence already surrounds it. The city requires a minimum enclosure height of 1.5 metres, openings that cannot pass a 100-millimetre sphere, non-frost-susceptible posts, and self-closing, self-latching gates with the lock at least 1.35 metres above the enclosure bottom, as set out in Ottawa's pool, hot tub, and pond guidance.
Quebec uses different pool-enclosure dimensions. The provincial enclosure must be at least 1.2 metres high, prevent passage of a 10-centimetre sphere, and limit chain-link openings to 30 millimetres unless compliant slats are installed. Municipal rules can be stricter, so a Quebec-side project must follow the applicable municipal and provincial requirements rather than copy an Ontario design.
Frost and buried services need equal attention
Ottawa geotechnical guidance estimates frost penetration at up to approximately 1.8 metres on bare ground or pavement and approximately 1.5 metres where snow cover remains. Ontario building-code provisions require foundations on frost-susceptible soils to extend below the potential frost-damage zone or use an engineered method that prevents adfreezing and frost jacking, as summarised in Ontario frost-protection provisions.
Request a free Ontario One Call locate before excavation at least 5 business days before a single-address project and 10 business days before a multi-address or large project, as noted in Ontario municipal utility-locate guidance. Wait for notified infrastructure owners to respond. A public locate does not necessarily identify private electrical, gas, irrigation, or other service lines.
Hydro Ottawa advises keeping excavation clear of marked infrastructure and avoiding digging within 1 metre of marked utilities, according to its safe-digging guidance. Locates are generally valid for 60 days, so delayed or phased work may need a new request.
The Step-by-Step Fence Installation Process
A professional installation follows a sequence because each stage protects the next one. Skipping layout checks or rushing post installation usually creates problems that appear later as leaning lines, uneven gaps, dragging gates, or costly rework.
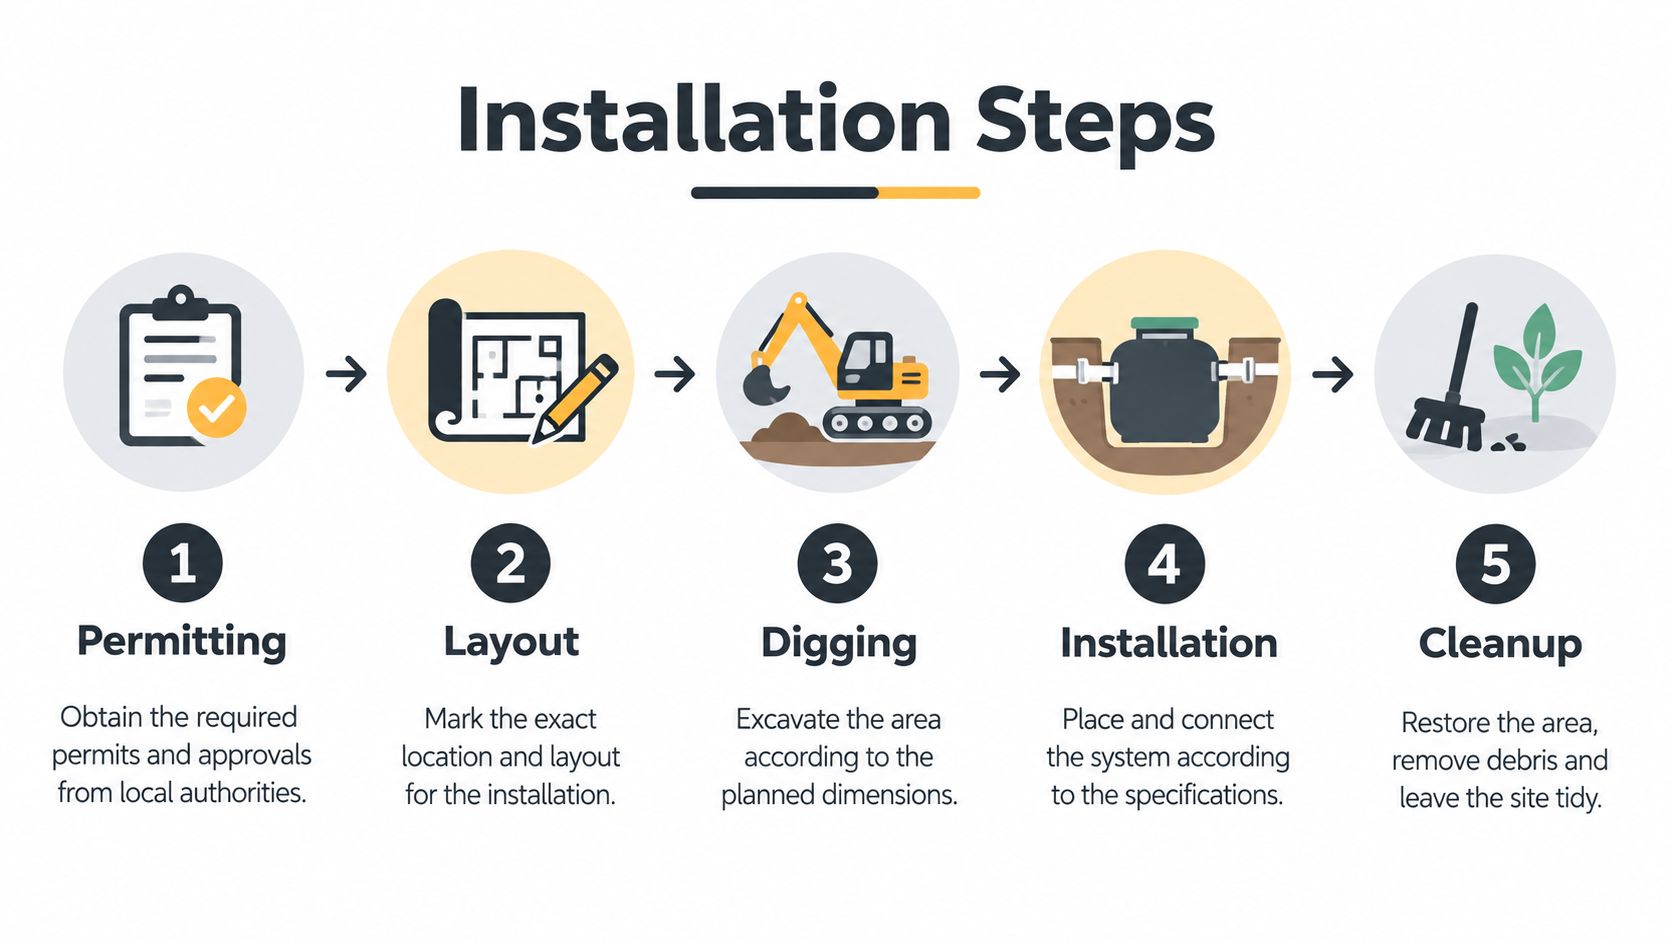
1. Inspect and measure the site
The first visit should confirm the property line, access route, grade, existing structures, trees, drainage, gates, and buried-service markings. The installer should also identify whether corners, gate posts, or long runs need a stronger detail than standard line posts.
Measure finished grade, not just the visible lawn. A slope can create a gap beneath a panel, alter the effective height of a pool enclosure, or force stepped panels instead of a continuous line.
2. Mark the layout
Use stakes and string to show the proposed fence before excavation. This gives the homeowner and neighbours an opportunity to review the alignment, gate swing, finished side, and relationship to decks, driveways, pools, and walkways.
A good layout catches practical problems early. A gate that opens into a snowbank or lands beside a downspout may satisfy a drawing but fail in daily use.
3. Excavate for the conditions
Post holes must reflect the soil, drainage, exposure, and frost strategy. In Ottawa, shallow holes in wet, frost-susceptible soil can lift unevenly, producing leaning posts and gate misalignment. Concrete collars alone don't eliminate frost heave when water, expansive soil, and inadequate bearing depth remain present.
The crew should preserve utility markings, use careful or hand excavation near identified services, and remove roots or obstructions without disturbing more ground than necessary. If an old stump blocks a post location, deal with it before the layout becomes fixed. Homeowners comparing removal options can review stump grinder pricing explained while planning site preparation.
4. Set posts and install the fence
Posts should be aligned, braced, plumbed, and allowed to stabilise according to the selected system and site conditions. The crew then installs rails, panels, mesh, pickets, or glass sections, maintaining consistent spacing and following grade changes deliberately.
The correct approach to placing fence posts matters more than the speed of the excavation. A post that is slightly out of line can force every connected panel to compensate, and a weak gate post can make a well-built fence look defective.
5. Fit gates and complete the walkthrough
Gate hardware deserves its own inspection. Check the swing, clearance, latch engagement, self-closing action where required, and operation after the surrounding ground is restored. For pool enclosures, confirm the latch location and opening dimensions after landscaping and soil placement, not before.
The final walkthrough should cover the fence line, post stability, panel alignment, gate operation, debris removal, and maintenance instructions. Ask the contractor to document any agreed exceptions, drainage details, access arrangements, and warranty terms.
A visual installation overview can help homeowners understand how the stages fit together:
Real-World Examples and Project Case Studies
Local fence projects rarely fail because a homeowner couldn't choose between two colours. They fail when the design ignores a boundary, a grade, a gate, or the ground beneath the posts. The following examples are planning scenarios based on common Ottawa–Gatineau constraints, not claims about named completed projects.
A shared line across several properties
A townhouse group wants one consistent privacy treatment across adjoining backyards. The efficient approach is to coordinate the survey information, agree on a shared material and finished side, confirm access for excavation, and record ownership of each section before requesting quotes.
The important saving isn't just buying more material at once. Coordinated layouts reduce mismatched heights, repeated site visits, conflicting gates, and disputes over who maintains a section that sits between properties. Each owner should still confirm their own title and boundary position rather than assuming the group layout proves ownership.
A Gatineau pool enclosure
A homeowner wants a modern enclosure with minimal visual obstruction. Glass may suit the aesthetic, but the design must still satisfy the applicable height, opening, gate, latch, and placement rules. A pre-installation review should record finished grades, pool edge, gate swing, nearby deck surfaces, landscaping, and any object that could create a climbable route.
The final inspection must happen after the soil and surrounding features are installed. A compliant panel can become part of a noncompliant system if a raised garden bed, deck, or equipment pad changes the effective access point.
A sloped Kanata backyard
A sloped backyard needs a choice between stepped sections and a carefully raked line. The wrong approach leaves triangular gaps, awkward panel heights, and extra pressure on corner posts. Frost protection becomes especially important where drainage changes across the slope or snow is cleared from one side of the fence.
A strong plan identifies the difficult posts first. Corner posts, gate posts, retaining-wall interfaces, and locations exposed to bare ground deserve more attention than a routine line post in sheltered soil.
A fence should be designed from its difficult points outward. The easy sections will follow.
Maintenance Tips and Choosing a Contractor
Maintenance starts with the material, but it ends with the site. Keep snow, stored materials, soil, and dense vegetation from pressing against panels or blocking gates. Inspect after winter movement and after major storms, particularly around corners, gate posts, hinges, latches, and sections beside driveways.
Maintain each material deliberately
PVC: Wash dirt and salt from the surface, inspect connections for movement, and make sure gate hardware remains aligned.
Hybrid systems: Check steel supports, fasteners, and any wood or wood-look components separately. One material may remain sound while another needs attention.
Wood: Inspect post tops, end grain, joints, and areas close to the ground. Stain or seal the surface according to its exposure and product requirements.
Ornamental iron: Remove surface rust promptly, keep drainage paths clear, and repair damaged coatings before corrosion spreads.
Chain link: Look for bent mesh, loose ties, leaning posts, and gate hardware that has lost tension.
Glass: Clean panels with suitable products and inspect clamps, channels, seals, and edges for damage.
Pool enclosures need a seasonal safety inspection. Check that gates close and latch without assistance, snow and ice aren't preventing operation, posts haven't heaved, openings beneath panels haven't enlarged, and landscaping hasn't created a foothold.
Select the contractor, not just the quote
Ask each installer who verifies the boundary, who orders the utility locate, how the crew handles frost-susceptible soil, and who obtains a pool-enclosure permit when one is required. Request an itemised estimate, proof of insurance, warranty terms, recent local references, and a written description of what happens if excavation reveals rock, roots, drainage problems, or private services.
Reject vague proposals that show only a total price. Also reject anyone who suggests skipping a required permit, dismisses the property line as “obvious,” or treats concrete as a universal answer to frost movement. A reputable contractor explains the trade-offs before taking a deposit.
Clear administration matters too. Confirm payment stages, change-order procedures, disposal responsibilities, and the process for sending invoices as a contractor. Good paperwork keeps a physically demanding project from becoming a financial dispute.
Conclusion and Next Steps for Your Project
A successful residential fence installation starts with the boundary and local rules, then moves through material selection, utility locating, frost-aware post design, careful construction, and final inspection. Ottawa and Gatineau homeowners shouldn't use the same assumptions on both sides of the river, especially for pool enclosures and street-facing fences.
Choose a contractor who measures first, documents the plan, respects the ground, and treats gates as working safety equipment. A clear estimate and a careful walkthrough will protect the appearance, function, and long-term value of the finished fence.
FenceScape provides residential fence design, measurements, post setting, panels, gates, and finishing work for Ottawa–Gatineau properties. Visit FenceScape to request a free estimate and discuss a fence plan built around your material choice, property boundary, frost conditions, and local requirements.
Comments