
Privacy Screen Wood: A Practical Guide to Building Your Wooden Privacy Screen
- Eric Lafleche
- Feb 3
- 12 min read

A wooden privacy screen transforms your backyard into a secluded oasis, but success starts with a solid plan. Think of planning as the most critical phase. It's the step that ensures you build a lasting home improvement, not a weekend project that turns into a major headache.
Step 1: Planning Your Backyard Privacy Screen
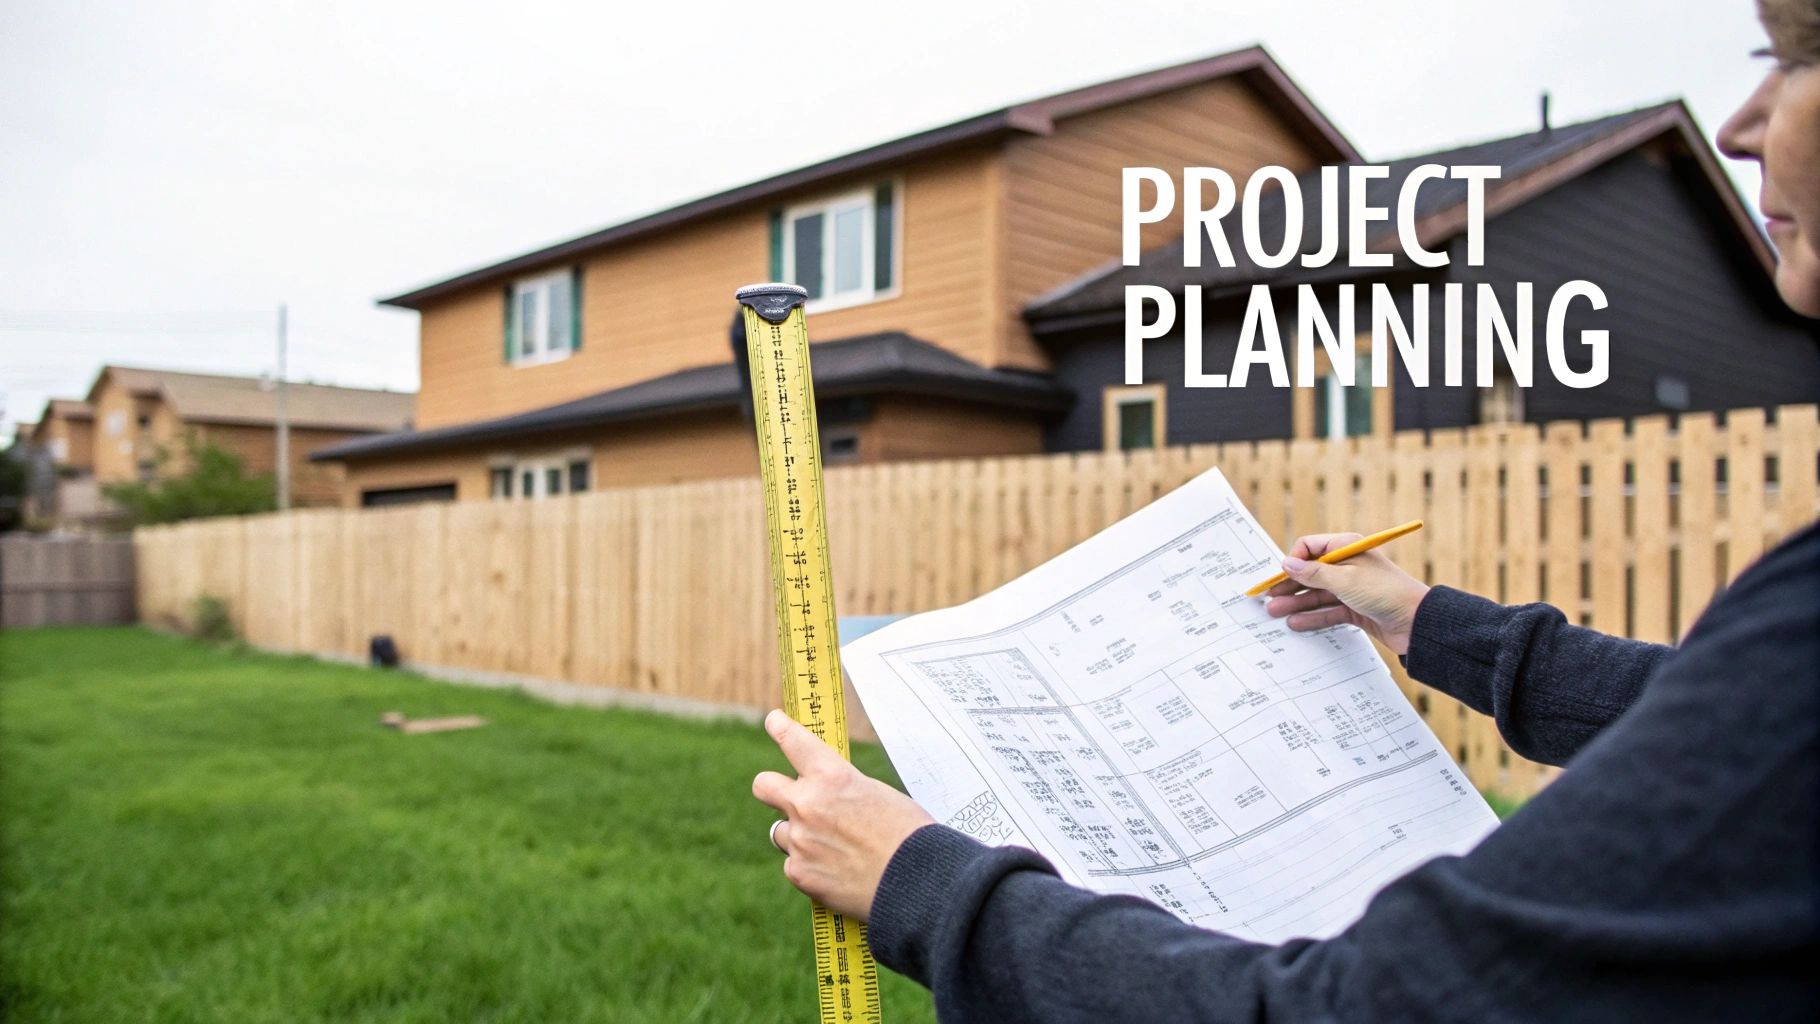
Before you price out lumber or sketch designs, take a moment for practical planning. This initial stage is about clarifying your vision and understanding the real-world constraints of your property. Completing these steps will save you time, money, and frustration. This framework provides the actionable questions and information you need, whether you're building it yourself or hiring a professional.
Define the Screen's Primary Function
First, decide what this screen must do. Your answer will drive every decision, from height and location to the build style. Are you building a fortress of solitude or a subtle visual break?
Pinpoint your main goal:
Create a Secluded Zone: To shield a hot tub, patio, or outdoor lounge, you'll need a taller, more solid screen for effective privacy.
Block Wind or Sun: A strategically placed screen can make a deck usable on windy days or provide afternoon shade. A design with spaced slats is ideal for this, as it allows some airflow.
Establish a Boundary: If a full fence is too much, a stylish screen can effectively mark your property line.
Hide an Unsightly View: A simple screen is the perfect solution for concealing garbage bins, A/C units, or a neighbour's clutter.
Knowing your primary function keeps you focused. For example, a hot tub screen must be at least six feet tall for real privacy, but a screen to hide an air conditioner might only need to be four feet high.
Verify Bylaws and Property Lines First
This step is non-negotiable. Skipping it can lead to disputes with neighbours or a costly order to tear down your work. In Ottawa, a privacy screen under 2.0 metres (about 6 feet 7 inches) high generally does not require a building permit. However, rules may differ for corner lots or properties with unique zoning.
Actionable Step: Before digging, visit the City of Ottawa's website or your local Gatineau municipal office's site. This quick check ensures your project is compliant from day one.
Equally important is knowing your exact property line. Do not guess. Refer to your property survey—the official document you received when purchasing your house. Building even a few inches on your neighbour’s land can cause serious legal issues. If you can't find your survey, hire a surveyor to mark the lines professionally.
Set a Complete and Realistic Budget
Your budget will steer almost every decision, from wood type to whether you DIY or hire a pro. A common mistake is budgeting only for the cost of lumber.
A realistic budget must include:
Materials: All lumber, posts, concrete mix, screws, and hardware.
Finishing: The stain or sealant needed to protect the wood.
Tools: Any necessary tool rentals or purchases.
Contingency Fund: Set aside an extra 10-15% for unexpected costs.
As you explore options, consider natural alternatives. Elements like quick-growing trees for privacy can work alongside a screen or serve as a living fence.
With a clear plan and budget, you can tackle the project confidently or have a productive, detailed conversation with a contractor, ensuring your vision is executed perfectly.
Step 2: Choosing The Right Wood For Ottawa's Climate
The most important material choice you'll make is the wood. Ottawa's climate—deep freezes, heavy snow, and humid summers—demands a material that can withstand extreme weather swings. This choice is about balancing aesthetics, budget, and long-term durability. Let's compare the top three options: Western Red Cedar, Pressure-Treated lumber, and a modern hybrid system.
Option 1: The Timeless Appeal of Western Red Cedar
Western Red Cedar is the premium choice for good reason. Its natural oils and tannins provide built-in resistance to rot and insects without chemical treatments—a major advantage in our damp springs and muggy summers.
Cedar is also "dimensionally stable," meaning it resists warping, twisting, and shrinking. This stability is key to maintaining the clean, sharp lines of your privacy screen over time.
Aesthetic: Cedar offers a beautiful, rich colour that can be left to weather into a distinguished silvery grey.
Weight: It is lightweight, making it easier to handle during construction.
Durability: With proper care, a cedar screen can last 15 to 25 years or more, making it a sound long-term investment.
While the upfront cost is higher, its natural beauty and low maintenance make it a worthwhile trade-off for many homeowners.
Option 2: The Practical Strength of Pressure-Treated Lumber
If your budget is a primary concern, Pressure-Treated (PT) lumber is your workhorse. Typically a softwood like spruce or pine, it's chemically treated to resist rot and pests, offering excellent structural integrity at a lower cost than cedar.
Actionable Tip: When buying PT lumber, be selective. Choose boards that are as straight and dry as possible. Freshly treated wood is often wet and heavy, making it prone to warping as it dries. Stack it flat with spacers ("stickering") for a week or two to let it acclimate before building. This simple step makes a huge difference in the final quality.
While it lacks the initial warmth of cedar, a well-built PT screen looks great with a quality stain. It will require more consistent maintenance to prevent cracking and splitting. For more details, consult our guide on what pressure-treated lumber is and its best uses for outdoor projects.
Option 3: The Modern Hybrid Solution
To get the best of both worlds, consider a hybrid system. This approach uses galvanized steel posts as a foundation, paired with natural wood panels.
The steel posts create a rock-solid frame that will never rot at ground level—the number one failure point for any wood fence or screen. You can then install your choice of wood infill, whether cedar or PT, knowing the core structure is secure. This smart design drastically extends the life of your screen and virtually eliminates future post repairs.
Wood Material Comparison for Ottawa Weather
This quick breakdown helps you compare the top wood choices for our climate side-by-side.
Material | Average Cost (Per Linear Foot) | Lifespan (with maintenance) | Best For | Maintenance Needs |
|---|---|---|---|---|
Cedar | $50 - $90 | 15 - 25+ years | Homeowners prioritizing natural beauty, rot resistance, and long-term value. | Optional staining to preserve colour; otherwise low. |
Pressure-Treated | $30 - $60 | 10 - 20 years | Budget-conscious projects where structural strength is key. | Regular staining or sealing is crucial to prevent cracking and warping. |
Hybrid (Steel & Wood) | $60 - $110 | 25+ years | Those seeking maximum durability and minimal structural maintenance. | Wood panels require standard maintenance (staining/sealing). |
Whether you choose cedar's elegance, PT's practicality, or a hybrid's durability, you're making a solid investment. Durable privacy solutions are in high demand, with the average cost for a standard 100-linear-foot privacy screen in Ottawa hovering around $7,666. This investment can boost property value by 5-10% in our competitive market.
Step 3: Designing a Screen That Enhances Your Home
A wooden privacy screen is more than a barrier; it's a key architectural feature for your backyard. The right design should feel like a natural extension of your home, adding both style and function. By thinking through these key design elements, you can build a screen that provides privacy while boosting your property's curb appeal.
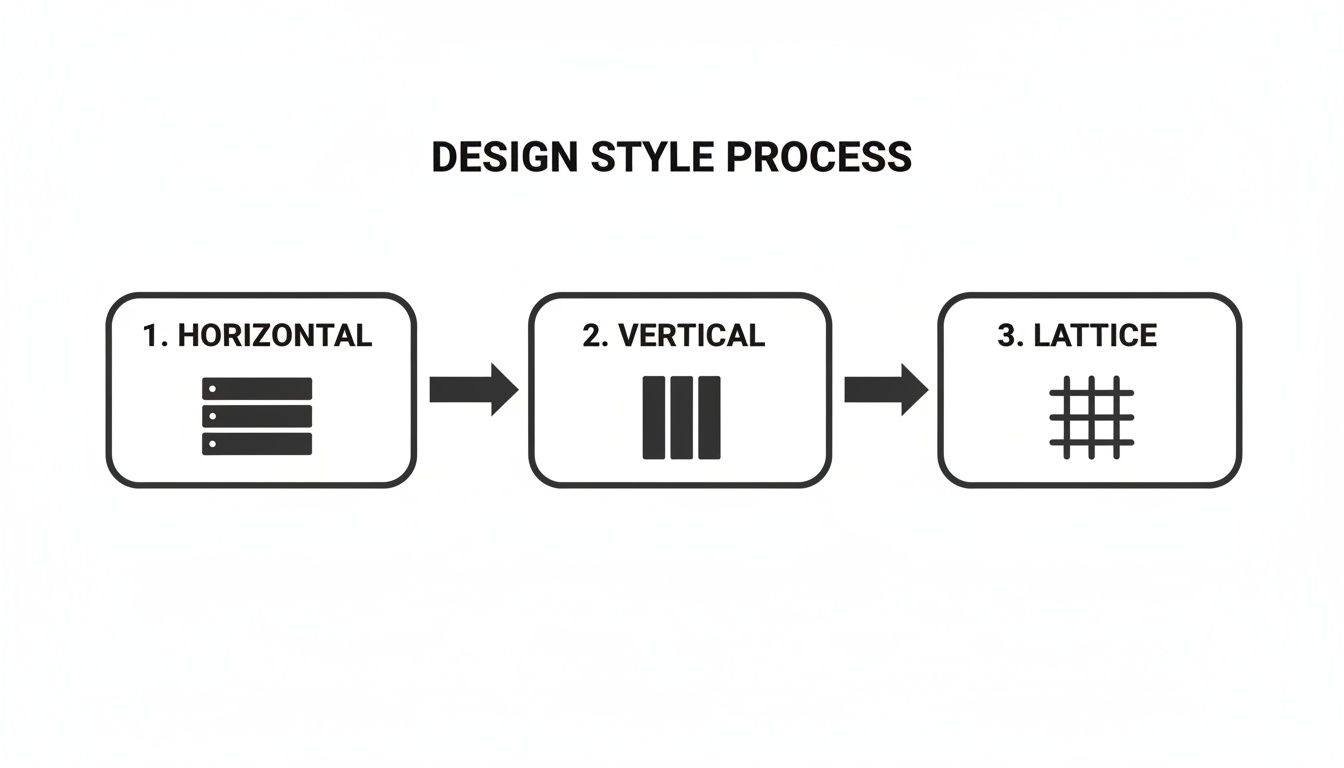
Horizontal vs. Vertical Boards: How to Choose
The orientation of the boards completely changes the feel of your yard.
Horizontal boards create a modern, sleek look. The long lines draw the eye sideways, making a small yard feel wider and more spacious. This style is an excellent choice for complementing contemporary homes.
Vertical boards offer a more traditional, classic appeal. They create a sense of height, making the screen feel taller and more stately. This orientation is perfect for creating a cozy, secluded retreat by making the space feel more enclosed.
Pro Tip: Horizontal boards span a longer distance between posts, making them prone to sagging over time. To prevent this, install a vertical support—a "stiffener"—on the back of each panel to keep the lines perfectly straight.
Select the Right Design Style for Your Needs
The construction pattern impacts both privacy and airflow. You don't have to settle for a solid wall of wood.
Here are three popular styles and their practical applications:
Board-on-Board: For maximum privacy. Overlapping vertical boards eliminate all gaps, making it a perfect choice for total seclusion around a hot tub or patio. However, it can feel heavy and limits airflow.
Shadowbox (or "Good Neighbour"): A clever design that alternates boards on either side of the rails. It appears solid from a direct view but allows light and air to pass through at an angle, making the screen feel less imposing for both you and your neighbour.
Lattice-Top: Offers a balance of privacy and openness. A solid base provides seclusion where needed, while a decorative lattice panel on top adds elegance and breaks up the visual weight. For more ideas, explore our guide to the most popular wood fence styles in Ottawa.
Add Custom Touches for a Unique Look
Small details elevate a standard build into something truly custom. These additions can connect the design to your home's character.
Consider these functional and beautiful elements:
Integrated Planters: Build planter boxes into the screen's base to soften the structure with greenery and flowers.
Post Caps: Swap basic flat caps for decorative copper, solar-powered, or custom-cut wood caps for a polished, high-end finish.
Contrasting Stains: A simple designer trick. Stain the frame and posts a different colour from the main boards. For instance, a dark frame with lighter infill creates a sharp, sophisticated look.
Thinking through these elements ensures your privacy screen is a beautiful and valuable addition to your home, not just a utility.
Step 4: Building Your Screen From the Ground Up
This is where your design becomes a reality. Whether you're a DIYer or overseeing a professional crew, understanding the proper installation process for a privacy screen wood structure is crucial. This project demands precision, from the first post hole to the final screw, to ensure it stands strong against Ottawa's harsh winters.
Set a Rock-Solid Foundation
The posts are the backbone of your screen. If they shift, the entire structure is compromised. In the Ottawa-Gatineau region, frost heave can push poorly set posts right out of the ground.
Actionable Step: Before digging, call Ontario One Call. This free, mandatory service marks all underground utility lines (gas, hydro, communications). Hitting a line is a costly and dangerous mistake. Do not skip this.
Once the area is clear, follow these steps for digging and setting posts:
Dig to the Right Depth: To prevent frost heave, each post hole must be a minimum of 4 feet (48 inches) deep. This places the concrete footing well below the frost line.
Add a Gravel Base: Pour about six inches of gravel into the bottom of the hole before placing the post. This improves drainage and prevents water from pooling at the base, which causes premature rot.
Plumb and Brace: Center your post in the hole. Use a level on two adjacent sides to ensure it's perfectly plumb (straight), then lock it in place with temporary 2x4 bracing.
Now, mix and pour concrete to fill the hole. Pro Tip: Slope the top of the concrete away from the post to create a watershed. Let the concrete cure for a solid 48-72 hours before building on it. Rushing this step will undermine all your work.
99% of leaning screens we see are caused by posts that weren't set deep enough. A 4-foot depth isn't a recommendation; in this climate, it's a requirement for a lasting structure.
Frame for Maximum Strength
With the posts anchored, build the frame that will hold the screen boards. This framework must be strong and square. Typically, this involves running horizontal 2x4 rails between the posts.
For screens up to eight feet wide, top and bottom rails are sufficient. For taller or wider screens, add a middle rail for extra support. Use high-quality, exterior-grade screws or structural connectors; nails are not strong enough for the long term.
Actionable Tip: To check if your frame is square, measure diagonally from corner to corner, then measure the opposite corners. If the two measurements match, your frame is perfectly square. Adjust now, before attaching any boards. Our step-by-step guide for creating a rock-solid fence post in concrete provides more detail on these principles.
The board orientation you chose will dictate your framing method.
Whether you choose horizontal boards, vertical slats, or a lattice top, it all begins with solid posts and a sturdy frame.
Attach Boards for a Flawless Finish
This is where the screen takes shape. Consistency is key. Create a simple spacer—a small piece of wood cut to your desired gap width. Use it between each board to guarantee a uniform, professional finish.
Follow these tips for fastening boards:
Level the First Board: Use a level to ensure your first board is perfectly straight. All other boards will follow its lead, so getting this one right is critical.
Use Quality Fasteners: Choose stainless steel or coated deck screws designed for outdoor use with your specific wood type to prevent rust stains.
Pre-Drill Ends: To prevent splitting, especially with cedar, pre-drill pilot holes for screws near the ends of the boards.
If you're building a gate, assemble it on a flat surface first to ensure it's square, then hang it. Use heavy-duty, adjustable gate hardware from the start to prevent sagging—one of the most common gate issues. These final details are what separate an amateur job from a structure that looks great and functions perfectly for years.
Step 5: Protecting Your Investment Through the Seasons
Your new wooden privacy screen requires proactive care to withstand Ottawa’s seasons. A consistent maintenance routine will keep your screen looking its best and structurally sound, preventing small issues from becoming expensive problems.
The first year is critical. Whether you used cedar or pressure-treated lumber, you must apply a high-quality stain or sealant within the first few months to a year. This initial coat creates the primary barrier against moisture and UV damage.
If you used pressure-treated wood, allow it to dry completely first, which can take several months. Actionable Test: Sprinkle water on the surface. If it soaks in, the wood is ready to be sealed. If it beads up, wait longer. Cedar can typically be finished much sooner.
How to Seal, Stain, and Clean Your Screen
Stain and sealant act as sunscreen for your wood, preventing sun bleaching and moisture damage that leads to warping and rot. The key to longevity is reapplying the finish before the previous coat fails.
Follow this reapplication schedule based on your finish type:
Transparent and Semi-Transparent Stains: These highlight the natural wood grain. Reapply a fresh coat every 2-3 years. A screen in full sun may need it every two years.
Solid Stains: These offer the most robust UV protection, acting like a thin coat of paint. They can last 3-5 years before needing reapplication, making them a great low-maintenance option.
Before re-staining, always clean the screen. Once a year (typically in the spring), wash away grime, pollen, and mildew. Do not use a high-pressure washer, as it can damage the wood fibres. A simple mix of mild soap and water with a soft-bristled brush is all you need.
Perform Quick Annual Inspections
After cleaning, perform a quick walk-around inspection. This simple habit helps you catch problems early. Look for loose boards, popped screws, or signs of rot, paying close attention to the bottom of the screen where it's closest to the damp ground.
Catching a loose board and tightening a few screws takes five minutes. Ignoring it can lead to a warped panel or structural strain that requires a much more involved repair. A quick spring inspection is the best preventative maintenance for your screen.
If a post feels wobbly, it may indicate a footing issue. However, most loose boards just need to be re-fastened. Also, check that any gate hardware is tight and functioning smoothly.
This straightforward routine—clean, inspect, and re-coat when needed—will add years to the life of your wooden privacy screen, ensuring it remains a source of pride and privacy, not a maintenance chore.
Your Top Questions About Wood Privacy Screens
Even with careful planning, questions arise. Here are direct answers to the most common questions we hear from Ottawa-Gatineau homeowners about privacy screen wood projects.
Do I Need a Building Permit for a Privacy Screen in Ottawa?
Usually, no. In Ottawa, if your privacy screen is 2.0 metres (about 6 feet 7 inches) high or less, a building permit is generally not required.
However, there are exceptions for corner lots, properties adjacent to parks, or homes near a river. Screens that are part of a pool enclosure are subject to much stricter regulations.
Actionable Advice: Don't guess. Always verify the current regulations on the City of Ottawa's website or call a professional. This ensures your project is compliant from the start.
What’s the Best Time of Year to Install a Wood Privacy Screen?
The ideal installation window in Ottawa-Gatineau is from late spring through early fall. During this time, the ground is thawed and stable, allowing concrete footings to cure properly and anchor your posts securely.
That said, professional crews can often work outside this period. Booking for late winter or early spring can be a smart move, as you may find better availability and more competitive pricing before the summer rush.
How Deep Should the Posts Be in Ottawa?
This is a critical detail for our climate. To prevent frost heave from pushing your posts out of the ground, they must be set well below the frost line.
The standard in Ottawa is a minimum depth of 4 feet (48 inches). Setting posts in concrete at this depth is the single most important step for the longevity of your screen, guaranteeing it remains straight and solid through our intense freeze-thaw cycles.
Is Cedar Really Worth the Extra Cost Over Pressure-Treated Wood?
This is the classic budget-versus-beauty debate. While Pressure-Treated (PT) lumber is a solid, budget-friendly option, cedar is often an investment that pays off in the long run.
Here is a practical breakdown of why cedar is often worth it:
Natural Defence: Cedar contains its own rot- and insect-resistant oils, requiring no chemical treatments.
Stays Straight: It is significantly less likely to warp, twist, or shrink than PT lumber, keeping your screen looking sharp for longer.
Superior Aesthetics: The rich colour and beautiful grain of cedar provide an unmatched natural look.
Considering its durability and lower maintenance needs, cedar's upfront cost often translates to better long-term value for a feature you'll see every day.
Ready to transform your backyard with a beautiful and durable wooden privacy screen? The team at FenceScape has the expertise to guide you through every step, from design to installation, ensuring a perfect result that stands up to the Ottawa climate. Contact us today for a free, no-obligation estimate!
Comments