
Privacy Fence Build Guide for Ottawa–Gatineau

A neighbour's upstairs windows look straight into the backyard, so a taller fence seems like the obvious fix. But before ordering panels, an Ottawa–Gatineau homeowner needs to know where the property line runs, which yard rules apply, and whether a buried utility crosses the proposed route. Those details affect more than compliance: they shape the materials, post layout, gates, drainage and long-term upkeep.
A successful privacy fence build is a coordinated outdoor project, not just a row of panels between posts. Plan the boundary and municipal requirements first, then choose a fence system that can handle the site, local weather and the way the property will be used.
Plan Your Privacy Fence Build
A homeowner in Ottawa wants a taller rear-yard fence to screen a patio. The proposed line looks straightforward, but the boundary hasn't been confirmed, a side segment may fall under a different yard classification, and nobody has checked for underground services. Ordering panels now risks buying the wrong height or length, while digging first could mean striking a utility or placing posts across the property line.
Start with the site, not the product catalogue. Walk the proposed route from several points, including the house, the patio and the neighbouring side. Look for survey pins or other boundary evidence, note changes in ground level, and identify where the fence meets buildings, existing landscaping or a shared boundary. In Ottawa, confirm the property line and check Fence By-law 2003-462; ordinary residential fences generally don't require a building permit, but underground utilities must be located before post excavation (Ottawa's building-permit guidance).
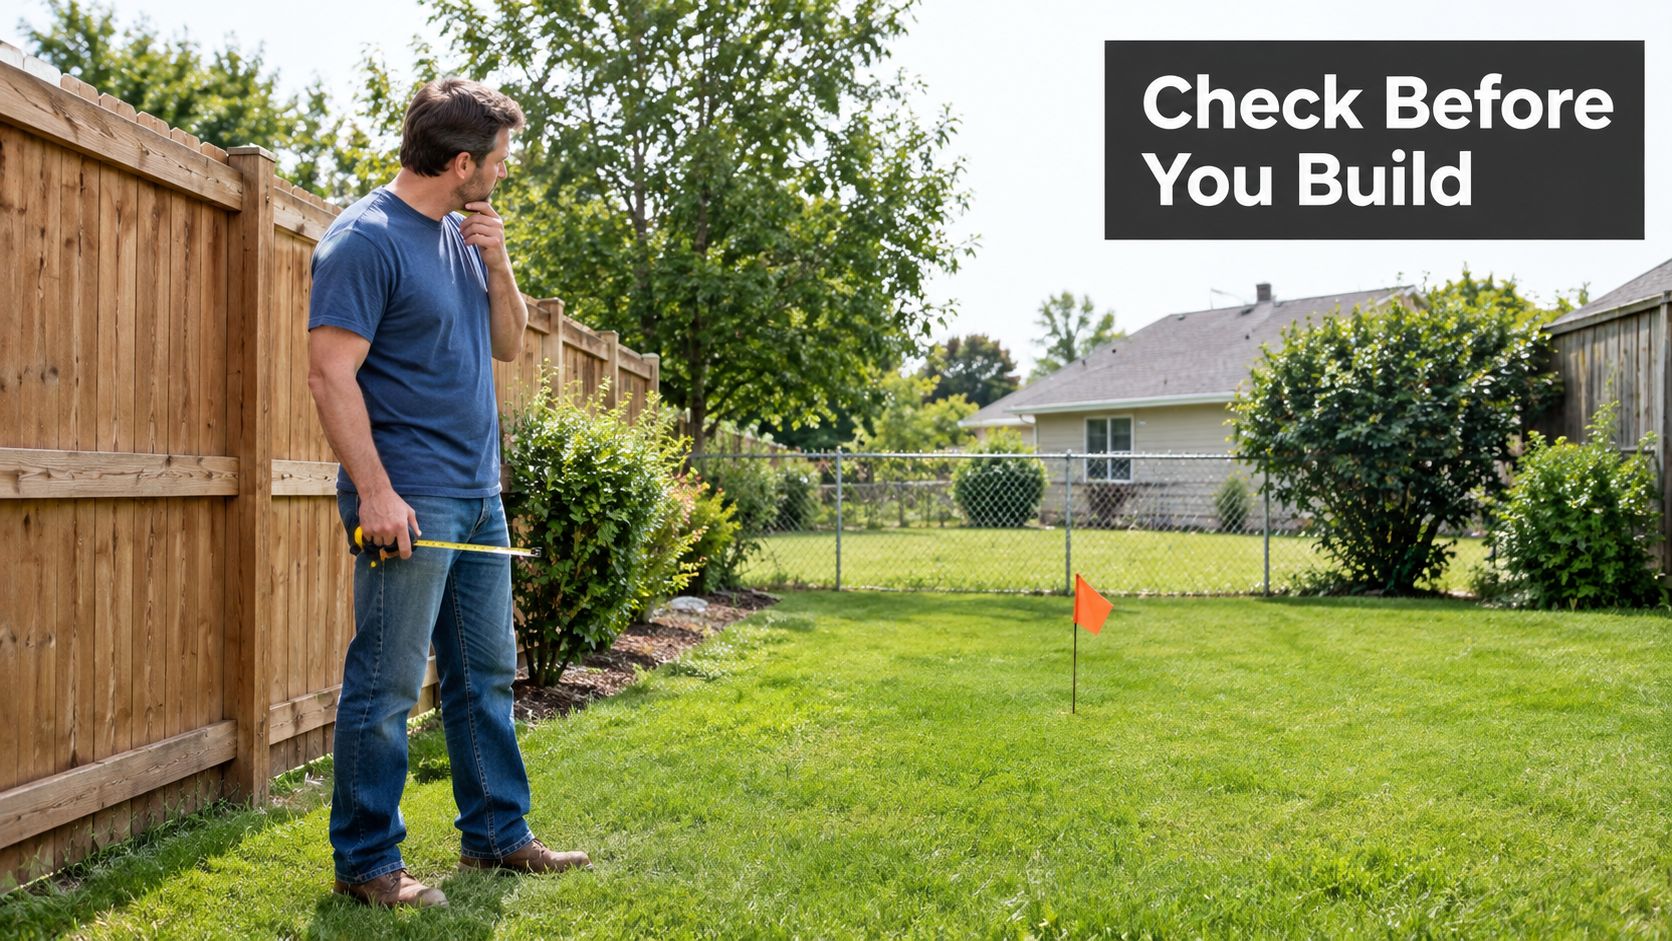
Draw the route before choosing panels
List what the fence needs to accomplish. Privacy may be the main goal, but security, street-facing appearance, drainage and access all influence the layout. Mark gate locations and the openings you need for people, equipment or regular yard maintenance. Note which parts of the route are front, side or rear yard, and whether a side boundary adjoins a street.
Then record practical constraints: slopes, mature trees, low spots where water collects, neighbouring fences, retaining walls and likely utility locations. A compact, scaled sketch can show the route, gates, yard classifications and elevation changes together. It also gives a supplier or installer something concrete to price.
Plan before you purchase: Panel dimensions can't correct a misplaced line or a height limit you discovered after delivery. Confirm the route and rules first, then match materials to the actual site.
Once the layout is on paper, check the applicable municipal requirements and arrange utility marking before excavation. Only then should the material order reflect the measured fence segments, gate openings and chosen construction method.
Check Ottawa and Gatineau Rules
The same fence design can be acceptable on one lot and unsuitable on another. The first compliance check is the municipality. The next is the fence's position on the property: front, side, rear, or a side yard that adjoins a street. Multi-unit properties and pool enclosures need their own review rather than an assumption based on a neighbouring backyard.
Project location | Yard or property type | Relevant rule | Planning consequence |
|---|---|---|---|
Ottawa | Residential front yard | Maximum fence height is 1 metre | Keep front-yard screening below the stated limit. |
Ottawa | Residential side or rear yard | Maximum fence height is 2.1 metres; gates may be 30 centimetres taller than the applicable limit | Confirm the height by yard segment before ordering panels. |
Ottawa | Residential property | The more attractive side must face the neighbouring property or street; barbed-wire and electric fences are prohibited in residential zones | Choose a finish and orientation that meet the city's requirements. |
Ottawa | Pool enclosure | A separate permit is required | Don't treat a pool barrier as an ordinary privacy fence. |
Gatineau | One- to four-unit home, front yard | Maximum height is 1.2 metres | A high privacy screen may not be suitable at the front. |
Gatineau | One- to four-unit home, side yard adjoining a street | Maximum height is 1.5 metres | Identify street adjacency before setting the design height. |
Gatineau | One- to four-unit home, rear yard or side yard not adjoining a street | Maximum height is 2 metres | Use the correct yard classification in estimates and orders. |
Gatineau | Building with more than four dwelling units or collective housing | Maximum height is 2.5 metres in a non-street-adjacent side yard or rear yard | Multi-unit projects need a property-type check before standardising the fence. |
Gatineau | Fence near a sidewalk or street curb | Keep the fence at least 1 metre from a sidewalk, or 1.5 metres from a street curb where no sidewalk exists | Confirm the setback reference before laying out posts. |
Gatineau | Pool enclosure | A permit is required | Plan the enclosure as a regulated safety project. |
Ottawa's landscaping guide sets the residential height limits and gate allowance shown above (Ottawa landscaping guide). Gatineau's rules distinguish dwelling types, street-adjacent yards and the required fence setbacks (Gatineau residential fence standards). In ordinary cases, residential fencing in both municipalities doesn't require a permit, but pool enclosures are an important exception.
For homeowners coordinating fence work with a larger renovation, a practical checklist of permit and inspection tips for remodels can help keep responsibilities visible. For a shared boundary, review property-line fence rules as part of the early planning process, but confirm the property line itself rather than treating a neighbouring fence as proof.
Put the relevant constraints on the sketch and in the estimate: municipality, property type, height by segment, street adjacency, setbacks and any pool-enclosure requirements. That gives everyone working on the project the same compliance baseline before materials are ordered.
Choose Materials for Ottawa Weather
The visible panel is only one part of a fence system. Posts, rails, fasteners, gates and the way water drains around the base all influence whether the finished line suits the property. A material that looks right in a sample can still be a poor match for a windy, sloped or frequently used site.
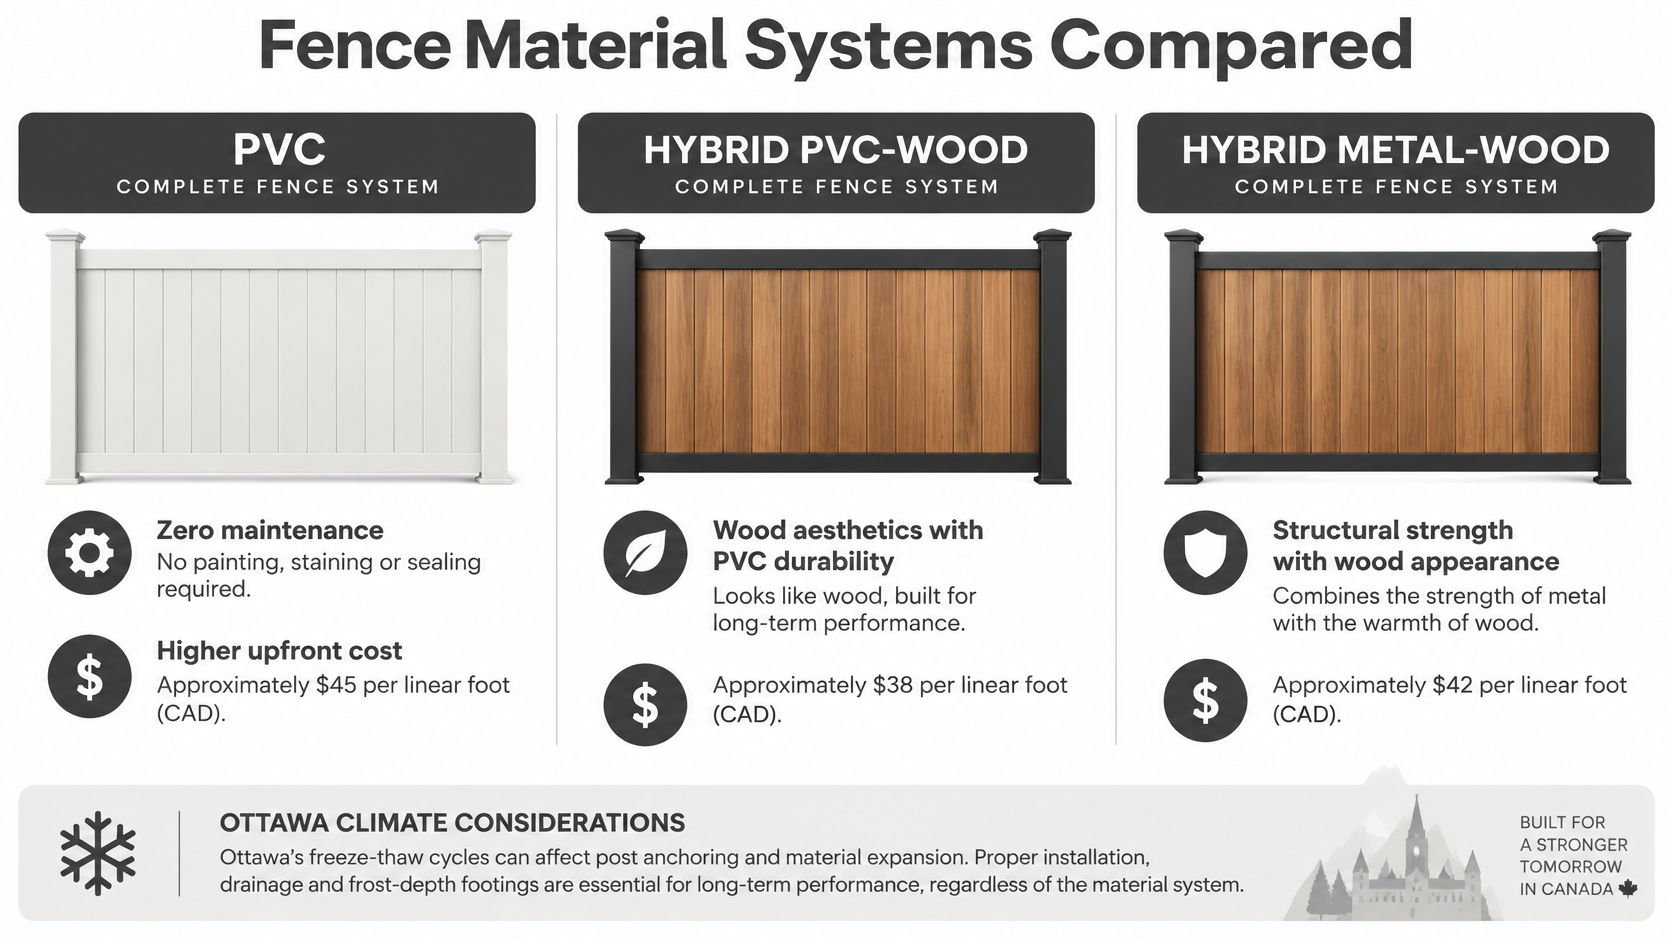
Match the system to the job
PVC offers a consistent finished appearance and can suit homeowners who'd rather avoid routine wood finishing. Its solid panels still need suitable structural support, and the manufacturer's installation requirements matter when planning posts and rails.
Hybrid construction pairs privacy panels with structural components selected for the project. A PVC-and-wood combination can balance a different look with distinct maintenance needs, while metal-and-wood assemblies bring another set of design and structural choices. Don't assume that mixing materials removes the need to assess wind exposure, connections or gate support.
Cedar and other wood offer a natural appearance and can be repaired or altered with familiar carpentry methods. Wood needs attention to moisture, exposed ends and clearance from soil. Pressure-treated lumber can be a practical choice where the application and treatment rating are suitable.
Ornamental iron creates an open boundary rather than a full visual screen, so it can work where visibility and security matter more than blocking sightlines. Chain link serves a different purpose again: it defines an edge without providing the solid coverage most privacy-focused homeowners want. Glass may suit selected railing or design applications, but its placement, visibility and cleaning requirements need careful consideration.
A property manager repeating one design across several lots should weigh consistency, repairability and gate operation alongside appearance. A pool owner has another priority: the enclosure must satisfy its own safety rules, which can narrow appropriate system choices. A neighbourhood group can coordinate a shared design and purchasing process, while allowing for each property's route, grade and municipal limits. For a broader overview of how different fence types suit different projects, see this guide to fencing choices for Tyler homeowners. For regional planning, all-season fencing considerations can help keep weather exposure in view.
Gatineau's permitted rear-yard and non-street-adjacent side-yard height depends on dwelling type, so a repeated design still needs a property-specific check before it's carried from one lot to the next (Gatineau fence height rules).
Choose the system that meets the privacy goal without ignoring post support, weather exposure, repairs and access. Appearance matters, but it shouldn't be the only test.
Install the Fence from Layout to Finish
A straight fence begins before the first hole is dug. A small layout error can spread along the run, while a post that moves during installation can leave panels uneven and gates difficult to adjust. Work in a sequence that keeps the line visible and lets you catch problems before they're locked into place.
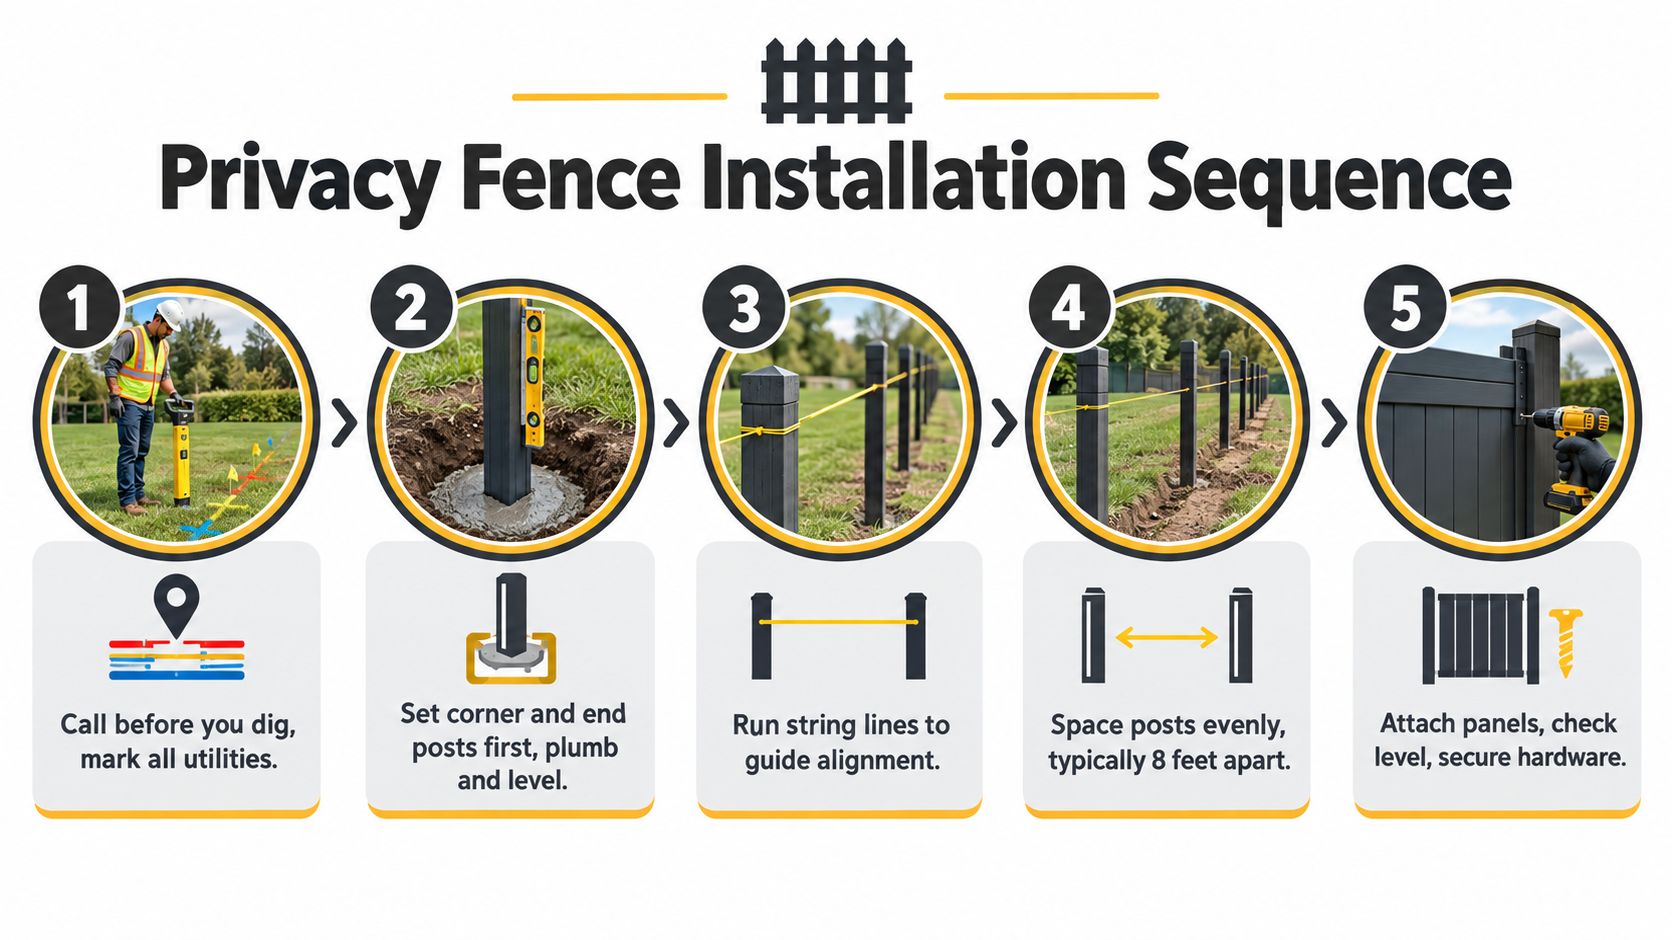
Set the line and posts
Begin only after the utility locations, fence route and applicable requirements are confirmed. Establish end and corner points, then stretch a taut string line between them. A bowed line isn't a reliable guide; reset it before placing posts. Where the ground slopes, decide whether panels will step or follow a graded rail layout, then plan how the top edge and bottom clearance will read from the house and the neighbouring side.
Post depth shouldn't come from a generic national rule of thumb. Ontario's Building Code requires frost penetration to be established from local experience, so ask a local installer or building professional how local ground conditions should inform the footing design. Soil, drainage, wind exposure, fence construction and gate loads all affect the decision.
Excavate carefully, keeping spoil clear of the fence route so you can inspect the holes and maintain a clean work area. Drainage matters: don't leave water collecting at a post base, and don't bury wood where soil contact can keep it wet. Set the end and corner posts first, then check each in two directions with a level. Brace them so they remain plumb during concrete placement and curing.
Fill in the run and attach the panels
Once the ends establish the line, place intermediate posts to suit the actual rail or panel module. Recheck the string line and the post faces before fastening anything. If posts shift during concrete placement, correct them while the assembly can still be adjusted.
Pause if the reference line changes: A moving string, unequal post tops or a leaning post signals a layout or support problem. Adding panels won't make the underlying alignment right.
Allow the footing to cure according to the product and installation conditions before loading the posts. Then fit rails, boards or panels in a consistent order, checking the line and level as you go. Keep a deliberate gap above grade so water, vegetation and seasonal ground contact don't trap moisture against the fence. Cap exposed wood and follow the material maker's guidance for protecting cut ends.
Fit gates after the supporting posts are stable. Check that the gate swings freely, meets the stops cleanly and stays aligned through its full movement. A gate that binds or won't latch is a reason to stop and correct the post or hardware setup, not to force the latch into place.
A sound installation should have steady panel tops, plumb posts, firm connections and clear drainage at the base. Use this guide to placing fence posts alongside the product instructions when planning post layout and installation.
For a visual overview of the work sequence, watch this installation video:
Resolve Common Design and Build Problems
Maximum height isn't automatically the best design. A tall, solid fence can block more sightlines, but it also presents more surface to the wind and can make post support and gate alignment more demanding. On an exposed property, a slightly different layout or a less solid section may serve the site better than choosing the tallest permitted panel.
Common problems often begin with a reasonable-looking assumption. Someone uses a rear-yard height for a side yard that adjoins a street, measures from the wrong grade, or treats the neighbour's existing fence as the boundary. Others set posts too close to a sidewalk or curb, or continue a straight panel line across uneven ground without deciding how the bottom and top edges should follow the slope.
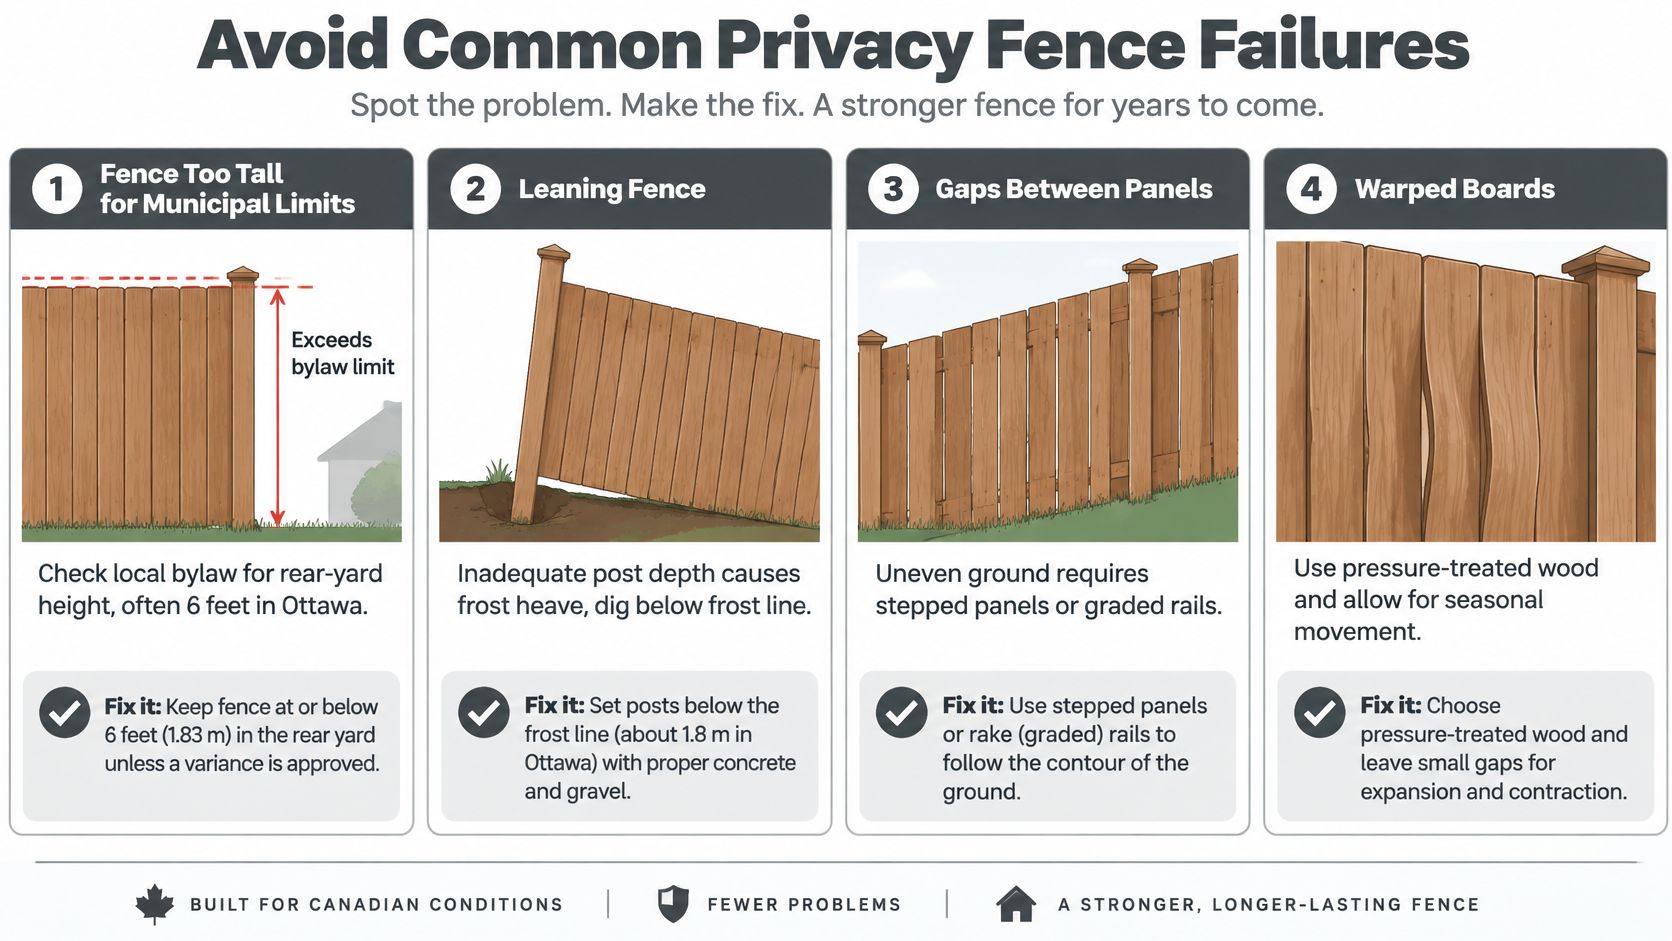
Diagnose the cause before patching
A board touching soil may stay damp and deteriorate sooner than a board with a planned clearance. A gate can also become difficult to operate when posts shift, hinges loosen or the ground changes around the opening. Frost-related movement may affect post plumb, the gap under a gate or latch alignment; the result depends on the site and construction, so inspect the whole assembly rather than adjusting only the latch.
On the Quebec side, a fence too close to a sidewalk or curb can be a layout problem, not something that can be fixed by trimming a panel after installation. In either municipality, uncertain boundaries call for confirmation before work proceeds. Moving a post after the line is assembled can affect several adjoining sections.
Pool projects need a separate safety review. Ottawa's pool-enclosure guidance calls for posts that aren't susceptible to frost, openings that prevent a 100 mm sphere from passing through, and self-closing, self-latching gates with the lock at least 1.35 metres above the enclosure bottom (Ottawa pool-enclosure safety requirements). A solid panel that looks private doesn't automatically meet those requirements. Opening size, post design and gate hardware need to work as parts of the enclosure, not as afterthoughts.
A privacy fence and a pool barrier may share a boundary, but they don't share the same design assumptions. Review the pool safety requirements before choosing panels or gate hardware.
Treat leaning posts, ground-contacting boards, gaps that have changed, or a gate that won't latch as signs to investigate. The right correction may be a small adjustment, but recurring movement or a failing post can mean the design or footing needs professional attention.
Finish and Maintain the Fence
Installation isn't the end of the job. Freeze–thaw conditions, moisture, vegetation and everyday use can gradually affect posts, panels and gates. A brief inspection after a demanding season can catch a loose hinge or a shifted post before it causes more damage.
At the start of each demanding season, walk the full line and look for movement, impact damage or separation at the rails. Check posts for lean, caps for damage and exposed wood for wear. Clear vegetation carefully, and don't let piled snow or wet leaves press against boards or block drainage.
A practical inspection routine
Posts and panels: Look for leaning supports, loosened connections, bowed panels or boards that have separated.
Gate and latch: Open and close each gate. Check for swelling, rubbing, sagging and reliable latch engagement.
Bottom clearance: Confirm the fence still has room to drain and isn't being pushed or held against wet soil.
Caps and finish: Replace damaged caps and maintain any protective finish according to the product guidance.
Pool access: Make sure the gate closes and latches properly, and check for changes to enclosure openings or hardware.
A small adjustment may be enough when a hinge is loose or a latch needs realignment and the supporting post remains firm. A post that keeps leaning, broken structural parts, or repeated gate movement deserves a closer assessment before the problem spreads. Don't force a gate to close or pack soil against a panel to hide a changing gap.
Pool enclosure height also depends on the site's public-access conditions. Ottawa's guidance requires at least 1.8 metres where the enclosure is 3 metres or less from a public pathway or gathering area; a reduction to 1.2 metres applies only under the specified residential condition where the enclosure is more than 3 metres from an adjacent public walkway (Ottawa pool-fence height guidance). If an enclosure changes or a gate is replaced, review the applicable requirements rather than assuming the original arrangement still fits.
Choose Between DIY and Professional Installation
An accessible residential run with a confirmed boundary, straightforward ground and a manageable layout may suit an experienced DIY builder. The work still calls for accurate measuring, safe excavation, steady post alignment and a gate that operates properly. If any of those parts are uncertain, the time saved by skipping planning can turn into rework.
Professional help makes more sense when the property line is unclear, the route crosses steep or difficult ground, excavation is extensive, or the design needs several gates. Pool enclosures deserve a separate compliance review. Multi-lot, commercial or institutional work adds coordination and access demands, while a sensitive shared boundary can make communication and careful site management as important as installation skill.
Give estimators a usable project brief
Before requesting estimates, prepare a concise package with:
Material system and finish: Identify the preferred assembly and what matters most about appearance, privacy and maintenance.
Fence route and height: Mark the line and note the intended height for each yard segment.
Gates and site access: Show gate locations, expected use and any access constraints for materials or equipment.
Utilities and approvals: Record whether utilities have been marked and who will confirm municipal requirements and permit responsibilities.
Finish and timing: Describe cleanup expectations and the preferred project window.
Compare estimates by the work included, not just the visible fence. Ask who handles layout, utility coordination, gate fitting, site cleanup and the final walkthrough. FenceScape is one Ottawa–Gatineau option for turnkey planning, material selection, installation and post-install support across homeowner, property-management, neighbourhood-group and contractor projects.
Before accepting the finished work, confirm the boundary and compliance details, then walk the entire line. Check that the fence runs straight, drainage and ground clearance are maintained, gates open and latch, finishes are complete, the site is clean and the installer has walked through any care or adjustment needs with you.
For an Ottawa–Gatineau privacy fence, FenceScape offers planning, material selection, installation and post-install support designed to match the property and its requirements. Visit FenceScape to discuss your fence route, material options and the practical steps needed for a clean, durable finish.
Comments