
Glass Railing Installation: A Practical Ottawa Guide

You've got the sketch, the supplier tab open, and a deck that would look twice as good without pickets blocking the view. Then someone asks about permits, guard loads, and whether your slab edge can take a base shoe, and the project stops being a shopping decision. That's normal in Ottawa-Gatineau. A glass railing installation succeeds when you settle the structural questions first, because the glass is the last thing you should order, not the first.
Why Glass Railing Installation Starts with Code, Not Panels
Most owners start by comparing clear, frosted, and low iron glass. Installers who've built these systems start somewhere less photogenic, with the load path. A person leans on the top rail, force travels through the panel into clamps, posts, or a base shoe, then through anchors into framing or concrete. If any link in that chain is undersized, thicker glass won't rescue the assembly.
Ottawa treats glass this way for a reason. In Ottawa, glass guards in both Part 3 and Part 9 buildings must be designed by a professional engineer under the applicable Ontario Building Code structural provisions, with the glass itself designed in accordance with CAN/CGSB-12.20-M89 and the completed guard required to resist the same prescribed loads as guards built from other materials, as set out in the City of Ottawa glass guard advisory. That single requirement changes your order of operations.
What a Permit Ready Package Actually Contains
A visual quote tells you panel sizes and a price. A permit ready package tells a plans examiner how the guard works. Expect documented dimensions, material sizes, glass type and thickness, joints, anchor points, and design loads, tied to your specific deck, balcony, or stair rather than a catalogue drawing.
That documentation matters because Ottawa's approval question isn't whether a kit looks sturdy. It's whether the connection design, anchorage, and supporting structure can carry the reactions the engineer calculates. A generic online kit can't automatically answer that for your framing, your slab edge, or your setback from the edge.
Field reality: A railing that feels rigid when you shake it has not passed structural design. Rigidity is a sensation, not a calculation.
The Contrarian Point Worth Accepting Early
The glass panel is rarely the central compliance problem. The problems that stall projects are anchor locations landing in blocking that isn't there, slab edges too thin for the specified edge distance, and stairs where finished tread heights shift the guard geometry. Settle those first and the aesthetic choices, frameless or posted, clear or patterned, become straightforward selections inside a system that already works on paper.
Gatineau projects add a second layer, since Quebec requirements and municipal rules apply across the river. Confirm which jurisdiction governs your property before anyone fabricates anything, and give the engineer the same site information either way, since the load path logic doesn't change at the provincial border.
Ontario and Quebec Guard Rules That Shape Your Project
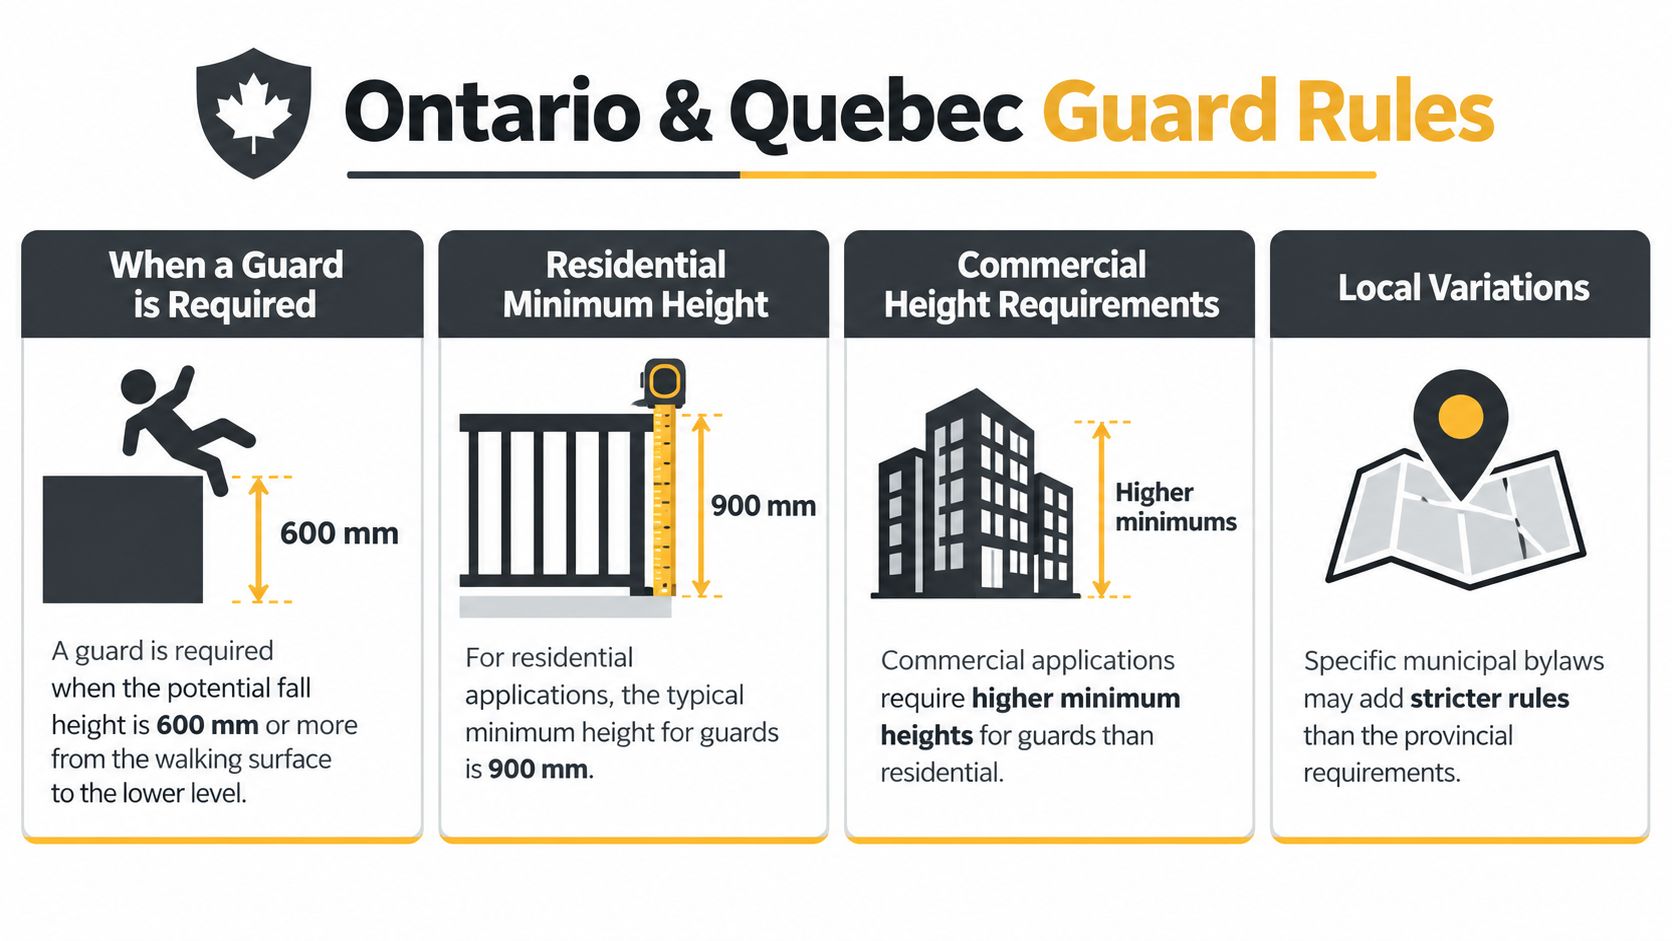
Code language sounds abstract until you translate it into measurements on your own deck. Start with the trigger. For many residential applications, a guard is generally required where the walking surface is more than 600 millimetres above the adjacent level, with a commonly applicable minimum guard height of 900 mm inside dwelling units and for certain exterior guards serving no more than two dwelling units, and exterior guards that can require 1,070 mm when the protected walking surface is higher than 1,800 mm above finished ground, as summarised in this overview of Ontario guard heights and mounting rules.
Heights, Loads, and Why Both Matter
Height determines panel ordering dimensions, so measure from the finished walking surface, not from framing or a nearby floor. Loads determine everything behind the glass. Ontario requires guards to resist prescribed horizontal and concentrated loads, and those numbers drive anchor size, spacing, and substrate choices long before anyone talks about hardware finishes.
Guard trigger: Confirm the drop beside every edge, including where grade falls away, since one side of a deck can need a guard while another doesn't.
Height category: Establish whether your guard serves a dwelling unit, a shared exterior space, or a commercial occupancy before fixing panel height.
Climbing resistance: Ontario addresses openings or attachments between 140 mm and 900 mm above the protected surface, which rules out horizontal elements a child could climb in that zone.
Safety Glazing Is Not Optional Décor
Ontario requires glass in guards to be laminated or tempered safety glass conforming to CAN/CGSB-12.1, with Supplementary Standard SB-13 governing glass in guards more broadly. Laminated glass holds together after breakage because of its interlayer, while tempered glass is strong under static loading but can be vulnerable to shattering under concentrated impact. Substituting ordinary annealed glass is a common failure mode, and it's never a saving worth making.
Glazing near stairs catches people out. Glazing extending to less than 1,070 mm above stairs, ramps, or landings generally must be protected by a guard or designed to withstand guard loads, and inside dwelling units the corresponding trigger is 900 mm. Flag low windows at stair runs before ordering, because a window can become a guard obligation.
Pool areas layer enclosure rules on top of guard rules, so treat them as a related but separate compliance exercise, as covered in this guide to glass pool fence requirements and installation. If you can describe your project in these terms, drop height, guard height, occupancy, and substrate, your first call with an installer or engineer gets productive immediately.
Site Prep and Substrate Review Before You Order Glass
Walk the site the way an installer does, tape in hand, before anyone quotes panel sizes. For an Ottawa-Gatineau glass railing installation, begin with a code classification and substrate review rather than selecting hardware first, identify whether the guard serves a dwelling, stair, balcony, deck, assembly area, or egress route, verify the required guard height and opening limitations, and then have the supporting deck, stair stringer, slab edge, or framing checked for the specified guard reactions, following the Ontario Building Code regulation for guards and related provisions.
Reading the Structure Under the Finish
Finished elevations come first, because guard height is measured from where feet land. Note deck board thickness, tile build up on balconies, and any future resurfacing plans, since adding material later effectively lowers your guard. Then find out what lies under the finish, joist layout and blocking on wood decks, reinforcement and thickness on concrete, stringer material on stairs.
Point loads are the concept owners underestimate. A spigot or post concentrates the guard reaction into a small footprint, and that force has to land in framing or reinforced concrete capable of receiving it. Anchoring into deck boards alone, or into a slab edge without adequate edge distance, produces movement you can feel and an inspector can reject.
If the substrate can't take the reaction, you don't have a hardware problem. You have a framing or concrete problem, and it's cheaper to solve before glass exists.
A Pre-Fabrication Checklist That Separates Quotes From Designs
Finished elevations confirmed: Measurements taken from final walking surfaces at every run, stair, and landing.
Substrate identified: Framing members located and marked, or concrete thickness and condition verified at anchor lines.
Edge setbacks checked: Anchor positions tested against manufacturer edge distance and spacing requirements, not eyeballed.
Transitions planned: Corners, gates, stair angles, and panel joints laid out as one arrangement, since panel widths depend on where supports can land.
Documentation assigned: A clear answer on who supplies engineered details and who submits what for permit.
On local projects, an installer such as FenceScape handles site measurement and system selection as part of planning, which reflects how the work should sequence regardless of who you hire. What you want from any contractor at this stage is specifics, where anchors land, what they land in, and which drawing says so. Vague reassurance here becomes expensive improvisation later.
Choosing an Anchoring and Mounting Method for Ottawa Conditions
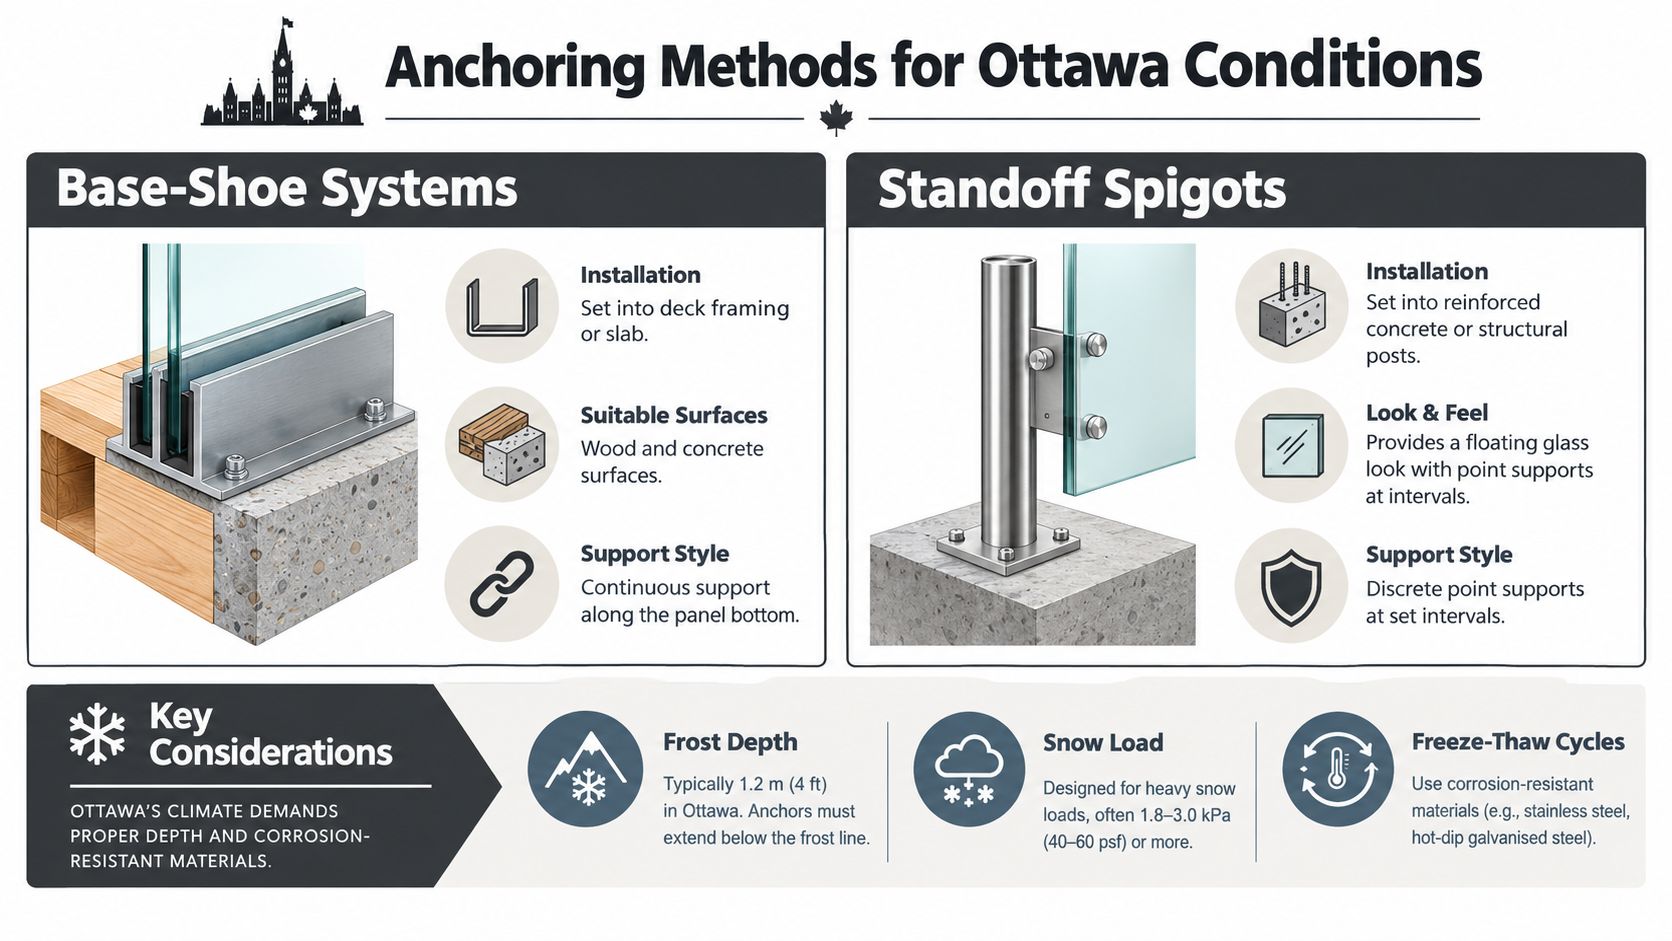
Four families of systems cover most Ottawa work, and none of them wins everywhere. Ontario's Building Code requires glass in guards to conform to Supplementary Standard SB-13, and Ottawa's technical guidance specifies that glass in a guard is supported within a structural framework, anchored, and provided with a continuous protective top rail whose framework supports the glass edge, with the glass required not to be in direct contact with metal or other hard elements, as detailed in the SB-13 glass in guards requirements. Judge each mounting method against that framework idea, plus your substrate.
Comparing the Main Options
System | Best Substrate | Watch For |
|---|---|---|
Base shoe | Concrete slabs, well blocked wood framing | Drainage and freeze thaw in the channel |
Standoff spigots | Reinforced concrete, structural posts | Point loads and edge distance |
Side mounted brackets | Slab edges, stair stringers | Fascia strength, usable deck width gained |
Posts with clamps | Varied framing, retrofit decks | Clamp torque and gasket condition |
Base shoe systems give continuous support along the panel bottom and the cleanest frameless look. They also collect water if drainage paths block, so in Ottawa they demand weep detailing and a substrate that won't move seasonally. Standoff spigots float the glass and shed debris more easily, but each fitting delivers a concentrated reaction that needs real structure behind it.
Side mounting preserves deck surface and keeps anchors out of standing water, which is useful on balconies. It only works where the slab edge or stringer has the depth and strength for the bracket pattern. Posted systems with clamps tolerate the most site variation, suit retrofits where framing is unpredictable, and give the continuous top rail a natural support rhythm, at the cost of visible verticals.
If you're comparing hardware families across suppliers, reviewing how railing for decks is organised by mounting type helps you learn the vocabulary before talking to a local engineer about your substrate. One caution applies to every option, glass must never bear directly against metal, so compatible gaskets and isolating materials at every contact point are part of the system, not accessories.
Decide on bird safe glazing or visual markers at this stage too, since patterned or marked panels are fabricated, not added later. A slightly visible panel on a flyway facing deck is a design decision you make once, on paper, rather than a retrofit after the first collision.
Anchoring, Setting, and Aligning the Panels on Site
Site work starts with paper, not a drill. The installation workflow should confirm the occupancy-specific load category, obtain the glass make-up, interlayer, thickness, support condition, and tested or engineered system documentation, verify edge quality before handling, protect glass from metal-to-glass contact, torque fittings progressively and evenly, and perform a documented final check, as described in National Research Council guidance on glass in guards. If that documentation isn't on site, anchors shouldn't be drilled.
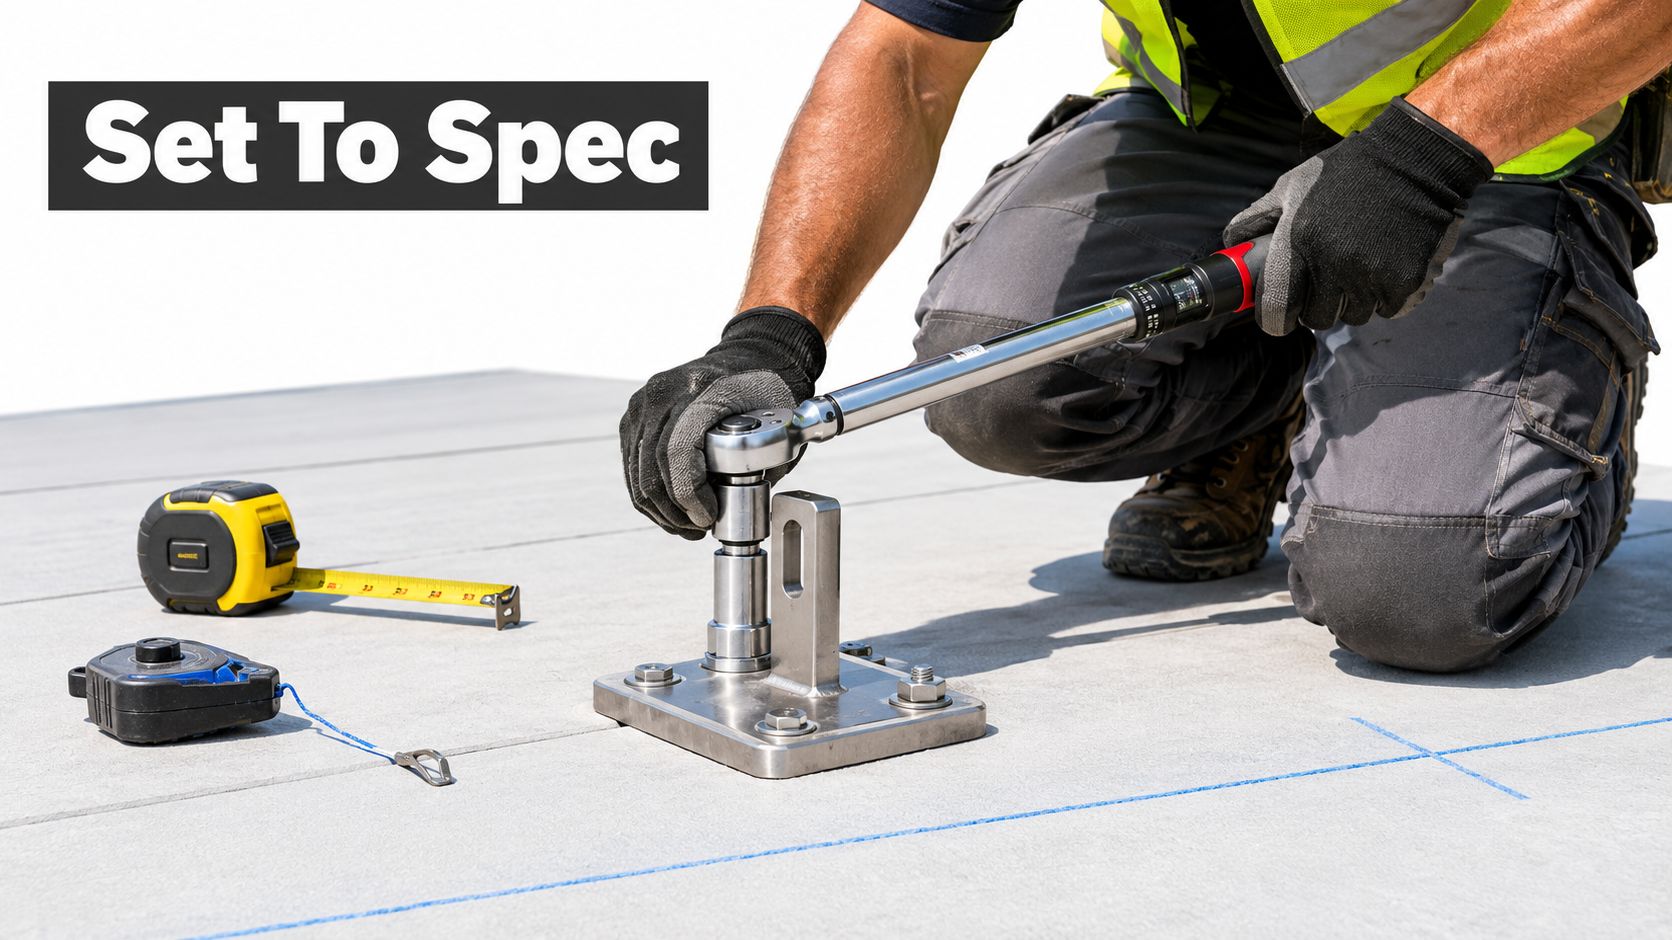
Here's a close look at the torque stage, where anchor work either matches the engineering or departs from it.
Anchors First, Glass Second
Layout follows the manufacturer's embedment, spacing, and edge distance tables for the specific anchor, whether mechanical or chemical. Crews mark anchor lines from the layout drawing, confirm they hit the framing or concrete identified during site prep, and only then drill. Torque gets applied to specification and ideally logged, because an anchor that feels tight and an anchor torqued to spec aren't the same thing.
Setting panels is a handling exercise as much as a fitting one. Edges get inspected before lifting, setting blocks and isolation gaskets go in so glass never touches metal, and panels are plumbed and aligned before final tightening. Clamps come up progressively and evenly across a panel, since over tightening one fitting is a recognised way to stress glass.
This walkthrough shows the setting and alignment rhythm on a real installation, including how panels are handled before final tightening.
Two rules deserve emphasis. Never field drill or notch tempered glass, since it can't be cut after tempering and attempting it destroys the panel. And keep weep paths open as you seal and finish, because neat silicone work that blocks drainage creates the winter problems covered next.
Interim checks happen panel by panel, not at the end. A crew that checks plumb, gaps, and hardware snugness as each panel lands can correct a drifting line cheaply, while a crew that waits discovers alignment errors after everything's tight. The same discipline applies to conventional guards, as this overview of deck railing installation sequencing shows for non glass systems.
Weatherproofing, Drainage, and Winter Performance
Five winters in, the railings that still look good in Kanata or Gatineau share habits, not luck. Correctly designed safety glass can withstand expected winter conditions, but edge impacts, excessive loads, and ice accumulation can affect the system, and guidance recommends snow brooms or plastic shovels while avoiding impacts to panels, edges, and fasteners, as noted in this Canadian guide to installing glass railings on decks. The glass tolerates cold. Careless ice removal is what hurts systems.
Water, Salt, and Ice Do the Real Damage
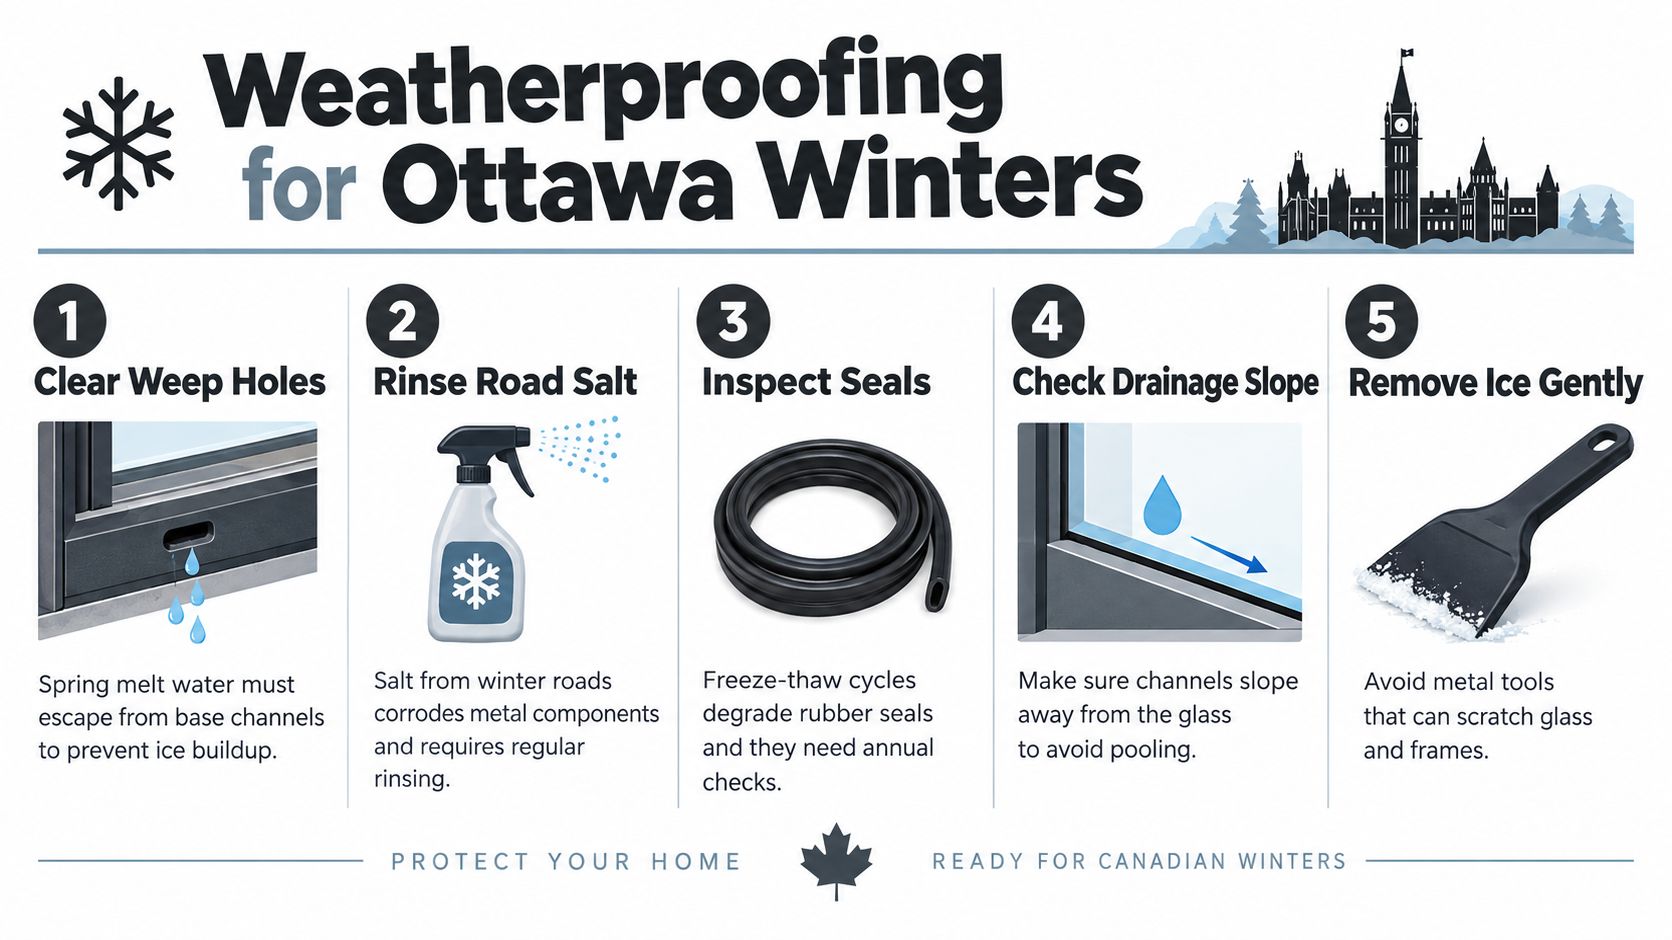
Drainage comes first. Base channels need their weep paths kept clear so melt water escapes instead of freezing in the shoe, expanding, and working on seals and setting materials. Check drainage slope at installation and again each spring, since pooling water at the glass edge is a slow, preventable problem.
Road salt migrates onto decks on boots and wind. Rinse salt from metal components regularly through winter, because fasteners, clamps, and finishes corrode under residue. Sealant condition matters for the same reason, and if you want background on how exterior sealants age and fail, South Mountain Window Cleaning's sealant guide explains the inspection basics that apply around glazed assemblies generally.
Clear snow gently: Use a snow broom or plastic shovel, never a metal edge against glass or fittings.
Never chip ice off panels: Work ice loose from the deck side and let panels shed on their own.
Inspect after impacts: A struck edge, a shifted panel, or new movement warrants a professional look, not a wait and see.
Freeze thaw cycles also test anchorage, which is why anchor choice and edge distance from earlier decisions show their value in year three, not week one. Year round exposure logic applies across exterior boundary products, something covered more broadly in this look at all season fencing performance.
Bird safety belongs in this conversation. Ottawa's bird safe design guidance flags clear glass railings as collision hazards and points toward bird safe glass or visual markers. Maximum transparency and wildlife safety conflict, and a subtly patterned panel often performs better in practice than invisible glass on a deck birds cross daily.
Final Check, Documentation, and Ready-for-Use Sign-Off
A finished railing and a ready railing aren't identical. The final walkthrough checks every panel for chips, scratches, and edge damage, confirms fastener torque against the log, tests for unexpected deflection, audits gaps against opening limitations, and verifies water can leave the base channel. Handrail continuity and alignment get checked along the full run, including corners and stair transitions where small errors hide.
What to Keep on File
Engineered drawings: The stamped design showing loads, anchor points, and glass specification.
Glass records: Supplier documentation for make-up, interlayer, and thickness as installed.
Anchor torque log: Evidence fittings were installed to specification, useful for inspections and future work.
Sign off records: Permit approvals and any commissioning confirmation from the installer.
Ready means documented. If a future inspector, insurer, or renovation crew asks how the guard carries its loads, your file should answer without anyone guessing.
That closes the sequence this guide built, code classification first, substrate second, engineered connection third, careful setting fourth, and documented verification last. Follow that order and the transparent finish you wanted at the sketch stage arrives attached to a guard that can prove it belongs there.
If you're planning a glass railing for a deck, balcony, or pool surround in Ottawa-Gatineau, FenceScape can help you work through site measurement, system selection, and installation with its own crew from planning to final walkthrough. Reach out for a free estimate and bring your measurements, photos of the substrate, and permit questions, so the first conversation covers the load path as well as the look.
Comments