
Pressure Treated Wood Railings: Ottawa-Gatineau Guide

Pressure treated wood railings are a smart value choice for Ottawa-Gatineau when the fastener system matches code and the lumber is dried and finished. A guard becomes code-relevant above 600 mm (24 in), with minimum heights of 900 mm (36 in) or 1,070 mm (42 in) depending on deck height, and openings must stay within 100 mm (4 in).
A homeowner choosing a railing today usually wants three things at once: a natural wood appearance, a reasonable budget, and confidence that the assembly won't loosen after several Ottawa winters. Pressure-treated wood can deliver that combination, but only when the wood, connectors, fastening pattern, and finish are treated as one system. Standard steel screws, wet green boards, and poorly supported posts are what create many of the failures people blame on the lumber.
Why Pressure Treated Wood Railings Still Matter in Ottawa-Gatineau
A typical project starts with a homeowner comparing cedar, metal, composite, and pressure-treated wood at the supplier. Pressure-treated boards often make sense because they're available, familiar to local crews, and easy to cut around an existing deck. They also provide a practical structural material for posts, rails, and framing when the exposure classification and local guard requirements are checked first.
The trouble usually appears later. A post begins to move, a rail twists, or a screw head shows orange corrosion. In Ottawa-Gatineau, repeated wetting, drying, freezing, and thawing put stress on every joint. The wood may still have sound fibres while the connection has already lost useful holding power.
The code threshold comes first
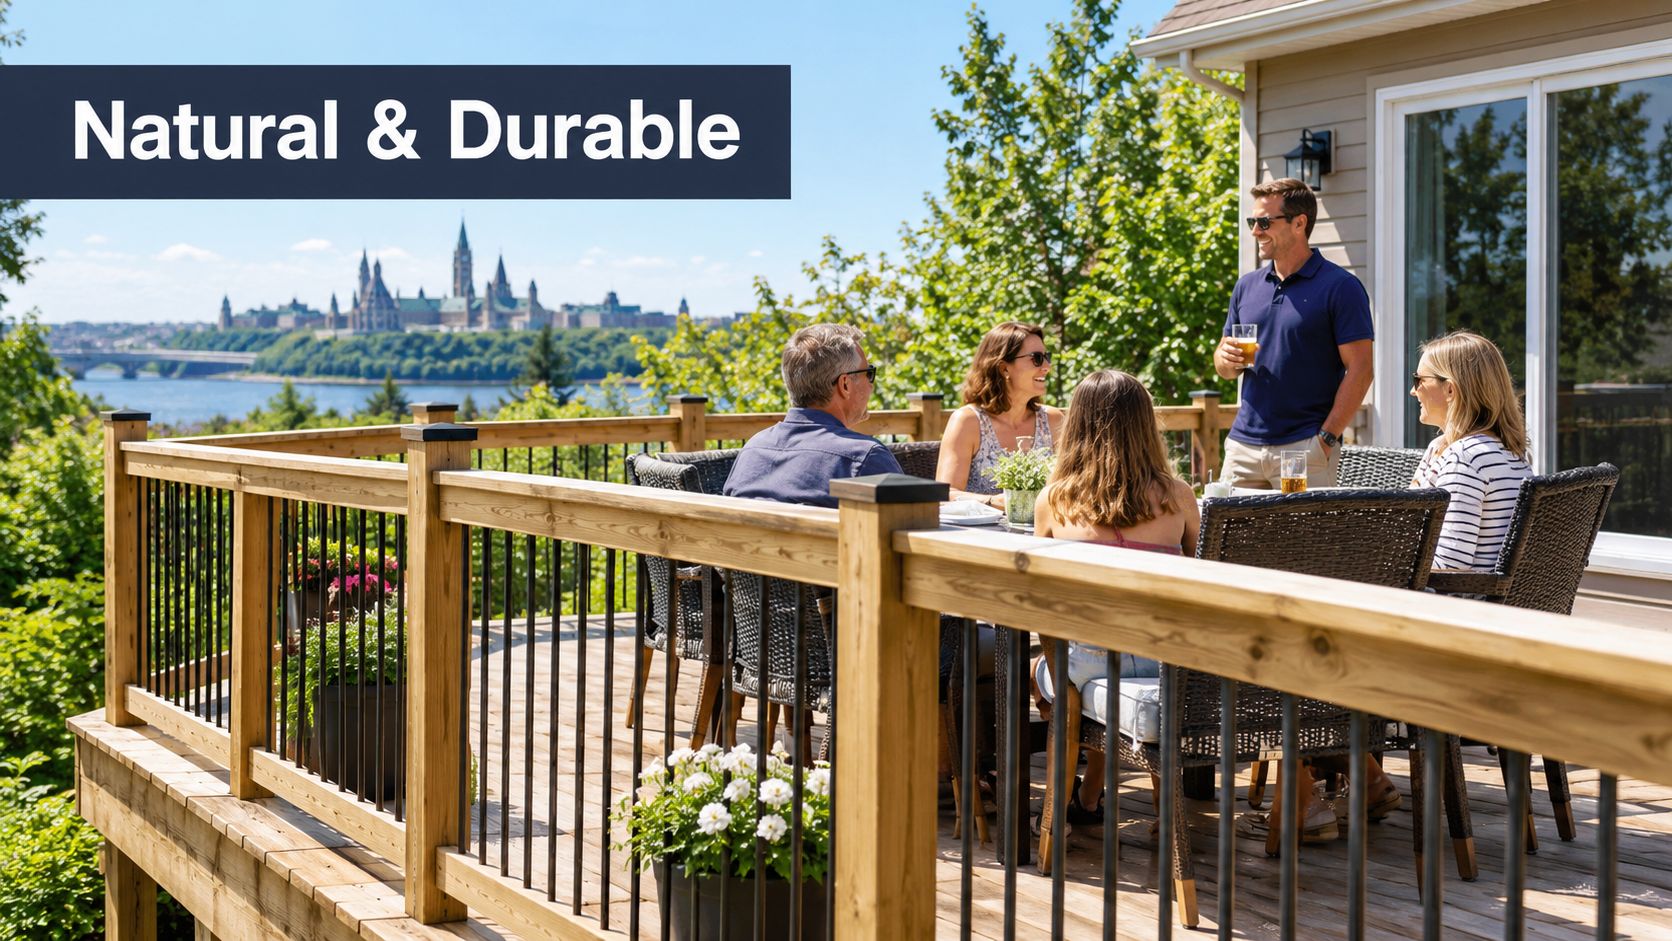
Ontario guidance requires guards above 600 mm (24 in), with a 900 mm (36 in) minimum guard up to 1.8 m (6 ft) and 1,070 mm (42 in) above that height, as outlined in the Ontario deck construction guide. Ontario guidance also calls for lumber within 150 mm (6 in) of grade to be pressure treated, which matters where railing posts or low structural members face splashback and ground moisture.
Quebec uses the same key height thresholds, requiring guards above 60 cm (2 ft.), a minimum height of 90 cm (36 in.), and 107 cm (42 in.) above 180 cm (6 ft.). Quebec guidance also specifies a 0.5 kN, or 113 lb, point side load, so post attachment isn't a cosmetic detail. It must transfer force through the rail, post, blocking, and deck structure, as explained by CAA-Quebec's guardrail safety guidance.
Practical rule: Treat the railing as a load-bearing assembly. The price of the board matters, but the connection determines whether the finished guard stays rigid.
Pressure treated wood remains a sensible choice for many residential decks because it can be specified for exterior exposure and adapted to irregular layouts. It underperforms when installers use interior-grade or incorrectly classified stock, drive incompatible fasteners, trap moisture at end cuts, or finish boards before they're ready to accept a coating.
Understanding Wood Species and Treatment Systems for Railings
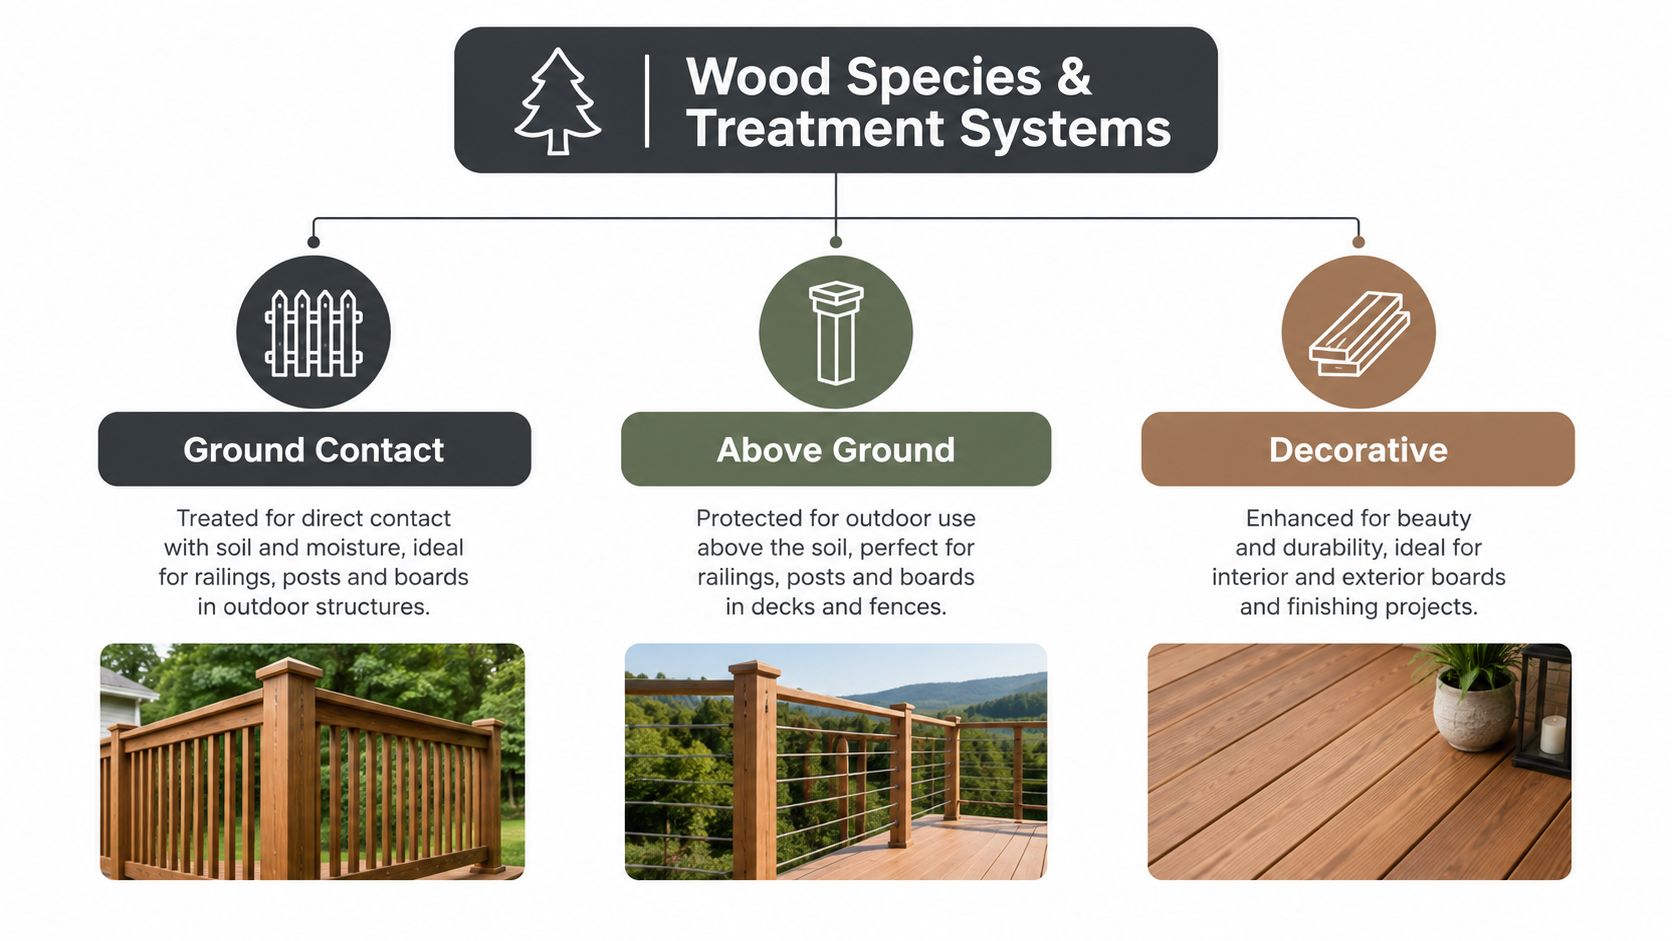
Not all treated lumber is interchangeable. A railing supplier may stock green SPF boards, treated components made with micronized copper azole, pre-drilled rails, and ground-contact posts in the same area. The label tells you more than the colour does.
Canadian requirements regulate pressure-treated wood and its preservatives under the Health Canada guidance for pressure-treated wood. For railings, use the CSA O80 use-category framework alongside applicable National Building Code requirements. The right selection depends on the member's position, moisture exposure, and expected service conditions.
Read the use category before buying
For an above-ground railing, start with these checks:
Above-ground rating: Choose stock explicitly identified for above-ground exterior use when the component stays clear of soil and persistent ground moisture.
Ground-contact rating: Use the appropriate ground-contact category for posts or members exposed to soil, standing water, or conditions that keep them wet.
Species and treatment: SPF and micronized copper azole products are common Canadian options, but the treatment system and service category still need to match the application.
End cuts: Field-cut ends expose untreated wood. Seal them with a compatible end-cut preservative rather than assuming the factory treatment continues through the new cut.
Component consistency: Rails, posts, pickets, and brackets should be selected as parts of the same exposure strategy.
The Canadian Wood Council information presented through Canadian retail guidance notes that preserved wood is commonly used for railings and outdoor applications, while NBC provisions address pressure-treated wood in both Part 4 and Part 9 construction. The same guidance states that preserved products can provide 5 to 10 times the service life of untreated wood. That advantage disappears quickly if the wrong use category or hardware is selected.
For a closer explanation of grading and selection, review this practical guide to pressure-treated lumber grades. Don't choose a board only because it's labelled treated. Confirm whether it is intended for above-ground railing work or a more demanding exposure.
How Fasteners and Connectors Control Railing Longevity
A treated post can remain solid while its fasteners lose strength. Treatment chemistry, especially copper-based preservatives, can accelerate corrosion in ordinary steel hardware. Once a screw necks down, a bracket thins, or a connector loses bearing area, the railing may feel loose even though the wood looks acceptable.
That's why pressure treated wood railings should be specified as a corrosion system. Posts, rails, brackets, bolts, washers, and screws all need compatible protection. Canadian retail guidance identifies hot-dipped galvanized fasteners and connectors at minimum for treated lumber, with stainless steel used where the exposure, design, or finish expectation justifies the premium.
Hardware choices that hold up
Hardware choice | Where it fits | What to watch |
|---|---|---|
Hot-dipped galvanized steel | A practical baseline for many above-ground treated-wood railings | Confirm the connector and fastener are intended for treated lumber |
Stainless steel | A premium option for demanding exposure or a higher-finish project | Higher material cost and the need to avoid mixing incompatible metals |
Standard interior steel | Not an acceptable shortcut for structural exterior railing work | Corrosion can reduce connection capacity before the wood appears failed |
The Canadian above-ground pressure-treated lumber guidance explains why retailers direct builders toward compatible galvanized hardware. The chemistry in treated wood can attack standard steel faster than untreated lumber would. A screw that looks adequate during installation may no longer provide dependable clamping after repeated moisture exposure.
The weakest part of a railing is often the connection hidden behind an apparently sound board.
Use connectors designed for exterior treated wood, not just any bracket that happens to fit the post. Washers should spread load without crushing the fibres, and screws should be driven cleanly rather than over-torqued until the head sinks into wet wood. Avoid burying hardware beneath filler or finish, because future inspection becomes much harder.
Seasonal movement adds another layer. Boards take on moisture, dry out, expand, and contract. A connection that starts with poor bearing or marginal penetration can loosen as the assembly moves. Good hardware won't correct a post attached only to thin decking, but the right structural attachment gives the wood room to move without turning every cycle into a loss of rigidity.
Installation and Fastening Best Practices for Deck Railings
A railing installation should begin with the supporting structure, not the decorative rail profile. Confirm that posts land on sound framing, blocking, or an engineered mounting arrangement. A post fastened only to the edge of a deck board may look straight on installation day but can flex under a side load and work the screws loose.
Build the attachment around the load
Ontario guidance addresses wood guards through prescriptive rules in Supplementary Standard SB-7, while Quebec requirements include a 0.5 kN, or 113 lb, point side load for guardrails. Those requirements make the post connection the central installation task, not an afterthought.
Use this sequence on site:
Set post locations against the guard layout. Verify the finished height and opening geometry before cutting rails or pickets.
Expose solid structure. Add blocking where the post location doesn't align with a suitable joist or beam.
Use at least two structural fasteners at each attachment point. The Ontario handrail fastening guidance specifies screws penetrating at least 32 mm into solid wood.
Keep attachment points distributed. That same guidance places fasteners no more than 1.2 m apart and requires the first fastener within 300 mm of each end.
Protect the cut and drilled surfaces. Seal exposed end grain and avoid creating pockets that hold water against the post.
Check movement before finishing. Push and pull the completed guard firmly. Any movement should be traced to the structure or connection and corrected before stain or paint hides the evidence.
Don't let the rail disguise a weak post
Rails transfer force between posts, but they don't compensate for inadequate post support. Use blocking, through-bolting, or a tested connector system where the deck design requires it. Keep fasteners aligned so they don't split narrow members, and pre-drill near board ends when the wood and connector design call for it.
The deck railing installation guide is useful for checking layout details before work begins, but kit instructions shouldn't replace local code verification. Ontario and Quebec rules differ in wording and enforcement, and municipal review may add project-specific requirements.
Site test: If the guard moves at the post, don't add a decorative cap or another rail screw. Open the connection and fix the load path.
Pressure-treated lumber also changes as it dries. Leave room for normal seasonal movement where the system design permits it, keep water from collecting on horizontal surfaces, and don't clamp wet boards so tightly that drying creates avoidable splits. A straight line on installation day is only the starting point. Rigid posts, compatible hardware, sound framing, and correct geometry create the lasting result.
Pressure Treated Wood vs Cedar vs Hybrid Railing Systems
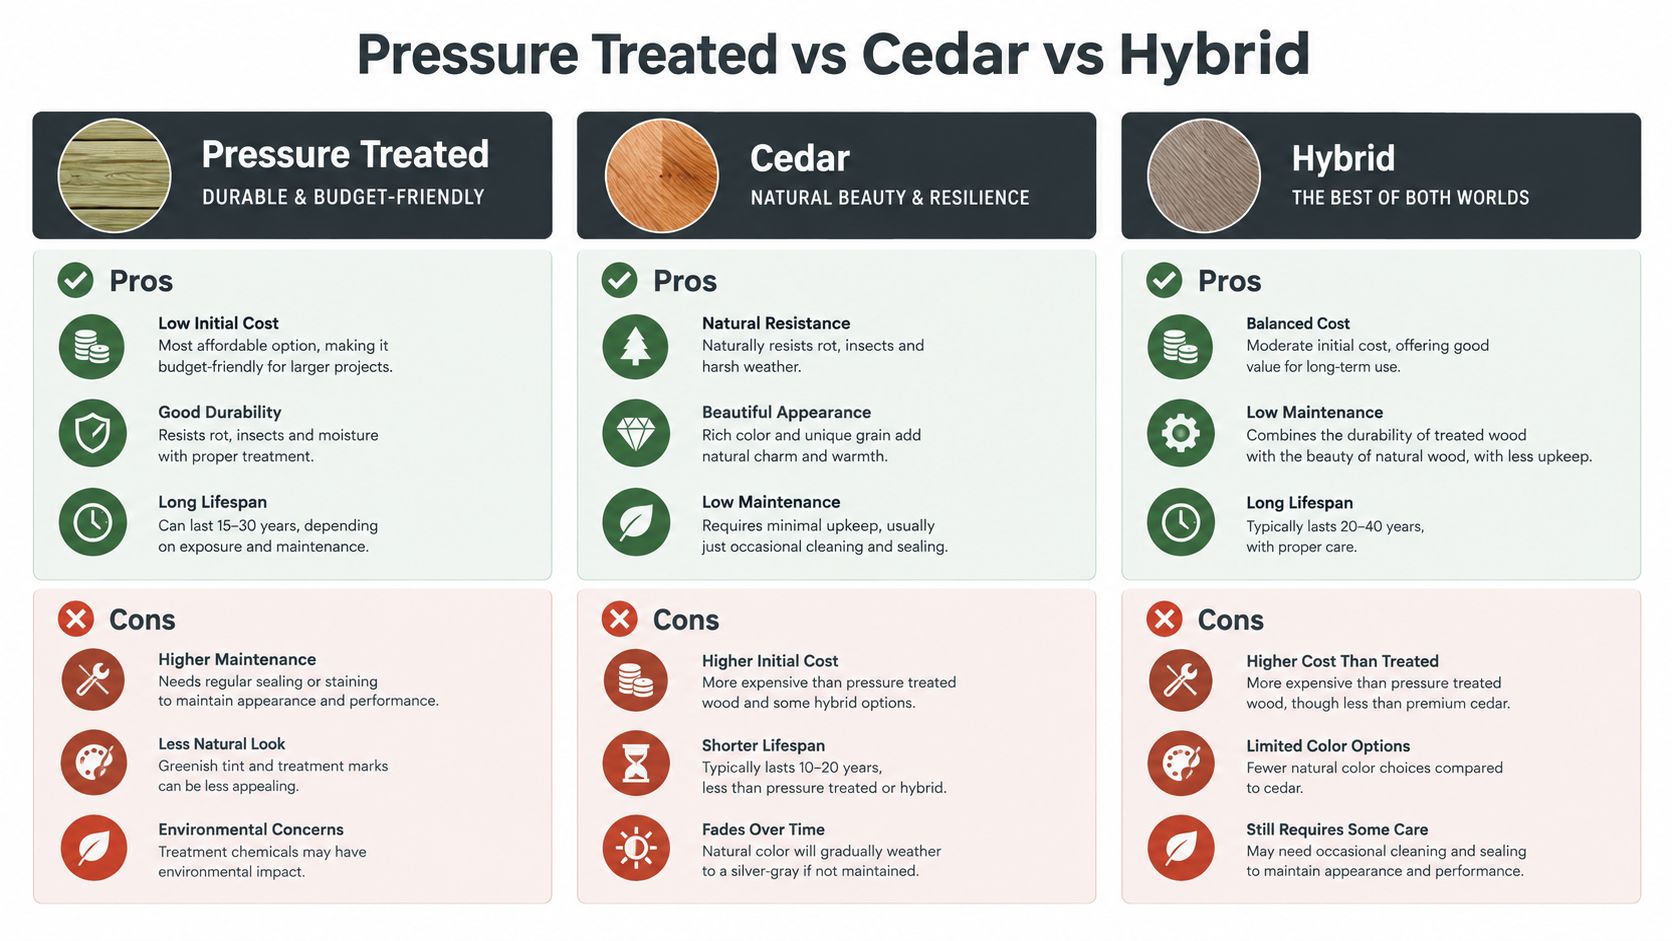
Pressure-treated wood is often the budget leader at purchase, but that doesn't automatically make it the lowest-cost railing over its full service period. The right comparison includes how soon the finish needs attention, how much colour variation you accept, how easily components can be repaired, and whether you want to do seasonal maintenance yourself.
The practical comparison
System | Upfront position | Maintenance and appearance | Ottawa-Gatineau fit |
|---|---|---|---|
Pressure treated wood | Usually the economical wood choice | Needs drying, compatible finishing, and regular inspection | Strong value when the assembly is detailed correctly |
Cedar | Often selected for its natural appearance | Can offer a refined look, but still needs moisture protection if colour and surface condition matter | Useful when appearance carries more weight than the lowest initial cost |
Hybrid wood system | Combines wood elements with engineered or metal components | Can reduce exposed wood in visible or vulnerable locations | Worth considering when appearance, rigidity, and maintenance balance matter |
Pressure-treated wood can outperform cedar over 5 to 10 years when the project prioritises structural practicality, readily available replacement parts, and a finish strategy the owner will realistically maintain. Cedar may make more sense when the natural colour, grain, and tactile finish matter enough to justify a different purchase and care decision. Neither system is maintenance-free in an Ottawa climate.
Hybrid systems can shift the maintenance burden rather than eliminate it. A steel element may reduce twisting or provide a cleaner structural line, but it still needs corrosion-compatible detailing where it meets treated lumber. Engineered components also bring manufacturer-specific spacing, fastening, and replacement rules.
Choose for the finish you can sustain
The most expensive mistake is choosing a material for its first-day appearance while ignoring the work required to keep it that way. Pressure-treated wood may start green or uneven in colour, and wet stock shouldn't be rushed into a coating. Cedar offers a warmer initial look, but it still weathers and absorbs moisture. Hybrid systems offer consistency, though their coordinated parts can be less forgiving during repairs or custom alterations.
For a homeowner comparing options, ask three direct questions:
Will the railing stay above ground and receive the correct treatment category?
Will the owner inspect and refinish exposed wood when needed?
Does the contractor provide a clear hardware and attachment specification?
The best value is the system that matches those answers, not the one with the lowest board price.
Finishing, Drying, and Winterizing Railings for Canadian Weather
Fresh pressure-treated lumber is often too wet for immediate painting or staining. A finish applied before the boards dry can peel, trap moisture, or produce an uneven result. Let the lumber stabilise in a protected, ventilated condition, then follow the coating manufacturer's moisture and application requirements.
Start with exposed end grain, cut edges, screw penetrations, and the underside of horizontal rails. These areas take on water quickly and deserve attention before the broad faces. Use a compatible exterior sealer or stain, and avoid creating flat ledges where snow and meltwater can sit against the wood.
For guidance on timing and preparation, this resource on when to paint pressure treated wood helps explain why drying comes before coating. Paint can provide the desired colour, while a penetrating stain may be easier to maintain on a railing that moves seasonally. The correct choice depends on the product system and the finish expectation.
A simple seasonal routine
After winter: Push each guard section, inspect post bases, and look for rust staining, split grain, and lifted screw heads.
After heavy rain: Check horizontal rails and post connections for standing water or darkened end grain.
Before finishing: Clean the surface, allow adequate drying, and test the coating on an inconspicuous area.
Before snow season: Clear debris from the deck edge and confirm that drainage paths remain open around posts.
The pressure-treated wood maintenance guide offers additional care considerations for exterior treated wood. Winterising isn't about wrapping a railing. It's about removing moisture traps, catching connection movement early, and keeping the finish from becoming the only barrier against water.
Key Takeaways and Decision Checklist for Pressure Treated Wood Railings
Pressure treated wood railings remain a practical Ottawa-Gatineau choice when the project treats material selection and installation as one decision. The wood needs the right exposure category, the guard needs to meet local requirements, and the hardware needs protection compatible with treated lumber.
Before ordering materials or accepting a quote, check the following:
Code geometry: Confirm whether the deck is above the 600 mm (24 in) threshold and verify the required guard height and opening limit using local guidance.
Exposure category: Confirm that every post, rail, and low member is rated for its actual moisture exposure.
Connection design: Ask whether the specification uses hot-dipped galvanized or stainless hardware compatible with treated wood.
Solid structure: Verify that posts attach to blocking, beams, or another sound structural support, not only to deck boards.
Fastening mechanics: Confirm the attachment pattern, screw penetration, and end distances before the rail is covered with finish.
Drying plan: Ask when the lumber will be coated and how the installer will protect exposed cuts.
Maintenance ownership: Decide who will inspect, clean, seal, or refinish the railing after winter.
A DIY kit can work when the deck structure, local code, hardware, and installation details are fully understood. Contractor installation makes more sense when posts need structural correction, the deck is high, or the project combines wood with steel, PVC, glass, or other railing components.
FenceScape designs and installs pressure-treated wood fencing and exterior railing-related systems across the Ottawa-Gatineau region, with options for wood, hybrid, PVC, ornamental iron, chain link, and glass applications. Visit FenceScape to request a project discussion that covers layout, material selection, compatible hardware, installation, and post-install support.
Comments