
Fence Repair Guide for Wood, PVC, Chain Link and Iron

The first warm weekend of the year is when a fence tells you what it's been doing all winter. You push the gate open and it drops half an inch, the latch no longer catches, and three posts along the back run lean the same way, as if something pushed them from behind. Nothing looks broken enough to panic over, so it waits until fall.
A leaning fence is rarely a fence that needs replacing. It's usually a fence that needs one specific thing corrected below the ground, and everything else follows from naming that thing correctly. The difference between a repair that lasts ten years and one that fails by August is almost never the board you fasten; it's whether you diagnosed the footing, the fastener and the local rule before you spent a dollar on materials.
Diagnose the Damage Before You Pick Up a Tool
The gate drags on a dry Tuesday, and by the weekend three posts along the same run lean the same way. Stop there. Name the cause before you buy a board: frost movement, a failed footing, or an enclosure that no longer meets the local repair standard. That call decides whether you fix it this week, mark it and wait for the thaw, or hand the run to a contractor.
A leaning post is a footing problem until the base proves otherwise. Push the top and watch the soil line. If the whole post rocks, new boards on it last one season. If the post stays put while a panel sags or a rail pulls free, the fasteners or the rails have failed. Same lean on the surface. Two different jobs underneath.
Work from the cause and the shopping list gets shorter. Match what you see, then treat the first repair as the minimum, not the finished job.
Symptom | Likely cause | First repair |
|---|---|---|
Leaning post | Frost heave or rot at the footing | Reset or replace the post and footing |
Gate drags or will not latch | Sagging hinges or a shifted gate post | Tighten or rehang hinges, then reset the post |
Split or soft wood boards | Moisture and unsealed wood | Replace the boards and reseal |
Rust or flaking coating on iron | Coating failure at joints | Wire brush, prime and repaint |
Loose chain link fabric | Failed tension band or tie | Re-tension the fabric and replace ties |
Cracked PVC panel | Impact damage | Replace the panel section |
Walk the run with a level and a notebook
Sight every post from two directions. A post can look plumb from the street and lean hard when you crouch and look down the line. Only that second view shows a whole run going over together. Press each rail and panel at the joint. Movement there points at the fastener or the post, not the board.
Write the findings down post by post, in order along the fence. That list is your scope, your shopping list, and the record if a neighbour, an insurer, or an inspector asks what condition the fence was in. Photograph every defect with a tape measure held in the frame, since a photo without a scale proves almost nothing. A measured photo log with measurements in frame answers the first three questions any contractor asks, and it's the kind of detail that lets a fencing company turn customer inquiries into booked appointments instead of trading voicemails for a week.
What Ottawa expects of a fence that stays up
Ottawa does not leave a sound fence to taste. Property Standards By-law No. 2013-416 requires fences and other residential enclosures to be kept in good repair and free from accident hazards. It also requires protection with paint, preservative, or another weather-resistant material. Cedar, redwood, and treated wood are specifically exempt from that coating rule. Unstable posts, broken rails, hazardous protrusions, and weather-related deterioration are upkeep matters with a legal edge, not cosmetic preferences. The same by-law requires unsightly markings, stains, and graffiti to be removed, with refinishing where necessary.
A proper assessment weighs surface protection alongside structure. Replacing the three cracked boards and leaving bare wood to soak up the next two winters fails that test.
The footing rule: if a post rocks in the ground, the repair starts below grade. Every time.
Frost decides whether you fix it now or wait
Ontario does not publish a single frost depth for the whole province. The Ontario Building Code requires the depth of frost penetration to be established using local experience, so the number that matters is the one your area's posts and footings are built to. Ottawa's pool-enclosure guidance goes further and specifies non-frost-susceptible posts (City of Ottawa pool enclosure brochure). On a pool fence, frost performance is a safety property, not a comfort feature. A gate that no longer closes because the post has heaved is a compliance problem, not a hinge adjustment.
Read the pattern before you reset anything. If several neighbouring posts lean the same way, suspect frost movement or washed-out soil rather than one bad post. A gate that binds only during the freeze-thaw weeks is telling you the same thing. So is water pooling at a post base after rain.
If a post comes back plumb after the thaw and the soil around it is firm, mark it with tape and check again after the next cycle. If it rocks, if the concrete collar has lifted, or if soil has washed away from the base, rebuild the footing now. Waiting until spring on a footing that has already heaved means paying for the same repair twice.
Then set the scope: one panel, the section between two posts, or the whole run. If most posts along a stretch are failing, patching individual boards returns the same problem every year. The honest repair is a rebuild of that run, with posts and rails renewed in one pass.
Check Permits and Property Lines Before You Dig
The most expensive fence repair is the one dug in the wrong place. A post set 200 mm onto a neighbour's side of the line, or a panel that closes off a deeded right of way, turns a straightforward fix into a boundary dispute that outlives the fence. Settle the line before the digger comes out.
When adjoining owners can't agree on a shared boundary fence, Ontario provides a formal route. Under the Line Fences Act, an owner may notify the clerk of the local municipality using the prescribed form and ask fence-viewers to inspect the fence and arbitrate what portion each owner must construct, repair, reconstruct, maintain and keep up. It's an escalation path, not a first move: document the defect, put your request in writing to the neighbour, and only then approach the municipality.
Fence-viewers won't tell you where your property ends. As Ontario's plain-language guide to line fences makes clear, boundary questions need the owners themselves, usually with legal advice and a professional survey. Some municipalities have by-laws exempting all or part of their area from the Act and assigning line-fence costs another way, so confirm the local rule before assuming the statutory process applies to you.
Four checks before any post hole opens:
Survey the line: find the pins or the survey plan, and keep the new post on your side of it.
Check setbacks: front and side yard setbacks differ, and a replacement that sits closer than the original can fail an inspection.
Call for locates: buried gas, hydro, telecom and water services get marked before you dig, at no cost to you, and it takes a few days to book.
Confirm whether this is a pool barrier: a repair that touches a pool enclosure is regulated differently from a backyard privacy fence.
In Ottawa, replacing an ordinary residential fence generally doesn't need a building permit, but the work still has to meet Fence By-law 2003-462, including the good neighbour rule that the more attractive side faces the neighbouring property and the street (Ottawa's building permit FAQ). Pool enclosures are the big exception: the city requires a pool-enclosure permit even when an existing yard fence already surrounds the pool, and a permit is required when the enclosure is replaced.
Temporary construction fencing is regulated separately again. The City's construction fencing guide sets a standard minimum height of 1.8 metres measured from the grade outside the enclosure, allows a reduction to 1.2 metres only in narrow circumstances, and requires removal no more than 30 days after construction or demolition is complete.
Tools and Materials for Each Fence Type
Assemble the kit before you buy a single board. Most repairs on any fence type need the same base: a post level, a drill with driver bits, a tape measure and a string line for alignment. Everything else is material-specific.
Fence type | Tools | Materials |
|---|---|---|
Wood | Post level, drill, circular saw, pry bar, post-hole digger | Cedar or pressure-treated boards, galvanized screws, post repair anchor, exterior sealer |
PVC | Rubber mallet, drill with bits, screwdriver, fine-tooth saw | Matching PVC panel or rail, stainless screws, PVC cleaner, joint sealant |
Chain link | Fence stretcher, tension bar, bolt cutters, tie wire tool | Chain link fabric, tension bands, rail sleeves, tie wire |
Ornamental iron | Wire brush, angle grinder with cutoff wheel, level | Rust-inhibiting primer, metal topcoat, replacement pickets, galvanized fasteners |
The item each type forgets
Wood: exterior-rated fasteners. Galvanized or stainless screws cost more and don't rust, and they don't leave the black streaks that standard screws weep into cedar within a season.
PVC: a rubber mallet and the right expansion gap. A steel hammer cracks a panel, and a panel installed tight against a post has nowhere to go when it expands in July.
Chain link: the correct tension band size. Measure the top rail diameter before ordering, because a band that's a size off will not clamp evenly and the fabric works loose again.
Ornamental iron: rust-inhibiting primer, applied and fully cured before any topcoat. Skip it and the topcoat fails at the weld joints first.
Match replacement material to what's already there. A new cedar board beside a board that's weathered grey will look like a patch from the street, and mixing metals at a bracket, such as a galvanized screw into aluminium, invites galvanic corrosion at exactly the point you need strength. Check your post-hole depth against what the existing posts show and what local practice calls for, since a shallower hole than its neighbours is a repair that moves next February. Buy about ten percent extra material for cuts and mistakes.
How to Repair Wood and PVC Fences
Brace the run before you touch it. A temporary stake or a 2x4 driven alongside the section stops the fence shifting while boards come off, and it keeps the gate post where it belongs.
Here's the sequence, from bracing to the final check.
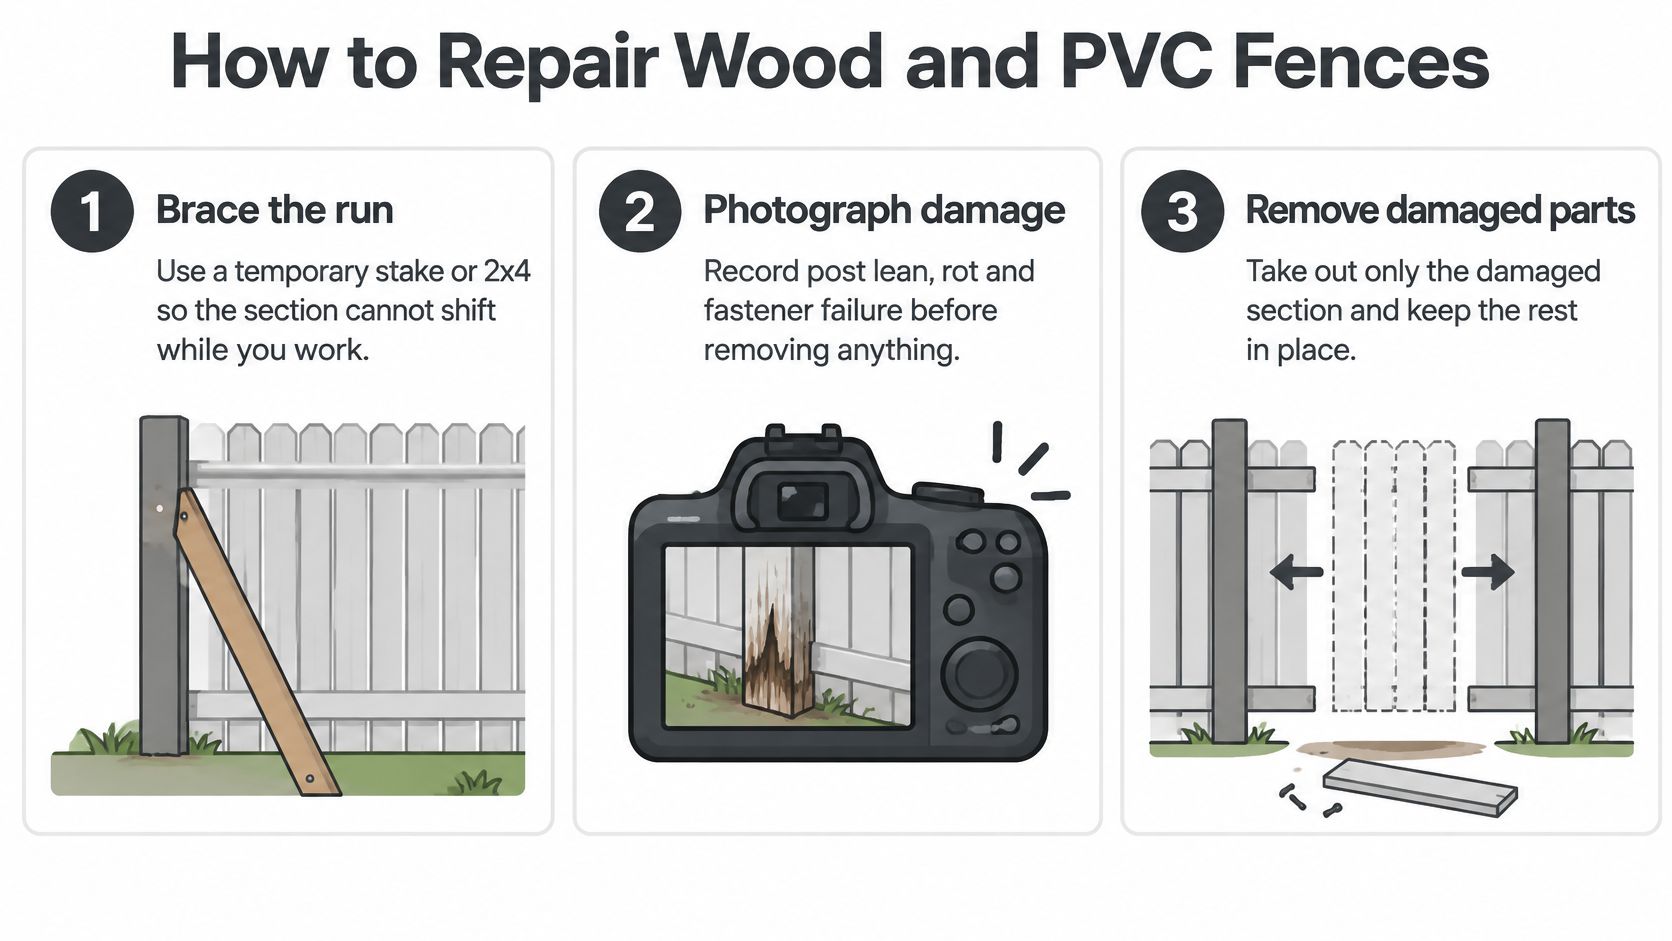
Photograph and record. Capture post lean, rot at the soil line and fastener failure before anything comes apart. Once the boards are off, the evidence is gone.
Remove only what's damaged. Keep the sound rails and panels, and label them if the run is long enough that pieces could be confused.
Dig to the footing. Expose the post base and inspect the concrete and the surrounding soil. A post soft at the soil line, or a footing that has lifted, gets replaced, not straightened.
Set the new post plumb. Check it on two faces with a level, then backfill in compacted layers with material that drains away from the post rather than holding water against it.
Fasten the rails. Two galvanized or stainless screws per end, and leave the manufacturer's expansion gap at every PVC joint.
Verify before you cover anything. Plumb, alignment, latch operation and drainage at the base. A defective footing hidden behind new boards is the costliest mistake in fence repair, because it only reveals itself after the next thaw.
Seal the cuts. Cedar and pressure-treated ends take sealer; PVC joints get a PVC-compatible cleaner, never paint.
For structural alterations, treat the job as regulated construction rather than maintenance. Ontario's Building Code framework requires work to comply with the applicable Act and code, and an inspector can require enclosed or covered work to be exposed if compliance is uncertain. Ontario's prescribed useful-life benchmark assesses wood and steel or chain-link fences at 15 years each and metal or wrought-iron fences at 25 years. Those are appraisal figures rather than guaranteed lifespans, and they're a fair signal that a fence past that age with several failing posts is a candidate for replacement rather than another round of patching. If you want the material-specific detail, this wood fence repair walkthrough covers board matching and post anchoring in more depth.
How to Repair Chain Link and Ornamental Iron
Chain link fails on tension, and iron fails on coating. Nearly every repair on either comes back to those two words, which is why the tools look so different: a stretcher for one, an angle grinder for the other.
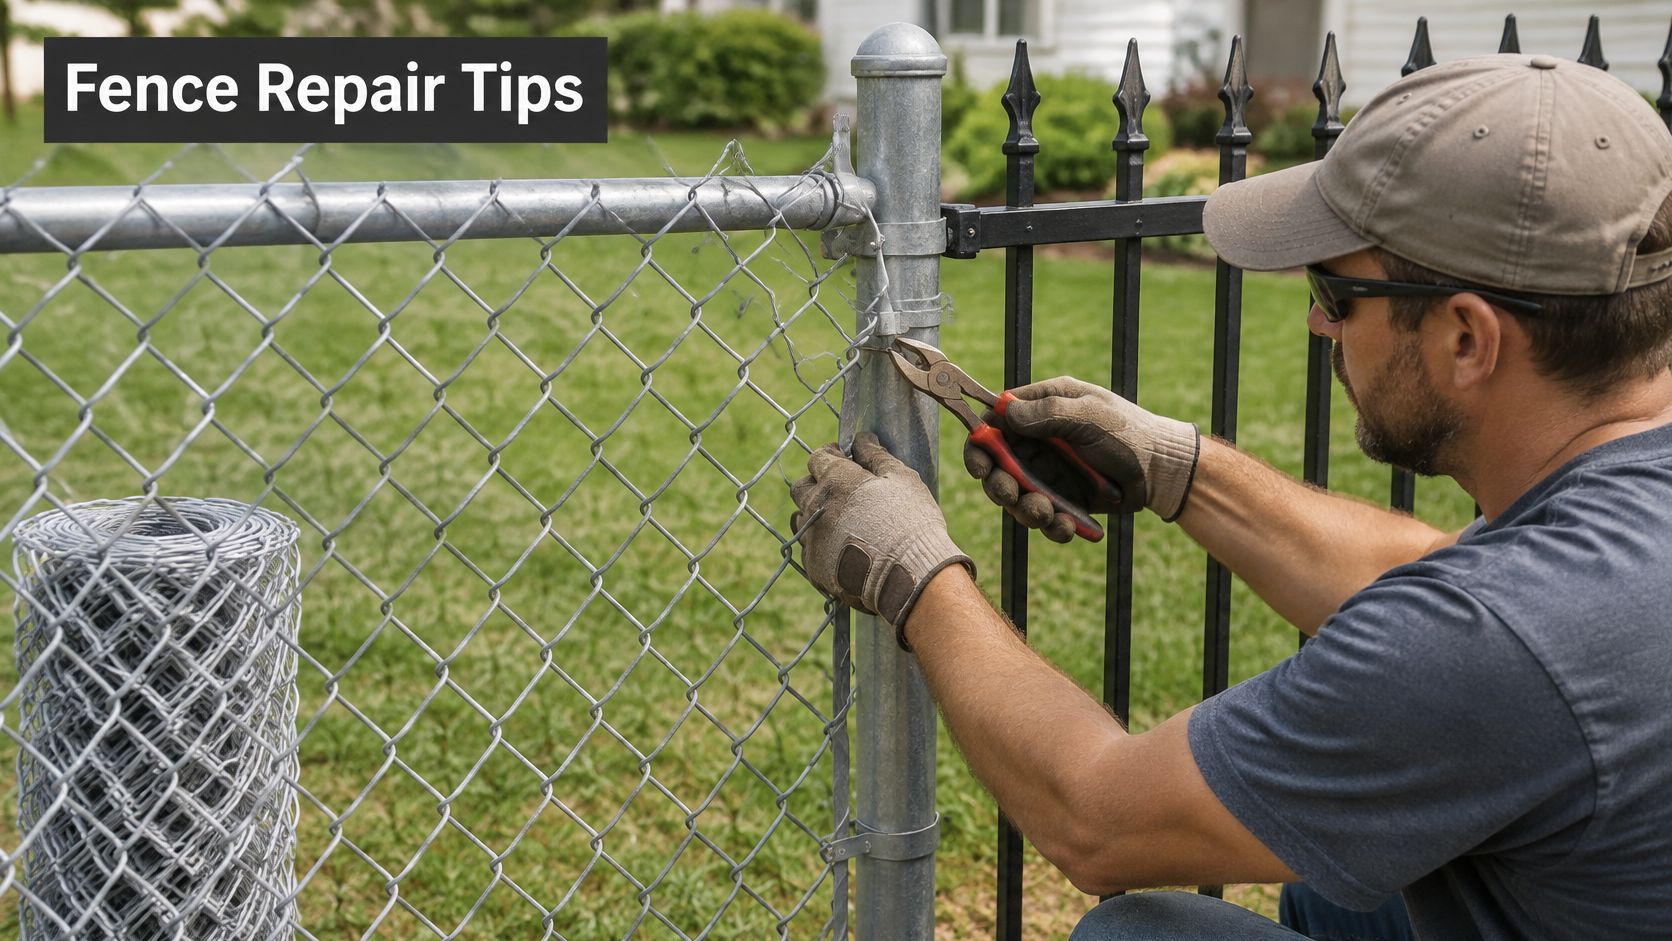
Chain link, from slack fabric to a straight top rail
Release the tension at the tension bar first, so the fabric isn't fighting you while you work. With the load off, cut the damaged fabric along a tie line and splice in a new piece, or rewire the knuckle to the top rail if the damage is confined to the top edge. Bent rail sections get replaced with sleeve couplings, never hammered straight, because a straightened rail keeps a memory of the bend and sags again under the first heavy snow.
Re-stretch the fabric with a fence stretcher and reattach it to each line post, then fit new tension bands at the spacing that suits the fence height. Tie the fabric to the rail every few links so a single cut tie doesn't let the whole panel sag.
The mistake that ends this repair within a season is reusing a distorted band or stretching against a post that's already leaning. The fabric comes up tight, the post pulls over, and the fence looks worse than it did before. Rust at the ground line is the other chain link failure worth understanding, since the bottom few inches of a post can thin away while the coating above looks intact; why chain link rusts at the base explains what to check before you decide a post is sound.
Iron, from rust bloom to a coat that holds
Wire-brush the rust back to bright metal and keep going until no flaking remains. Grind weld spots smooth, then wipe off oil and dust, because primer won't bond to either. Prime with a rust-inhibiting product and let it cure for the full time on the label, not the ten minutes you have before the weather turns.
Broken pickets come out by cutting the damaged section, welding in a sleeve or a new piece, and checking alignment against a string line. Two thin topcoats beat one heavy coat every time, since a thick single layer traps solvent and runs at the joints, which is exactly where water gets in next winter.
Here's a closer look at the tools and technique involved in a fabric repair.
The failure that shows up by the next spring is painting over rust that wasn't removed, or topcoating before the primer has cured. Both leave the coating sitting on top of a problem instead of sealing it out.
A chain link repair that isn't re-tensioned is just a tidier version of the same sag.
Pool Gate Tests and Enclosure Sign-Off
A pool gate is the one part of a fence where "it closes if you lift it" is a fail. Test it the way it will be used, with the pool open and people moving through it, and test it more than once.
The self-closing swing. Open the gate to roughly halfway and let go. It should swing shut on its own, from both directions, without a push.
The latch engagement. Confirm the latch catches without lifting, forcing or jiggling. A latch that needs a shoulder to seat is a latch that will be left open.
Repeat three times. A gate that closes once may bind after a cold morning, and the third test is the one that finds a hinge bolt backing out.
Check the gaps and height. Measure the bottom and side gaps and the enclosure height against the current municipal figures rather than a number you remember, because these limits are set by by-law and they change.
Inspect the whole repaired section. Every post, panel, hinge and fastener. Loose or missing parts get replaced before the pool is used, not after.
Ontario's public pool regulation requires a pool or spa to be closed when a required outlet cover is loose or missing, until it's repaired or replaced (Ontario's public pool regulation). That's the principle in miniature: a barrier with a defective component is closed until the component is fixed, not scheduled for later.
Before you sign off: run the gate test cold, ideally early morning, because hardware that works at 20°C can bind at 2°C.
Then close the paperwork. A pool-enclosure permit applies when the enclosure is replaced or altered, and the compliance inspection looks at whether gates are self-closing, self-latching and capable of remaining locked. Record the repaired locations, the materials, the fastener types and the gate-test results with dated photographs, so the record can be shown at inspection or at sale. The pool enclosure by-law requirements in Ottawa are worth reading before any gate or post work begins, because a repair that restores appearance without restoring compliance is the riskiest outcome available.
Cost Drivers and When to Call a Pro
Fence repair costs are driven by five things: how much of the run is damaged, the material, how hard the ground is to dig, whether a permit applies, and whether the work has to wait for warmer weather. Two quotes for the same fence can differ by a factor of two because one contractor priced a patch and the other priced a footing.
Repair scope | Main cost driver |
|---|---|
Single board or panel | Material matching and cutting |
Single post reset or replacement | Footing depth and soil digging |
Several posts or a full run | Scope, labour and permit |
Chain link tension or fabric splice | Tension bands and stretcher labour |
Ornamental iron picket welding and coating | Welding and surface preparation |
Pool enclosure or gate repair | Permit and compliance testing |
Repair it yourself when
The damage is one panel or a handful of boards, and the posts on either side are plumb and firm.
The fence isn't a pool barrier, so the work sits outside enclosure compliance.
The ground is workable, meaning you can dig a hole without a pry bar or a thaw.
Call a professional when
Several posts lean together, which points at a footing or drainage problem rather than hardware.
A footing has rotted or heaved, because resetting a post on failed support is money spent twice.
A pool enclosure or gate is involved, where the work interacts with a permit and an inspection.
Iron pickets need welding, or the fence sits on a shared line nobody can agree on.
Compare itemised quotes that separate labour, materials, removal and permit costs, never a single lump figure. Ask every contractor to put the footing condition, the materials and who carries the permit in writing, so two quotes describe the same job. We handle repairs across Ottawa-Gatineau with our own crew rather than subcontractors, which matters most when a quote depends on what's found once the first post comes out.
Post-Repair Care and Next Steps
April in Ottawa can undo a November patch. After the first freeze-thaw cycle, walk the repaired run and check three things: whether the posts are still plumb, whether the rail gaps have opened, and whether the gate latch still meets the strike. A post that drifts a few degrees is frost movement, not a finish problem. Catching it now is an adjustment. Leaving it is a second repair next winter.
Make that April walk a habit. Keep last year's photographs on your phone and compare them side by side, so new lean is separate from damage that was already there. Stained wood gets its next coat when water stops beading on the surface, not when a calendar says so. PVC only wants mild soap and water. An abrasive pad dulls the finish, so leave it in the shed.
I would hand the next step to a contractor when the work touches a pool enclosure, several posts share one failed footing, or the boards and rails you can buy will not match what is standing. Those jobs sit on frost heave, a footing that will not hold a reset, or a gate that still has to pass an enclosure test. A surface patch will not fix the cause. Bring the photographs, the symptom notes, and the gate-test results so the quote starts from those facts.
FenceScape designs and installs PVC, hybrid, wood, ornamental iron, chain link, and glass fences across Ottawa–Gatineau, and offers a free estimate. Call (613) 617-4414, or use the contact form to request a Material Quote or an Installation Quote. Visit FenceScape with your photos and measurements, and start from the cause of the failure rather than a guess.
Comments