
A Practical Guide to Fence Post Spacing
- Eric Lafleche
- Dec 1, 2025
- 11 min read
The secret to a fence that stands straight and strong for decades isn't the material—it's the fence post spacing. For most residential fences, the rule of thumb is 6 to 8 feet between posts. Getting this right is the single most important step in your project.
Proper spacing ensures your fence can withstand heavy winds, shifting ground, and daily wear. Get it wrong, and you're building in future problems like sagging rails, leaning posts, and frequent repairs. This guide provides the actionable steps to get it right the first time.
Why Post Spacing Determines Fence Strength
Think of your fence posts as the foundation of your house. If the foundation is unstable, the entire structure is compromised. Correct post spacing distributes the weight of the fence panels evenly, creating a balanced and resilient frame that resists sagging. This is especially critical for enduring the tough freeze-thaw cycles of an Ottawa–Gatineau winter.
Each post shares the load with its neighbours. Too far apart, and the horizontal rails will bow under their own weight. Too close, and the fence becomes overly rigid, unable to flex slightly with wind or ground movement, making it prone to damage.
The Goal: Strength and Durability
The objective is to find the optimal balance—a fence strong enough to resist the elements but flexible enough to adapt to seasonal changes without breaking.
Plan for Success
Before you dig, plan your spacing. A well-planned layout is the difference between a professional-grade fence and a future maintenance headache. Use the following standards as your starting point, then adjust for your specific project's needs.
Quick Reference: Standard Post Spacing by Material
Use this table to determine the standard spacing for your fence type. These are your baseline measurements before considering factors like fence height, wind exposure, and soil conditions.
Fence Material | Standard Spacing Range (Feet) | Actionable Insight |
|---|---|---|
Wood Fences | 6 to 8 feet | Use 8-foot spacing for 4-foot fences to match standard lumber lengths. For 6-foot privacy fences, reduce spacing to 6 feet for wind resistance. |
Vinyl (PVC) Fences | 6 to 8 feet | Spacing is dictated by the pre-made panels. Measure your panels' centre-to-centre distance and set posts to that exact measurement. There is no room for error. |
Chain Link Fences | 7 to 10 feet | Use 10-foot spacing for standard heights to save on posts and concrete. Reduce to 8 feet for fences over 6 feet tall or in high-wind areas. |
Aluminum Fences | 6 to 8 feet | Like vinyl, spacing is determined by the panel size. Adhere strictly to the manufacturer's specified distance to ensure panels fit and the warranty remains valid. |
As we proceed, you'll learn how to modify these standards based on your property's specific conditions.
Adjust Spacing for Your Fence Material and Height
Your choice of fence material directly impacts the required fence post spacing. A heavy cedar privacy fence exerts a much greater load on its posts than a lightweight chain link fence. Matching the spacing to the material is crucial for long-term stability.
Heavier materials require posts to be closer together to distribute the weight effectively and prevent the rails from bowing. Lighter materials allow for wider spacing. Get this balance wrong, and your fence will inevitably sag.

A stable fence begins with a plan that correctly accounts for the load from the start.
Wood Fence Post Spacing
For most wood fences, set your posts a maximum of 8 feet apart. This spacing is ideal because standard lumber rails are sold in 8-foot lengths, minimizing cuts and material waste.
However, for a tall 6-foot privacy fence, you must reduce the spacing to 6 feet. Taller, solid fences act like a sail in the wind. Closer spacing provides the necessary reinforcement to withstand strong gusts without leaning. For shorter, 4-foot picket fences, 8-foot spacing is sufficient.
Vinyl Fence Post Spacing
Vinyl fencing requires absolute precision. The system is sold in kits with pre-fabricated panels, meaning your fence post spacing is a non-negotiable rule set by the panel dimensions.
Most vinyl panels are designed for either 6-foot or 8-foot spacing. You must measure the exact length of your panels (from the centre of one post channel to the centre of the next) and set your posts accordingly. There is no tolerance for error. For more details on this material, review our guide to plastic and vinyl fence solutions.
Pro Tip: Before setting any posts, physically measure the vinyl panels you have on hand. Do not rely solely on the specifications on the box. A minor manufacturing variance can make installing the final panels extremely difficult.
Chain Link Fence Spacing
Chain link is lightweight and its open mesh allows wind to pass through, eliminating the "sail effect." This allows you to set your posts farther apart.
A spacing of up to 10 feet is standard and structurally sound for most residential chain link fences. This wider spacing saves time and reduces costs for posts and concrete. If you are installing a security fence over 6 feet tall or if your property is in a high-wind area, it's wise to reduce the spacing to 8 feet for extra stability.
Aluminum and Ornamental Iron Fencing
Similar to vinyl, ornamental aluminum or iron fences are sold in pre-sized panels. The correct fence post spacing is determined by the length of these panels, typically 6 feet or 8 feet.
These fences are designed for aesthetics, and their open structure means wind load is not a concern. The manufacturer has engineered the system to support the panel's weight at the specified distance. Follow their guidelines precisely. Deviating from the instructions can void the warranty and result in an unstable fence.
How Wind, Soil, and Gates Change the Rules
Standard spacing guidelines are a starting point. Real-world conditions like wind, soil type, and the inclusion of gates require adjustments to ensure your fence is truly durable. Adapting your plan to these factors is what separates a good fence from a great one.
A tall, solid privacy fence catches wind like a sail, creating immense force that pushes against the posts. This "sail effect" is a primary cause of fence failure.
If your property is in an open, windy location, the standard 8-foot spacing is inadequate for a 6-foot privacy fence. To counteract the wind load, you must reduce your fence post spacing to 6 feet. This adds more anchor points, dramatically increasing the fence's ability to resist pressure.
Assess Your Soil Conditions
The soil in your yard is as critical as the wind. Loose, sandy soil offers poor support compared to dense, heavy clay.
Loose or Sandy Soil: This soil provides little grip, making posts more likely to shift. To compensate, dig deeper and wider post holes to create a larger concrete footing. You must also reduce your post spacing to 7 feet or less to distribute the fence's weight over more anchor points.
Dense Clay Soil: Clay provides excellent stability, gripping the concrete footing securely. In stable clay, standard 8-foot spacing is generally adequate, provided high winds are not a major factor.
Understanding wind load is essential, especially if you plan to attach elements like wind resistant outdoor mesh banners for fencing. The same principles of force apply, making a solid structural plan non-negotiable.
Reinforce Your Anchor Posts
Corner posts, end posts, and gate posts are the structural anchors of your fence. They bear uneven and constant tension from the fence line and require special reinforcement. Standard spacing rules do not apply to their placement or installation.
A corner post is pulled in two directions simultaneously. A gate post supports the dynamic weight of a swinging gate, which creates significant torque.
To handle these forces, these key posts need extra support:
Deeper Footings: Set anchor posts 6 to 12 inches deeper than your line posts. This provides critical extra stability.
Wider Concrete Base: Use more concrete for anchor post footings, creating a bell-shaped base that resists being pulled or pushed over.
Purpose-Built Spacing: The posts on either side of a gate must be spaced to the exact width of the gate. For heavy or wide gates, upgrade from a 4x4 to a larger 6x6 post to prevent sagging.
Properly setting your anchor points is a critical step for a long-lasting fence. For more on the unique demands of gates, consult our guide on automatic gates for driveways in Ottawa.
A Step-by-Step Guide to a Perfect Fence Layout
With your plan in place, it's time to translate it to your yard. Precise layout is the foundation of a straight and professional-looking fence. Follow these steps to mark your project site accurately.
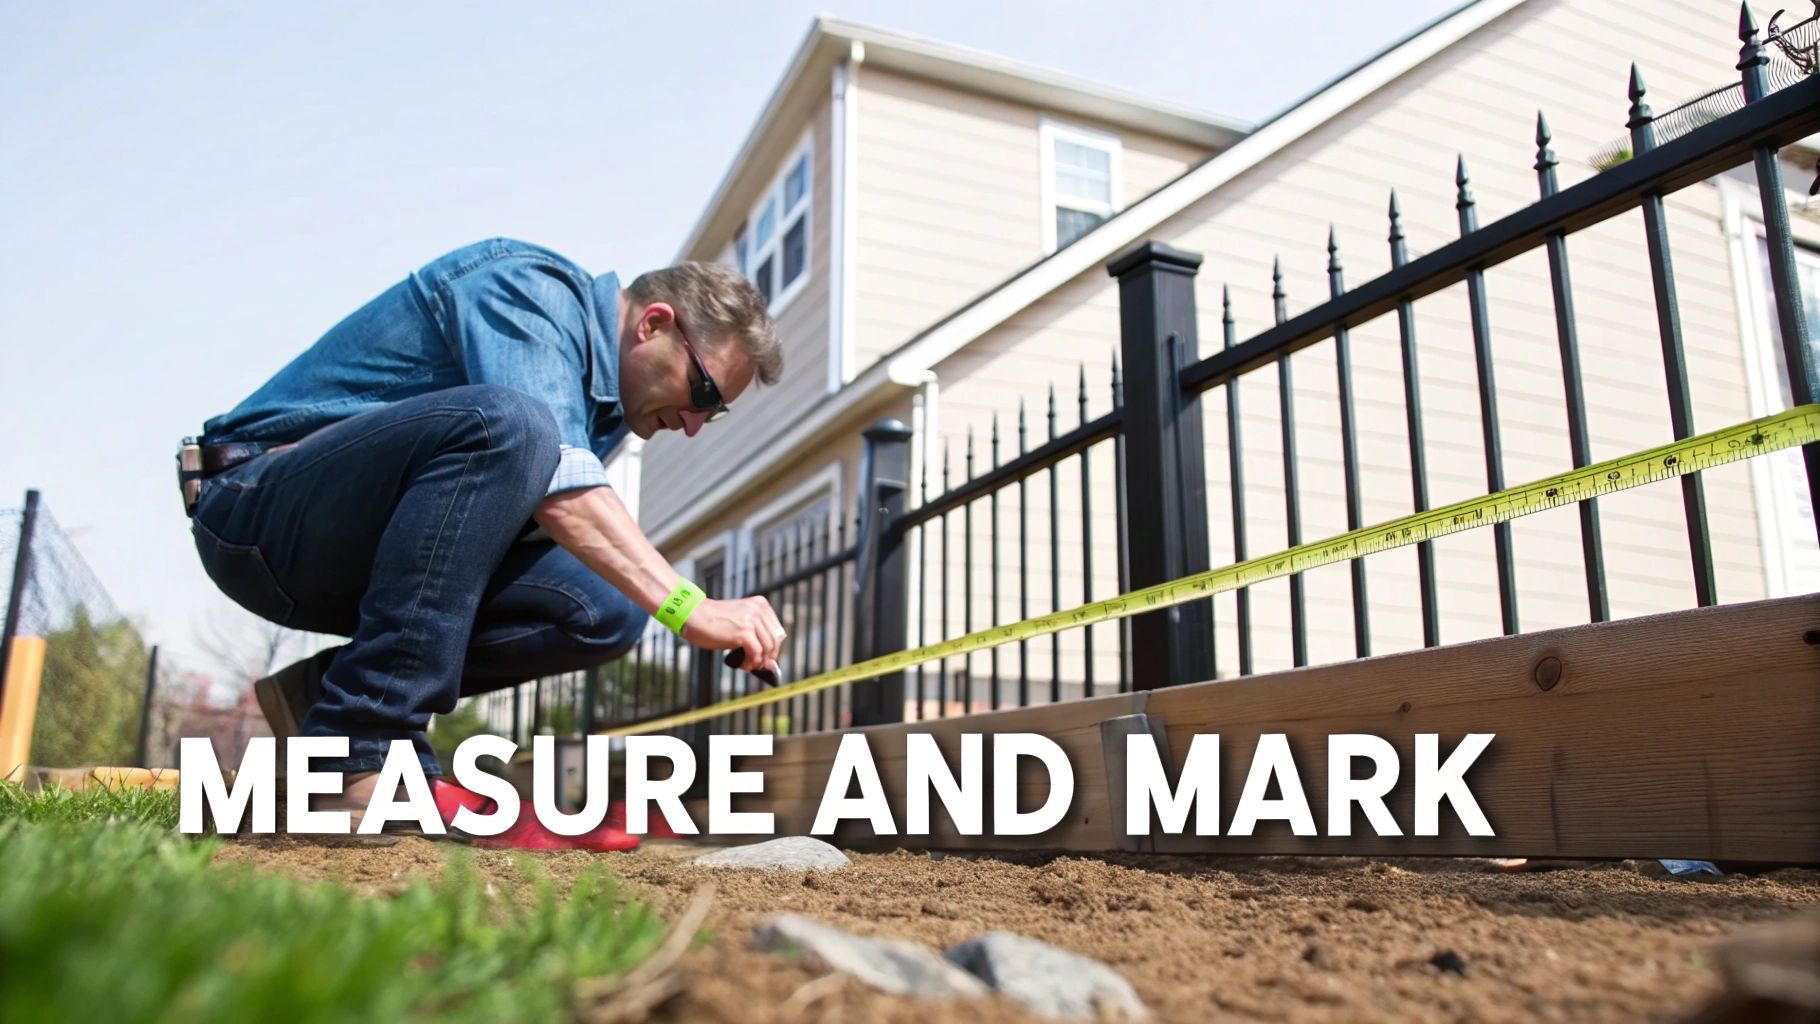
The fence builder’s golden rule is "measure twice, dig once." A small layout error now can become a major problem later, so work methodically.
Step 1: Verify Property Lines and Stake Your Corners
Before any work begins, you must be 100% certain of your property boundaries to avoid disputes with neighbours. Consult your property survey or contact your local municipal office.
Once boundaries are confirmed:
Stake the Corners: Drive tall wooden stakes firmly into the ground at each corner of your planned fence line.
Run a Mason's Line: Tie a mason's string tightly between the corner stakes, keeping it taut and a few inches above the ground. This string acts as a perfectly straight guide for your entire fence.
This simple string line is the most effective tool for ensuring every post is perfectly aligned.
Step 2: Mark Your Post Locations
With your string line as a guide, mark the exact location for each post. Use your predetermined fence post spacing—whether it's 8 feet, 6 feet, or a custom measurement.
Start at one end and use a tape measure to mark the centre of each post location along the string line. Mark each spot on the ground with spray paint or a small flag.
Crucial Tip: Always measure from the centre of one post location to the centre of the next. Remember that a standard 4x4 post is actually 3.5 inches wide. Factoring in post width is critical for ensuring panels and rails fit correctly.
Forgetting this detail is a common DIY error that can throw off your entire installation, especially for systems like chain link fence installation where centre-to-centre measurements are vital for proper tensioning.
Step 3: Calculate for Equal Sections
What happens when a fence run isn't a perfect multiple of your post spacing? For example, a 30-foot section with 8-foot spacing would result in three 8-foot sections and one awkward 6-foot section. This looks unprofessional.
To avoid this, divide the run into equal sections with this simple calculation:
Total Length of Run: 30 feet
Desired Spacing: 8 feet
Calculate Sections: 30 ÷ 8 = 3.75. Round this up to the next whole number, which is 4. This is the number of fence sections you need.
Final Spacing: Divide the total length by the number of sections: 30 feet ÷ 4 sections = 7.5 feet per section.
By spacing your posts 7.5 feet apart, you create four identical sections, resulting in a balanced, professional-looking fence.
Common Spacing Mistakes and How to Avoid Them
Even with careful planning, common mistakes can derail a fence project. Avoiding these frequent fence post spacing errors will save you time, money, and frustration. Review this checklist before you start digging.
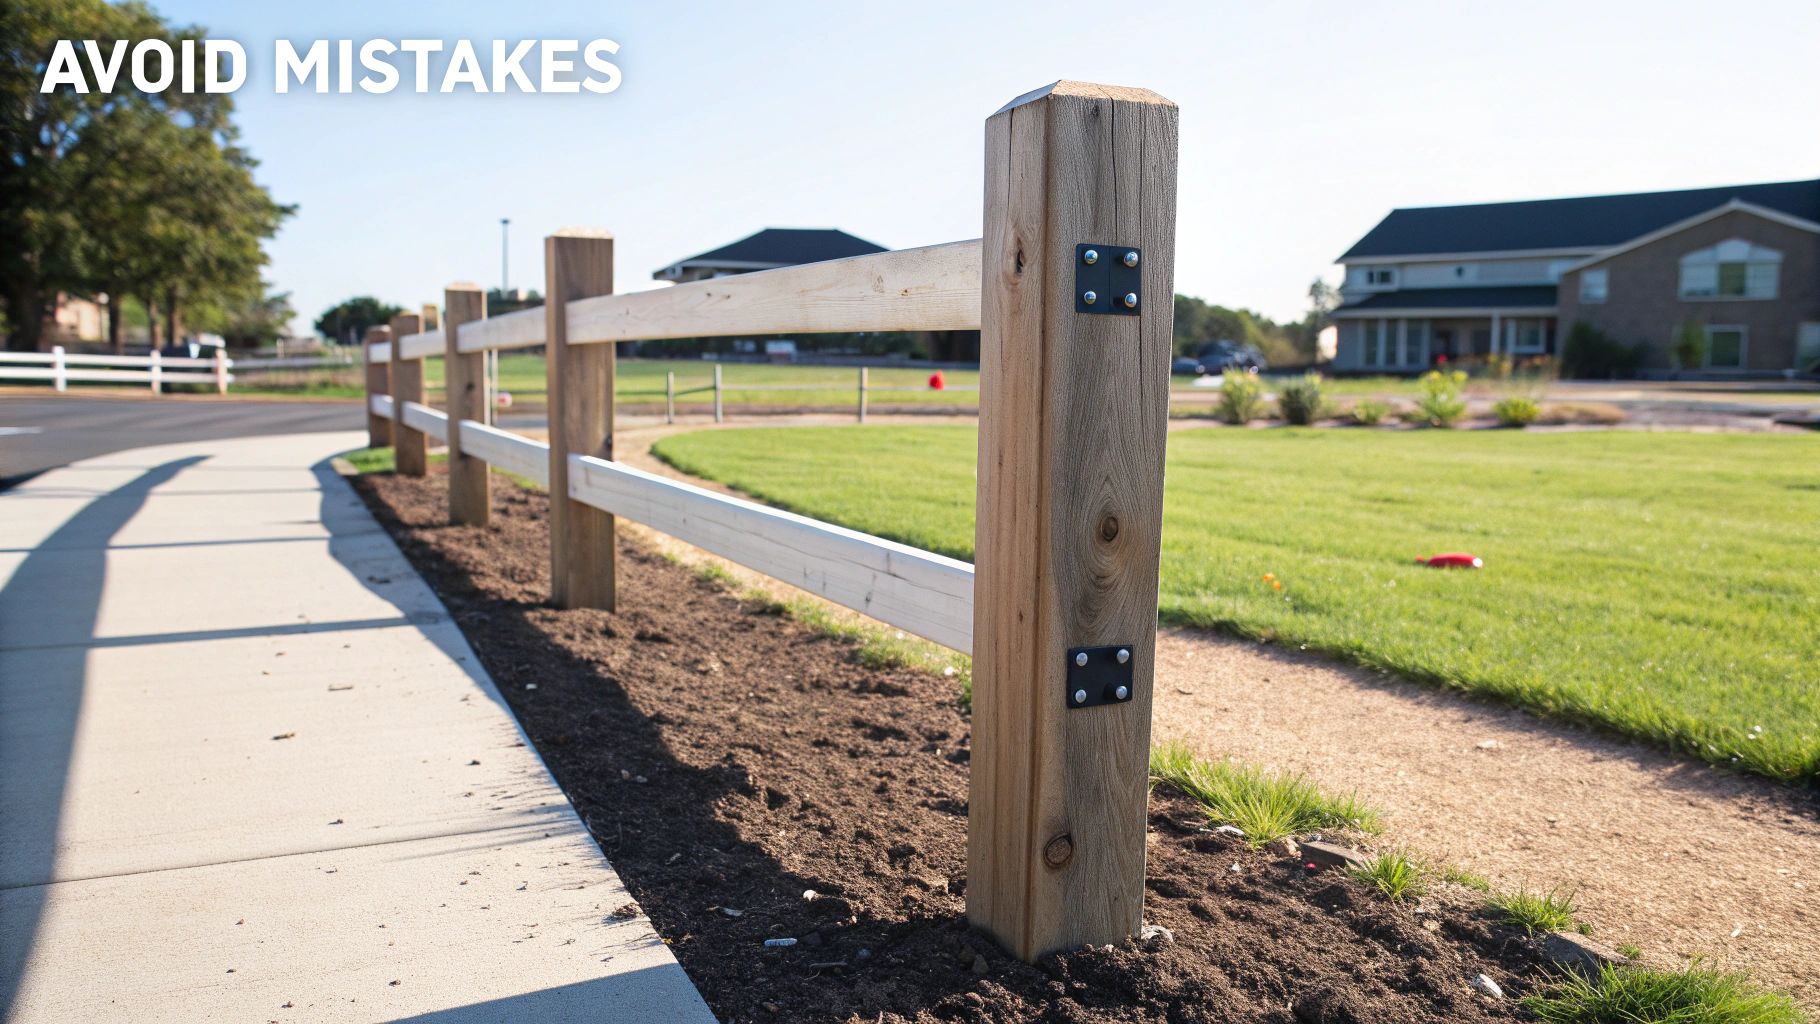
Dodging these predictable pitfalls is the key to building a fence that looks sharp and performs well in our Ottawa-Gatineau climate.
Forgetting the Actual Post Width
A classic mistake is measuring an 8-foot span from the edge of one post hole to the edge of the next. This forgets to account for the physical width of the posts themselves, resulting in sections that are too short for your rails or panels.
For pre-built systems like vinyl or aluminum, there is zero room for this error.
The Fix: Always measure from the centre of one post location to the centre of the next. Remember that a standard 4x4 post is 3.5 inches x 3.5 inches. Incorporate this actual dimension into your layout for a perfect fit.
Creating Uneven or Awkward End Sections
Nothing screams "amateur" like a long fence line with one undersized, awkward panel at the end. This happens when you start building from one end without planning the entire run first. This odd section looks bad and can create a structural weak point.
The solution is simple math before you begin:
Measure the Total Run: Get the precise length (e.g., 35 feet).
Divide by Target Spacing: For an 8-foot target, 35 ÷ 8 = 4.375.
Round Up for Sections: Round up to the next whole number, which is 5. You will build 5 sections.
Calculate Your Actual Spacing: Divide the total length by the number of sections (35 feet ÷ 5 sections = 7 feet).
This ensures every section is identical, creating a clean, professional, and structurally sound fence.
Spacing Mistake Prevention Checklist
Use this checklist before digging to avoid common errors and ensure a successful build.
Mistake to Avoid | Prevention Tip | Why It Matters |
|---|---|---|
Ignoring Post Width | Always measure from the centre of one post hole to the centre of the next. | Ensures pre-fabricated panels fit perfectly and keeps your fence sections uniform. |
Uneven Final Section | Divide your total fence length by the number of sections needed to get a consistent spacing measurement for all panels. | A balanced, symmetrical look is the hallmark of a professional job. It also avoids creating a weak point in the fence line. |
Forgetting Gates | Mark and measure for your gate opening first, and then plan the rest of your fence sections around it. | Gates have specific width requirements and need sturdier posts. Planning for them first prevents awkward adjustments later. |
Not Checking Property Lines | Have your property professionally surveyed or locate the official survey pins before digging. | The last thing you want is a dispute with a neighbour or being forced to tear down your brand-new fence. |
Skipping Local Codes | Check with your local Ottawa or Gatineau municipal office for regulations on fence height, materials, and setback requirements. | Prevents fines and ensures your project is compliant, especially if you need a building permit. |
Guessing Post Depth | Dig your post holes below the local frost line, which is 4-5 feet (1.2–1.5 metres) in the Ottawa–Gatineau area. | Prevents "frost heave," where the ground pushes your posts up during winter, ruining your fence's alignment. |
A few minutes spent reviewing these points is the best insurance for a fence that stands straight for decades.
On-the-Job Questions About Fence Post Spacing
Even with a solid plan, you can encounter surprises. Here’s how to handle common on-site challenges.
What If I Hit a Big Rock or Tree Root?
If you hit an immovable object like a large boulder or tree root while digging, do not dig a shallower hole. A poorly set post is a future failure point.
The best solution is to shift the post location 6 to 12 inches to one side of the obstruction. You can then slightly adjust the length of the two adjacent fence sections to accommodate the change. Alternatively, treat the obstacle as an endpoint and start a new section on the other side.
Can I Space My Posts Farther Apart to Save Money?
It’s tempting to stretch spacing beyond the recommended 8-foot maximum (or 10 feet for chain link) to save on materials. This is a false economy.
While you may save a small amount on posts and concrete upfront, you are guaranteeing future problems.
Spacing posts too far apart overloads the horizontal rails, causing them to sag quickly. The money you save initially will be spent on future repairs. Stick to the recommended spacing for a durable, long-lasting fence.
How Do I Handle Post Spacing on a Steep Hill?
Building on a slope requires shorter spacing to follow the contour of the ground cleanly. If you use standard 8-foot spacing, you will end up with large, unsightly gaps under the fence panels.
The standard practice is to shorten your post spacing. For most residential slopes, reducing spacing from 8 feet to 6 feet allows the fence sections to step down the hill more gracefully. This creates a much cleaner look and a more secure fence. For very steep grades, you may need to reduce the spacing even further.
Ready to build a fence that stands the test of time? The team at FenceScape provides expert design and installation services across the Ottawa–Gatineau region, ensuring your project is done right from the start. Get your free, no-obligation estimate today!