
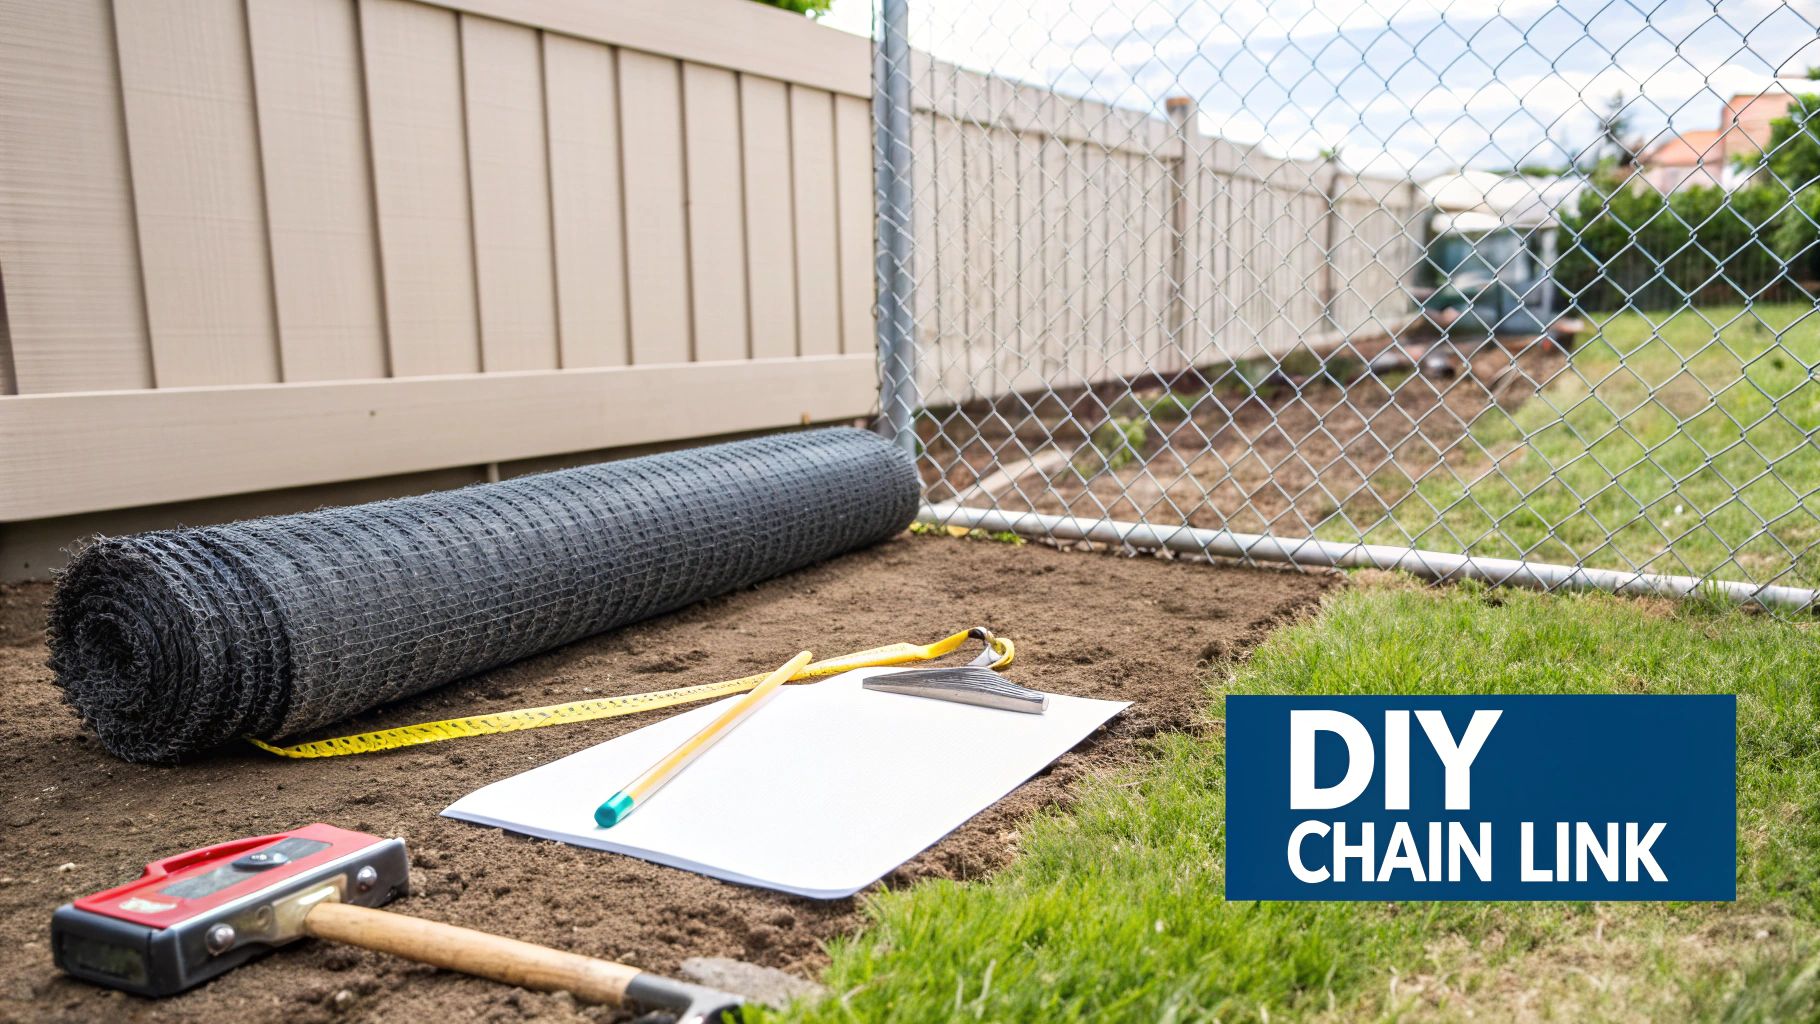
Chain Link Fence Installation How To: A Step-by-Step Guide
- Eric Lafleche
- Nov 26, 2025
- 13 min read

Installing a chain link fence comes down to three critical actions: planning your layout precisely, setting the posts in concrete so they're immovable, and stretching the mesh until it’s perfectly taut. Master these three steps, and you will build a durable, professional-looking fence that secures your property for years, avoiding the frustration of costly mistakes.
Your Practical Guide to DIY Chain Link Fencing
This guide provides actionable steps for installing a chain link fence, based on extensive hands-on experience. My goal is to equip you with the direct instructions and practical tips needed to complete this project successfully, whether you're securing a yard for a pet or defining your property lines. We will proceed step-by-step, from planning to final adjustments, ensuring you understand not just what to do, but why each action is critical.
Why Chain Link is a Smart Choice
Chain link is a popular and practical fencing solution. Its open weave secures property without obstructing views, making it ideal for residential yards and light commercial applications. It offers a reliable blend of security, visibility, and value.
The market reflects this practicality. The global chain link fencing market reached $9.8 billion in 2023 and continues to grow. This is driven by its durability, straightforward installation, and cost-effectiveness—often half the price of a comparable wood or vinyl fence. For more market data, you can review trends at bigerrysfencing.com.
What to Expect From This Guide
This guide is structured to mirror a real-world installation workflow, from initial prep to final completion.
Here is a breakdown of the key stages:
Planning and Permits: How to comply with Ottawa–Gatineau bylaws, locate your property lines, and create an accurate site plan.
Tools and Materials: A definitive checklist to ensure you have every necessary item before you begin.
Setting the Foundation: Step-by-step instructions for digging post holes, mixing concrete, and setting posts for maximum stability.
Installation and Tensioning: The technique for hanging and stretching the mesh to achieve a tight, sag-free finish.
A well-installed fence begins with meticulous planning. This phase accounts for 50% of your project's success by preventing common DIY errors like incorrect placement or boundary disputes.
A High-Level Look at the Installation Process
To understand the project scope, here is a breakdown of the major stages. Each phase builds on the previous one, so follow the sequence for a smooth installation.
This summary outlines each phase for a standard 150-foot residential fence, including the primary objective and a time estimate.
DIY Installation Phase Overview
Phase | Primary Goal | Estimated Time (for a 150 ft fence) |
|---|---|---|
Planning and Prep | Finalize layout, check local codes, and mark utility lines. | 4-6 hours |
Digging and Setting Posts | Create a stable foundation by setting all posts in concrete. | 8-12 hours (plus curing time) |
Hardware and Rail Installation | Attach all bands, caps, and the top rail to the cured posts. | 2-4 hours |
Stretching Mesh and Tying Off | Hang and tension the fence fabric for a tight, secure fit. | 4-6 hours |
Gate Installation | Mount and adjust the gate for smooth operation. | 1-2 hours |
These estimates are a guideline. Actual time depends on soil conditions, your experience, and whether you have help. Do not rush the process; precision is more important than speed.
Laying the Groundwork for a Flawless Fence
Starting a fence installation without a solid plan leads to costly mistakes and delays. Proper preparation is the key to a successful build. Follow these steps to establish the essential groundwork for your project.
Know Your Property Lines—No Guessing Allowed
This is your first and most critical action. Do not estimate your property lines. Building even a few inches onto a neighbour's property can result in legal disputes and force you to remove the fence.
To find your exact boundaries, locate your property survey or plat—a legal document included with your home's closing paperwork. If you cannot find it, request a copy from your local municipality’s land registry office. Once you have the survey, use it to drive temporary stakes at the corners of your property. This is your best protection against boundary disputes.
Decoding Ottawa–Gatineau Bylaws and Permits
Every municipality, including Ottawa and Gatineau, enforces specific fencing bylaws. Ignoring them can lead to fines or a teardown order. Perform your due diligence before proceeding.
While general guides on installing various types of fences are useful, you must verify local regulations.
Here's what you need to check:
Height Restrictions: Confirm the maximum allowable fence height for both front and back yards, as they often differ. A 6-foot fence may be permissible in the back but not the front.
Setback Rules: These regulations dictate the required distance between your fence and sidewalks, roads, or property lines.
Permit Requirements: Determine if your project requires a building permit. Taller fences often do. Contact your local municipal office—the City of Ottawa or Ville de Gatineau—to confirm. A quick phone call can prevent significant issues later.
One Call Prevents a Crisis: Call Before You Dig
This is a legal requirement in both Ontario and Quebec. Striking a buried utility line is dangerous and can cause widespread service outages and costly repairs.
At least five business days before you plan to dig, contact your local utility locating service. It's free. They will visit your property and mark the location of all buried lines with spray paint and flags. Do not begin digging until this is complete.
Sketch Out Your Battle Plan
With property lines staked and utilities marked, create a site plan. A simple sketch on paper is sufficient.
Your site plan is the project blueprint. It translates your concept into a tangible plan, helping you calculate material needs and preventing delays. For detailed cost planning, use our guide on the price of chain link fences.
Ensure your sketch includes:
The complete fence line with measurements for each segment.
The precise locations for all corner, end, and gate posts.
Gate locations, widths, and swing direction.
Any obstacles to work around, such as trees, sheds, or slopes.
This drawing will be your guide throughout the entire installation process.
Gathering Your Tools and Materials Checklist
A successful fence installation depends on having all necessary tools and materials on hand before you start. Proper preparation prevents interruptions and ensures a smooth workflow from start to finish.
This checklist is your project’s mission prep. Use it to gather everything you need to avoid extra trips to the hardware store and keep the installation moving efficiently.
Your Essential Toolkit
While you don't need a professional workshop, several tools are non-negotiable for a quality installation. Some you may already own; others, like a power auger, are worth renting to save time and physical effort.
Assemble the following gear:
Digging and Setting: Power auger (highly recommended for rent), post-hole digger (for cleaning holes), shovel, and a wheelbarrow for concrete.
Measuring and Levelling: Tape measure, a 4-foot carpenter's level, stakes, and mason's line to maintain a straight fence line.
Cutting and Assembling: Hacksaw or pipe cutter for trimming the top rail, a socket wrench set, and pliers.
Stretching and Finishing: A come-along or fence stretcher (essential rental), a tension bar, and hog ring pliers if installing a bottom tension wire.
Actionable Tip: Do not attempt this project without renting a power auger and a fence stretcher. Digging post holes manually in the rocky clay common to the Ottawa area is extremely difficult. Achieving a tight, professional finish on the mesh is nearly impossible without a proper stretcher. The rental cost is a small investment for a significantly better result.
Deconstructing the Materials List
A chain link fence is a system of interconnected parts. Forgetting even small components like brace bands can halt your progress. Use your site plan to calculate quantities and add 5-10% extra for small hardware like ties and bands.
Your materials list can be organized into the following categories.
Choosing Your Fence Fabric and Posts
These are the foundational components of your fence.
Fence Fabric (Mesh): Key factors are gauge (wire thickness) and diamond size. A lower gauge number indicates a thicker, stronger wire; 9-gauge is significantly more robust than 11.5-gauge. Galvanized finish is the standard, cost-effective choice, while vinyl-coated options provide enhanced rust resistance and a more modern look. Our guide to black chain link fences in Ottawa details the benefits of coated options.
Posts: You will need two types. Terminal posts (corner, end, and gate posts) have a larger diameter to withstand tension. Line posts are slimmer and are installed between terminal posts, with a maximum spacing of 10 feet.
Top Rail: This pipe connects all posts along the top, providing structural rigidity and a finished look.
The Essential Hardware Breakdown
Small hardware components are critical for holding the fence system together under tension. The table below outlines the function and placement of each piece.
Essential Chain Link Fence Components
Component Name | Primary Function | Location on Fence |
|---|---|---|
Tension Bands | Connect the tension bar and fence mesh to terminal posts. | Vertically spaced on all terminal posts. |
Brace Bands | Secure the top rail and truss rods to terminal posts. | At the top and sometimes bottom of terminal posts. |
Rail Caps | Cover the tops of line posts, allowing the top rail to slide through. | Top of every line post. |
Post Caps | Cover the tops of terminal posts to keep water out. | Top of every terminal, corner, and gate post. |
Fence Ties | Secure the mesh fabric to the line posts and top rail. | Spaced along all line posts and the top rail. |
Finally, purchase your concrete. A good estimate is one to two 27-kg bags of pre-mix concrete per post hole. Buy extra; it is better to have a surplus than to run out during the pour.
Setting Posts for a Rock-Solid Foundation
With your plan and materials ready, it's time to build the foundation. The stability and longevity of your fence depend entirely on how securely the posts are set. Do not rush this stage. A solid foundation will ensure your fence withstands Ottawa’s harsh winters for decades.
Laying Out Your Fence Line with Precision
First, establish a precise guide for your fence line. Drive wooden stakes firmly at every corner and end point marked on your site plan.
Next, run a mason's line tightly between the stakes, about 4-6 inches above the ground on the outside of your intended fence line. This string represents the face of your fence and must be perfectly taut. Walk the line to check for any dips or obstructions before you proceed.
Post Spacing and Hole Digging Strategy
With your guide string in place, mark the locations for your line posts. The rule is to space line posts no more than 10 feet apart. Spacing them every 8 feet will result in a stronger fence, but 10 feet is the industry maximum. Use a tape measure and mark each spot with spray paint or a small stake.
Now, it is time to dig. Post hole depth is critical in the Ottawa–Gatineau region due to the deep frost line.
To prevent posts from heaving during freeze-thaw cycles, you must dig below the frost line. In this region, that means digging to a minimum depth of 36 to 48 inches (3 to 4 feet). This is not optional.
The hole's diameter should be approximately three times the post's diameter. For a standard 2-inch line post, dig an 6-8 inch wide hole. This allows enough concrete to form a secure anchor. Renting a power auger is the most efficient way to accomplish this.
If you encounter existing concrete, understanding choosing the right drill bit for concrete will be necessary to proceed.
This diagram illustrates the essential tools that make the job efficient, from the auger to the wire stretcher.
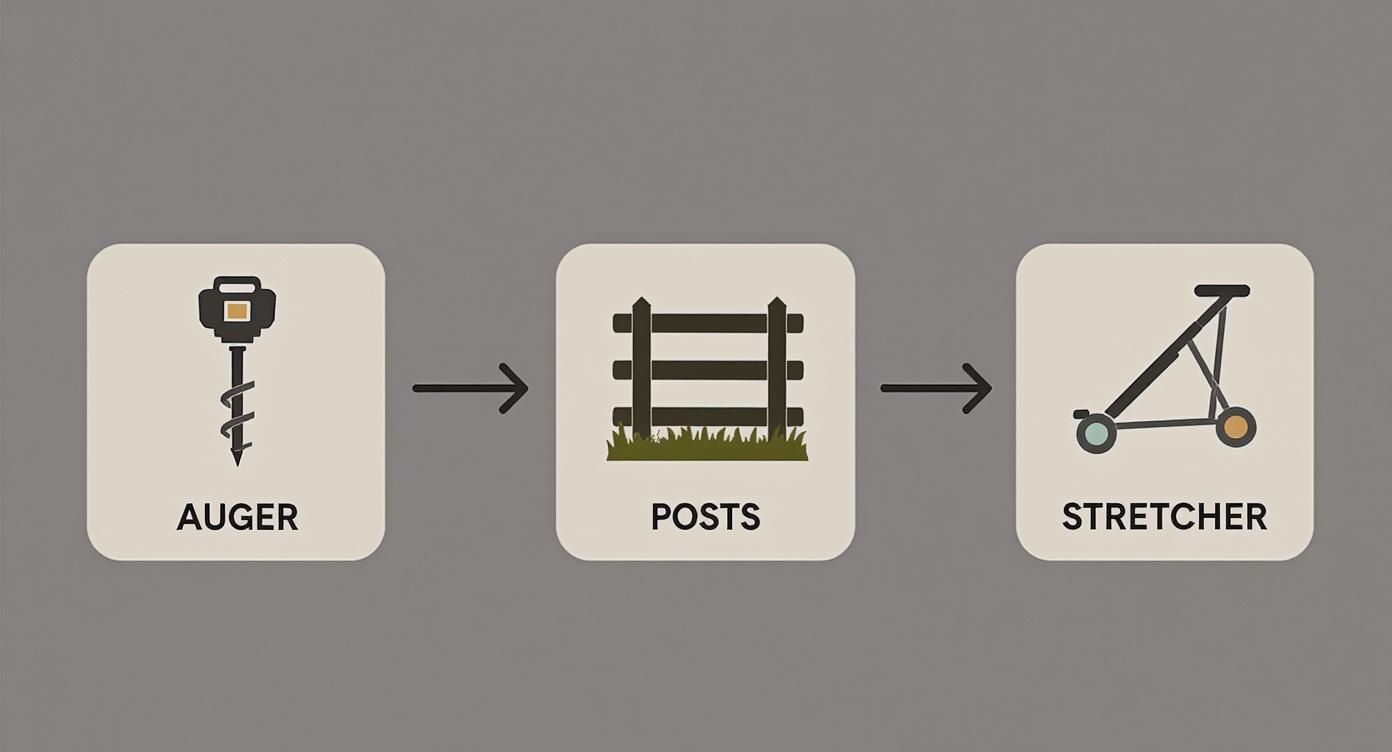
It provides a clear visual of how components become a finished fence and highlights the importance of using the right equipment.
Mixing Concrete and Setting Posts Perfectly Plumb
With the holes dug, you can now set the posts. Begin with the terminal posts (corners, ends, and gates), as they anchor the entire structure.
Follow these steps for a perfect set:
Prep the Hole: Add a few inches of gravel to the bottom of the hole for drainage. This prevents water from pooling at the base of the post and causing rust.
Position the Post: Place the post in the center of the hole. Use a carpenter's level to ensure it is plumb (perfectly vertical) on two adjacent sides. This step is best done with a partner—one to hold the post, the other to manage the concrete.
Mix and Pour: Mix the concrete in a wheelbarrow according to the package instructions. Aim for a thick, oatmeal-like consistency. A thick mix is strong; a watery mix is weak. Shovel the concrete into the hole around the post.
Final Checks: Continuously check for plumb as you fill the hole, as the weight of the concrete can shift the post. Once full, use a trowel to slope the concrete surface away from the post to aid water runoff. If needed, use stakes and rope to brace the post while the concrete cures.
Set all terminal posts first. Then, allow the concrete to cure for at least 24-48 hours before proceeding. Once they are solid, run a new string line near the top of the posts to use as a height guide for setting the line posts.
Installing Post Hardware for the Next Phase
After the concrete has fully cured (wait 2-3 days to be safe), install the post hardware. This makes hanging the mesh much more efficient.
Tension Bands: Slide these onto your terminal posts. Use one band for every foot of fence height, minus one. For a 5-foot fence, use four bands per post.
Brace Bands: These secure the top rail. Install one on each terminal post.
Post Caps: Place these on top of the terminal posts to keep out water and debris.
Rail Caps: These go on your line posts and are designed for the top rail to pass through.
Your posts are now set, plumb, and fitted with the necessary hardware. You have built the strong skeleton of your fence and are ready to install the mesh.
Stretching Mesh and Finishing Your Fence
With the posts securely in place, the next step is to stretch the chain link mesh. This is the most critical step for achieving a professional, sag-free appearance. Proper tensioning ensures your fence remains taut and durable for years.
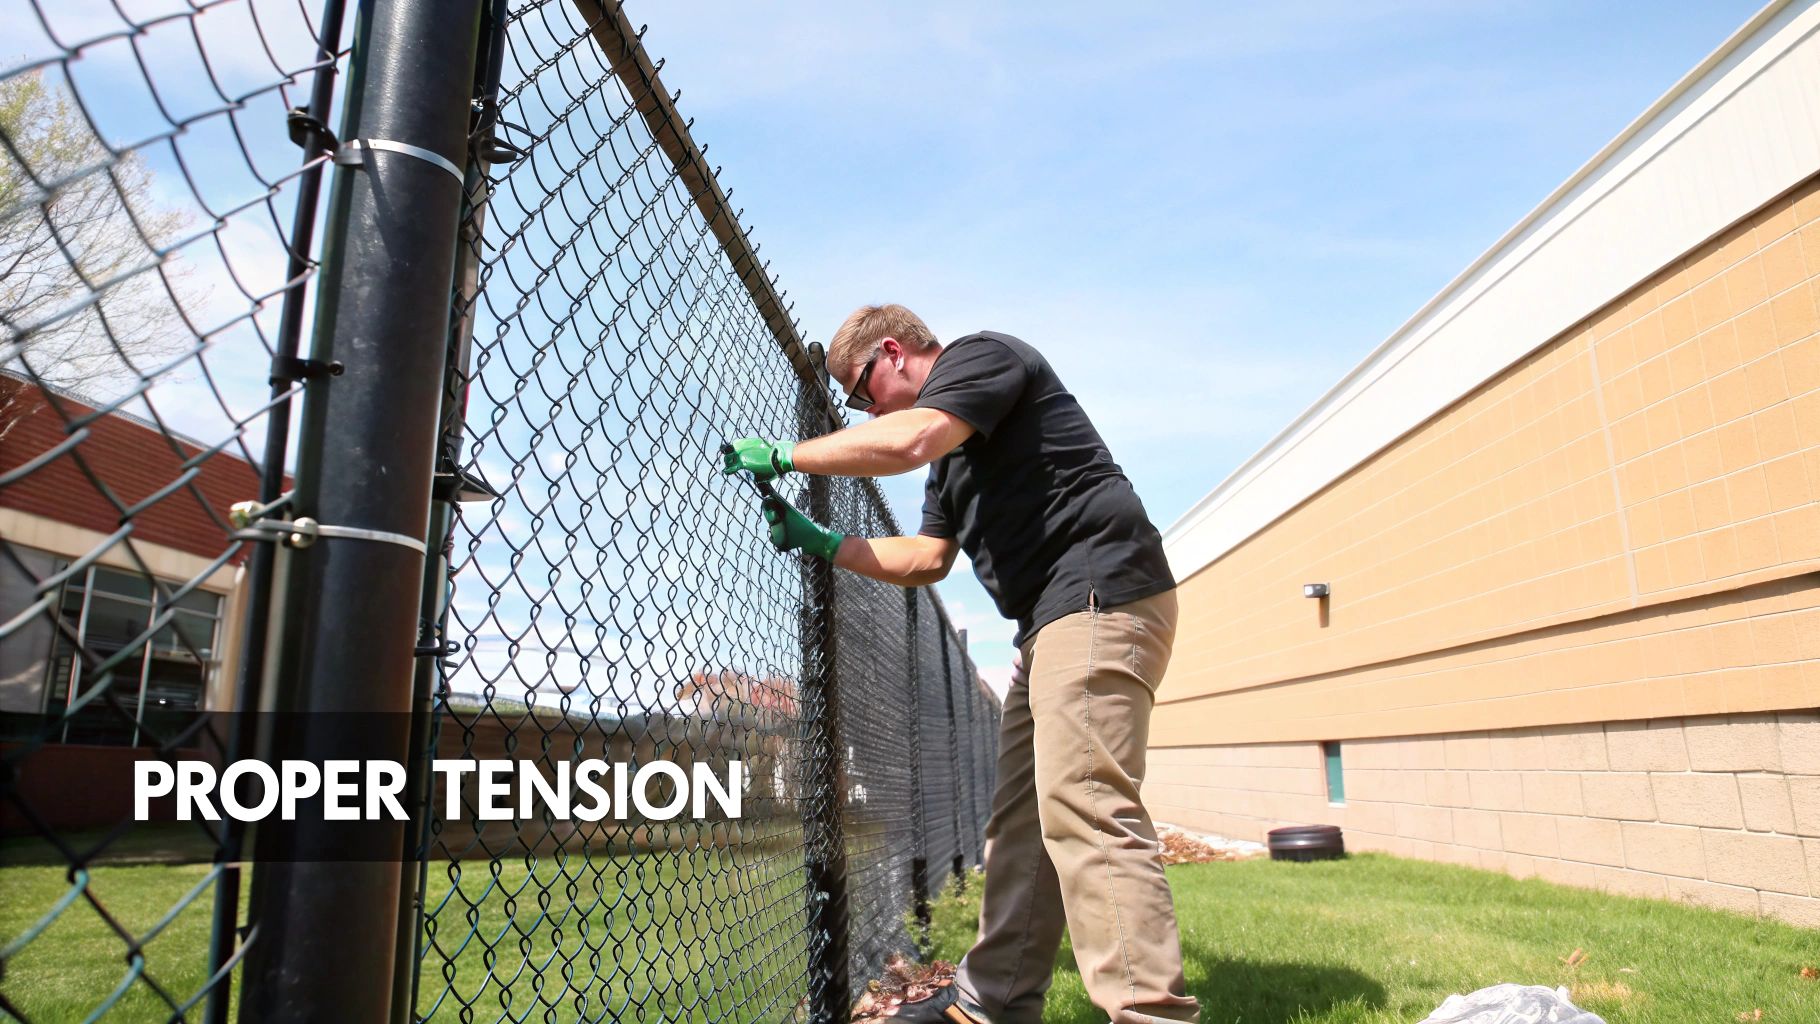
Effective tensioning requires leverage, not just strength. Attempting to pull the mesh tight by hand will not work. Your essential tool here is a fence stretcher or come-along, which provides the mechanical advantage needed for a taut, clean finish.
Hanging the Fabric Loosely
First, position the mesh. Begin at a terminal post (corner, end, or gate). Unroll the fabric along the outside of the fence line, keeping it close to the posts.
Examine the top edge of the fabric. It will have either "knuckles" (wires bent over) or "barbs" (wires twisted to a point). For residential fences, position the knuckles facing up for safety. If your mesh has barbs, they must point down.
Return to your starting point and weave a tension bar vertically through the first few links of the mesh. This bar distributes the pulling force evenly. Attach the bar to the pre-installed tension bands on the terminal post.
Next, hang the rest of the mesh loosely from the top rail using a few fence ties every 10 feet. This simply holds the fabric in place while you prepare to stretch it.
Mastering the Art of Tensioning
Now, move to the terminal post at the opposite end of the section you are working on. Insert a spare tension bar through the mesh about three to four feet before this final post. This will serve as the temporary anchor for your fence stretcher.
Attach one end of the stretcher to this temporary tension bar and the other end to the final terminal post. As you slowly crank the stretcher, the slack in the mesh will be removed.
How tight is tight enough? A properly tensioned fence should have minimal give. When you squeeze the mesh diamonds together midway between posts, they should compress no more than a quarter to a half-inch. The wire should feel firm when plucked, not loose. Avoid over-tightening, as this can damage the mesh or strain your terminal posts. The goal is "snug and firm," not "guitar-string tight."
Once you achieve the correct tension, the mesh is ready to be permanently secured.
Securing the Mesh and Tying Off
While the stretcher maintains tension, you need to cut the excess fabric. Find the correct link and untwist the knuckles of a single vertical wire strand to separate the excess mesh.
Weave your final tension bar through the end of the stretched mesh. Attach this bar to the tension bands on the terminal post. Once the bar is fully secured, you can slowly release the stretcher. The mesh will remain taut.
Finally, attach the fabric to all line posts and the top rail with fence ties. Use the following spacing:
Top Rail: One tie every 24 inches.
Line Posts: One tie every 12 inches.
Use pliers to bend the ties securely around the posts and rail, ensuring no sharp ends are exposed. For added security, especially for pets, consider installing a bottom tension wire.
Installing and Adjusting Your Gate
The gate is the final component. A poorly installed gate that sags or latches improperly can undermine the entire project.
Begin by attaching the female gate hinges to a gate post, spacing them to align with the male hinges on the gate frame. Lift the gate and slide the male hinges into the female hinges.
Next, install the gate latch on the opposite gate post at a comfortable height. Adjust the hinges as needed until the gate swings smoothly without dragging and latches securely without being forced.
Your chain link fence is now complete. For future privacy enhancements, slats are an excellent option. Explore the possibilities in our guide to chain link fences with slats.
When to Call in a Pro Like FenceScape
Even with a detailed guide, some fence projects are best left to professionals. Knowing when to hire an expert is a smart decision that saves time, money, and prevents frustration.
Difficult terrain, such as steep slopes, uneven ground, or the rocky soil common in Ottawa–Gatineau, presents significant challenges. Digging post holes in these conditions can be exceptionally difficult. A task that a professional crew with hydraulic equipment completes in an hour could take you an entire weekend of hard labour.
Is This Project Getting Too Big?
Evaluate the scale of your project. A small, level backyard fence is a manageable DIY task. Installing several hundred feet of fencing, however, is a major undertaking in terms of time and physical exertion, particularly if you are working alone.
Consider hiring a professional in these specific situations:
Tough Tools for a Tough Job: Professionals use powerful augers, commercial-grade tensioners, and core drills that are impractical to rent or buy for a single project.
Tricky Layouts: Complex layouts with multiple corners, existing structures, or connections to neighbouring fences require precision that comes with experience.
Navigating the Red Tape: If your fence line is near a sensitive area or involves a complex permit process, a local contractor’s knowledge of municipal bylaws is invaluable.
The Real Value of a Professional Job
Hiring a contractor is an investment in quality and peace of mind. While labour typically accounts for 30% to 60% of the total cost, the guaranteed result often justifies the expense. For more context on cost breakdowns, this article on fence installation pricing provides a useful overview.
A professional installation ensures every post is plumb, the concrete is mixed for Canadian weather, and the mesh is perfectly tensioned. The result is a durable, sag-free fence that will last for decades.
A fence installed by a team like FenceScape comes with a workmanship guarantee and is completed on a much faster timeline. It eliminates the physical strain and uncertainty of a DIY project, leaving you to simply enjoy the finished product.
If your project seems too demanding or you want a flawless result without the work, FenceScape is here to help. Contact us today for a free, no-obligation estimate and let our expert team build the perfect fence for your Ottawa–Gatineau property.
Comments